Modern Log Home - Guest Bath


Guest Bathroom design concept.


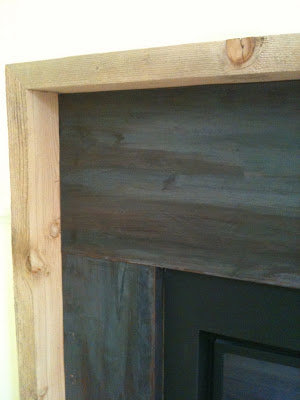
Last month I took a road trip to visit a clients weekend cabin located in a popular resort town a few hours north of the city (skiing, golfing, boating etc).  The homeowners are clients of mine who I've been working with for the past several years renovating their home in the city.  They purchased a weekend property earlier this year, its a chink log cabin that was built about 20 years ago.  A chink log cabin has squared logs instead of round and are stacked horizontally with a mortar bed (chink) in between the logs.  The logs used for this type of construction are weather equally on all sides so the exterior and interior look the same, in this case the builder used pine logs that had been weathered for 5 years and aged to a beautiful heather grey.  On the second floor where the guest bathroom is, the log walls are only about 3 feet high, as a result visually this creates a horizontal wainscotting effect.  In the guest bathroom, all the walls outside the room have this log feature but inside the bathroom there are only 2 of these log walls, you can see one of them in the photo below. 


Interior log wall of Guest Bathroom.


Now that my clients own the cabin they want to update the interior to reflect their personality and lifestyle, starting with the colonial 'knotty pine' kitchen and bathrooms.  They're a young family who are drawn to character homes but love simplistic modern style interiors and especially anything that's vintage 60's and 70's.  Knowing their style, I have to admit I was pretty EXCITED at the idea of mixing this modern aesthetic with the log cabin structure,,,,,,the interior would be a cool mix of rustic + vintage + modern + industrial - whatever you wanna call it (I hate trying to labell a style) it'll be a personalize mix that can only be called 'their' style.

For some bathrooms I design I'll spend a lot of time on the details, custom designing a vanity and mirror, I may spend hours searching for just the right marble or stone,,,searching thru batches of warehouse inventories to find just the right lot of tile or the perfect slab, and I'll order that 'perfect' light fixture, and faucets and statement tub,,,,,hoping they'll arrive within the next month or two.  But for some bathrooms I design, like this one,,,,,its all about simple design with ready-made and in stock.  These are the projects I really like to share on the blog because I think more readers can relate to these types of renovations.   My objective for this bathroom was to come up with a design plan using materials that were readily available thru local building stores up north and/or products that my clients could simply purchase off the shelf and bring them to the cabin on a weekend visit. The contractor was already standing-by, ready to go he was just waiting for the design plans.  So with no time to waste (literally!) here's what I came up with... 


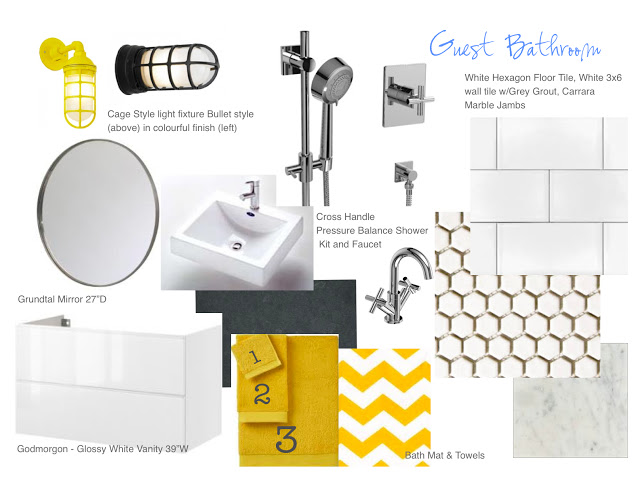
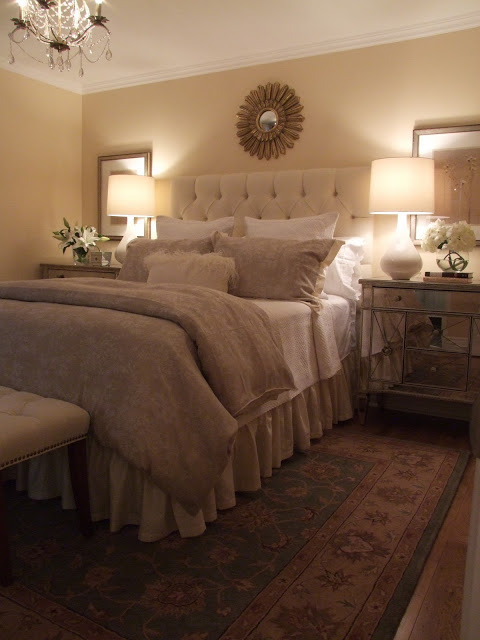
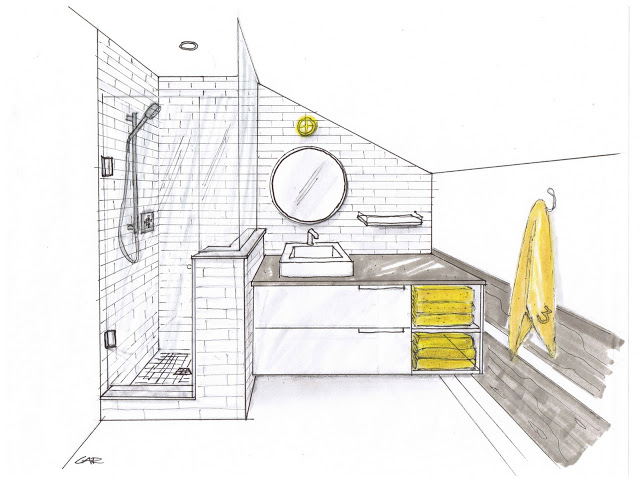
Keeping in mind there are weathered grey logs on two walls and no windows, I wanted to use lots of white to keep it bright, modern and really showoff the wood.  To me, nothing beats the simplicity of white subway and hex tile, the grey grout will give it a vintage vibe and an entire tiled wall simplifies all the angles.  I proposed installing the subway tile vertically to enhance the vertical lines to offset the low ceilings.  A ready-made floating vanity in high gloss white is a modern contrast to the weathered grey logs, with 2 drawers its also super functional.  Because I wanted the vanity to go wall to wall, I've asked the contractor to make a cubby shelf at the one end.  A new glass enclosed shower with ready-made carrara marble jambs will replace the tiny old one piece insert.  I suggested an industrial style cage light painted in a fun bold colour like a tourquoise blue or bold yellow,,,with towels to match.  The large round steel rimmed mirror, numbered towel sets and chevron bathmat are fun graphic elements. 


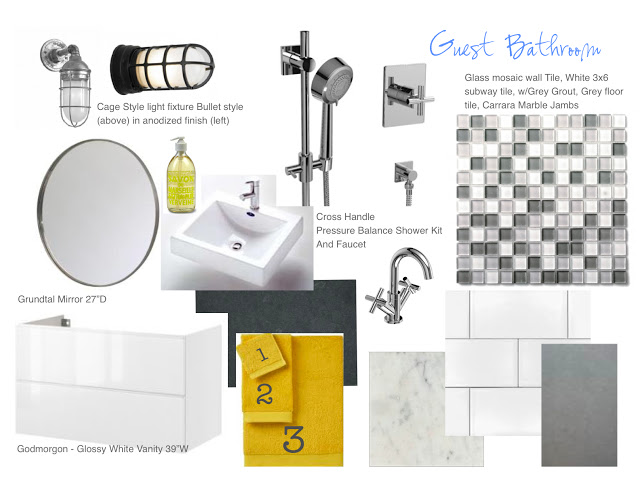
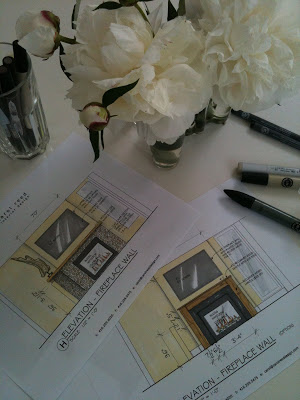
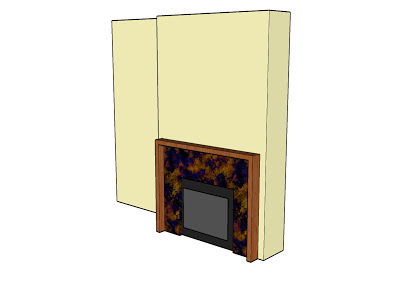
A slightly different twist on the same concept, here I suggested an entire wall (the vanity/shower wall) be clad in the multi-toned glass mosaic with the rest of the shower wall tiled in the white subway and a light grey floor tile.  I've seen this glass mosaic at Lowes and HD so its readily available and not super expensive.  I like modern graphic of the small 3/4"x3/4" and all the various tones of grey and white which I thought added interest and compliments the wide stripe effect of the grey logs, both visible from outside the bathroom too.  Although this is probably my favorite of the two options,,,they opted to go for the white subway tile, installed in the typical horizontal fashion (I tried!).  I then sketched a quick 3D for them to illustrate the shower stall glass detail and how everything all worked with the slope ceiling.


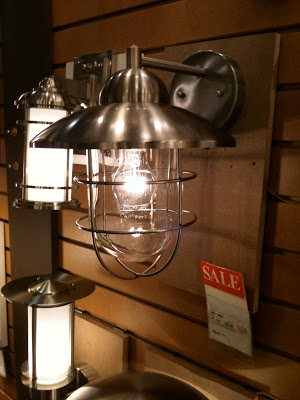
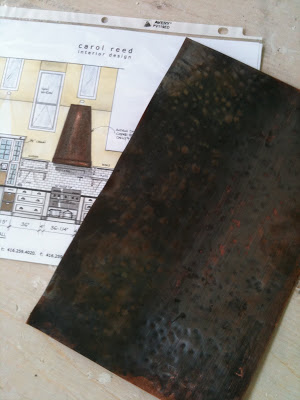
A couple of days after the design plan was finished I did a quick scouting trip for some lighting and came across this awesome outdoor fixture that I thought would be perfect for the bathroom, especially with a silver base bulb.  I love the industrial style of this fixture and at only $45 I think they're a steal!  The homeowners loved it so much they've bought several of them to use in the other bathrooms too.  Now let's see if I can convince them to paint at least one of them yellow. : )


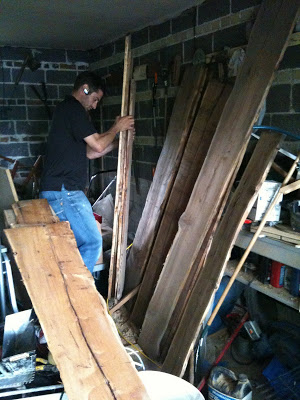
The old bathroom was torn out about 2 weeks ago and the contractor is already about halfway finished building this new one, he'll soon be ready for the glass and the countertop to be templated which are the only things not ready-made or off the shelf but will give the entire bathroom a custom look. Once this is done I'm not quite sure yet if he'll be moving on to the new design plans I've done for Master Bedroom Ensuite,,,,, or the kitchen, but I'll keep you posted!


HAPPY THANKSGIVING!


Master Retreat: 70's Sidesplit


Since the end of August I've started on so many new projects, a few of which I'll be working on over the next 6 months to a year - and will tell you more about them in future posts.  Since before the end of August I've wrapped up a lot of projects so I'd like to get some of these after pics off my plate so to speak before I move on to posting about the more recent stuff I'm working on.   The 70's suburban sidesplit I furnished for a single mom and her daughter was completed earlier this year, for me it was the first time I took on a project that didn't involve any renovating whatsoever - that had all been done before I came on board.  You can read more about the background story of this project here, and see after photos of the Daughter's room here and the Guest Bedroom here.

Like the other bedrooms in the house the master bedroom was on the small side but typical for a sideplit, it had a small walk-in closet and a tiny 3 pc ensuite and no redeeming architectural features at all.  It had brand new hardwood floors and a fresh paint job when I first 'met' this room.  My task was the same for this space as it was for the entire house, furnish it from top to bottom from scratch and have it completed and move-in ready in less than 3 months.  Although she invested in a designer, her spending budget was modest so every splurge would need to be balanced with a few great finds. 


The Before: this is what the room looked like the first day I saw it, the painters were just finishing up (talk about bad timing!).  Once again I would have to work with ICI's Bavarian Cream. : /   My client has a love for all things feminine and glamourous and traditional and elegant and french inspired and she wanted her new room to be all those things, but she's also young, professional and stylish so it had to be done in a way that looked modern and fresh (and by modern I mean current).


The After:  I had a custom diamond tufted headboard and end of bed bench made, added an elegant crystal chandelier, a luxurious wool area carpet and glamorous mirrored chests on either side of the bed.  The ruffled bed skirt, damask duvet cover and shams are from Au Lit.


Ready-made lined cream linen drapes with inverted pleat top and full length sheers dress up the not so fabulous looking window.  I found an antique walnut dressing table with 4 big drawers and after contemplating several options for new chairs, my client found this antique chair stored in her mother's basement, it belonged to her much loved aunt.  I thought it worked perfectly with the vanity and loved the fact that it had sentimental value.  This chair and one pair of antique lamps were the only things that my client brought with her into this house.  She does plan on reupholstering the seat or adding a slipcovered seat with 3/4 skirt.  The etched mirror accessories are vintage from Chatelet Home.  The knobs on the vanity were replaced with crystal ones since this pic was taken.


I had originally purchased a potted orchid for the dressing table but by the time I had returned and taken most of these photos,,,,all the potted orchids in the house had died, she's now replaced them with artificial.  This is a bad Iphone pic, for some reason I have no decent after photos of this area of the room,,,I think its because from every angle I tried to shoot it I was getting a bad reflection in the mirror.. 


When it comes to designing spaces or furnishing a room, I'm most particular about lighting more than anything.  Sometimes its to my detrement because I can get really hung up on finding something that I feel works just right,,,,,,,style, size, function,,,if its not just right,,the entire room falls short.  These lamps are one of my favorites and are from Crate & Barrel.  I like the simple form of the base and the drum shade which adds a modern touch to the space, it has a subtle crackle glaze, the soft curves and silk shade are so elegant.  I think their simplicity pairs well with the traditional crystal chandelier. It was near impossible to find a pair of these in stock but after much begging, pleading and phoning I did manage to score a pair at the 11th hour.


The wool area carpet had a traditional feel to it, it had a taupey cream coloured border with a grey/blue main field.  The end of bed bench wasn't ready in time for move-in (the day this shot was taken) but was delivered only a couple of weeks later....


Diamond pique lace edged coverlet & euro shams, and lace edged pillow cases were great finds from HomeSense as was the sunburst mirror.


The bench was delivered a couple weeks after move-in...


When I delivered the bench I also brought along one more finishing touch (which is now my most favorite thing in the room), a cream coloured velvet pillow with feather trim.  My client was completely in love with her new room already and this little find sent her over the moon. : )
Feather pillow, HomeSense.


Even though everything in this room is new to my client except her aunts chair, I'm happy that all things in the room aren't brand new - it was important for me to mix in a few antique pieces so the end result is a mix of new and old, splurges and saves, ready-made and custom made, feminine and tailored,,,,, but best of all I think we achieved traditional without looking dated.


All Photos:  Carol Reed


Almost Afters: Gail's New Fireplace


Last Friday I attended my last official site meeting for Gail's Kitchen and Family Room renovation.  I started working on this project on Dec.11th, 2009 so its been a looong process seeing this new space evolve from paper to reality week after week.  This last meeting represented what I call substantial completion, meaning the construction is considered complete, and the homeowner moves back into her new space!!!  The crew packs up all their things and they move-on to another job site, returning as needed to finish off any outstanding small items.

When I was at the house early that morning, the guys were doing some final paint touch-ups, I didn't have the opportunity to take any 'after' shots because they were just about to start the big clean-up but I'll be back for a follow-up visit very soon.   One of my FAVORITE things in the space was the new family room fireplace and last week was the very first time I had seen it.  The fireplace itself is a new clean face model gas unit by Napoleon.  Since my previous visit the new surround and mantle had been installed so it was a bit of a 'reveal' moment for me when I walked in, and when I saw it there, I just stopped in my tracks and gasped! : )  The design concept for the fireplace had changed several times over the past couple of months....


Here are a couple of initial concepts,,,in each I had envisioned antique or reclaimed wood being used for the mantle.  It was an awkward space, to the immediate right was a window to the immediate left is a half wall with stairs to the basement and the fireplace wall is also the only wall in the room for the tv.


A short time later we discovered a stash of antique wood boards in the homeowners garage (located in an income property they own across the street).  Of course I went crazy over them and asked the contractor to make us a rolling door from the boards and.......if there was enough material I also wanted to use it for the fireplace mantle.


Then about a month later,,,,,the coppersmith visited the house to do a site measure for the new custom copper hood canopy I had designed.  He brought a few samples for me to review and as soon as I saw them I asked if he could also make the fireplace surround out of the same copper.  No problem he said (Oh I love to hear that!!!) so I sent him a sketch with dimensions....


Excuse the ugly 3D image, (this is why I prefer hand renderrings) but I used this 3D sketch to illustrate how I wanted the copper surround and the wood mantle to be built.  A seperate sketch had all the dimensions on it.   I emailed this to the copper smith and my contractor who was making the mantle.  Unfortunately my contractor called me to say there wouldn't be enough of the antique wood left over from the door so what was plan 'b' ?  I asked him if he could find some rough hewn, gnarly wood that was about 2" x 6",,,,,, and that was the last I heard from him.


A few days later I showed up for my final site meeting and this was what they had built.  I LOVE it!!!
  

The homeowner is over the moon about it, and seriously I wish this fireplace was in my own home.  Its rustic and contemporary and I have to say I've never seen anything else like it, my contractor hit it outta the park with this one.  The wood he used was rough-hewn douglas fir, the knots are absolutely gorgeous and have the same character as the loft grade natural oak floor.  When I took this photo it wasn't quite 100% finished yet, the mantle was about to receive one more light sanding and a coat of oil.  Then the copper surround gets a once over with steel wool to remove some of the black coating and bring out the copper, the steel wool also gives it a low lustre sheen.

I hope you enjoyed this little glimpse of what the 'almost' finished space looks like, I have to say its a dramatic transformation from what was once there and I can't wait to post all the after photos. 


Note:  When building a surround and or mantle for any gas fireplace, its critical to refer to the mfg's installation specifications where you'll find all the minimum clearances that must be maintained.  There are strict clearances that must to be adhered to with regards to the use of combustible and non-combustible materials when cladding the surround and there are various clearance requirements with regards to mantle projections.  Always follow the mfg's specs for your exact model.


All Photos:  Carol Reed