The Guest Barn - A Peek Inside Part I

A late 19th century workshop

I’ve shared random images of our guest barn interior on Instagram and within other blog posts over the past few years but I haven’t featured them here in one blog post yet so here goes.

The barn is situated fairly close to the house, we’ve learned it was built in the late 1800’s or at the turn of the century, and approximately 25 years after the house was built. Located on the shores of what was and still is a fishing community it was built by the owner who was a carpenter by trade. Although we’ve always referred to it as a barn it was actually built for his workshop, it’s never been used to house animals. Wooden lobster traps were one of the things that were produced in the shop and there was also a mill located beside the creek at the front or our property. The style of house is referred to as a Carpenter Gothic or in Atlantic Canada its also known as a Fisherman’s Gothic.

When we purchased the property the barn was in solid condition although completely unfinished on the interior., it had been constructed entirely from sold timber posts and beams on a stone foundation with plank floors and walls and cedar shake cladding. It had electricity but otherwise was in its original condition showing the character of all its 100+ years age. We first began cosmetically transforming the main level to use as seasonal space back in 2017 and its evolved a bit every year since but still remains very much original and un-winterized and without plumbing.

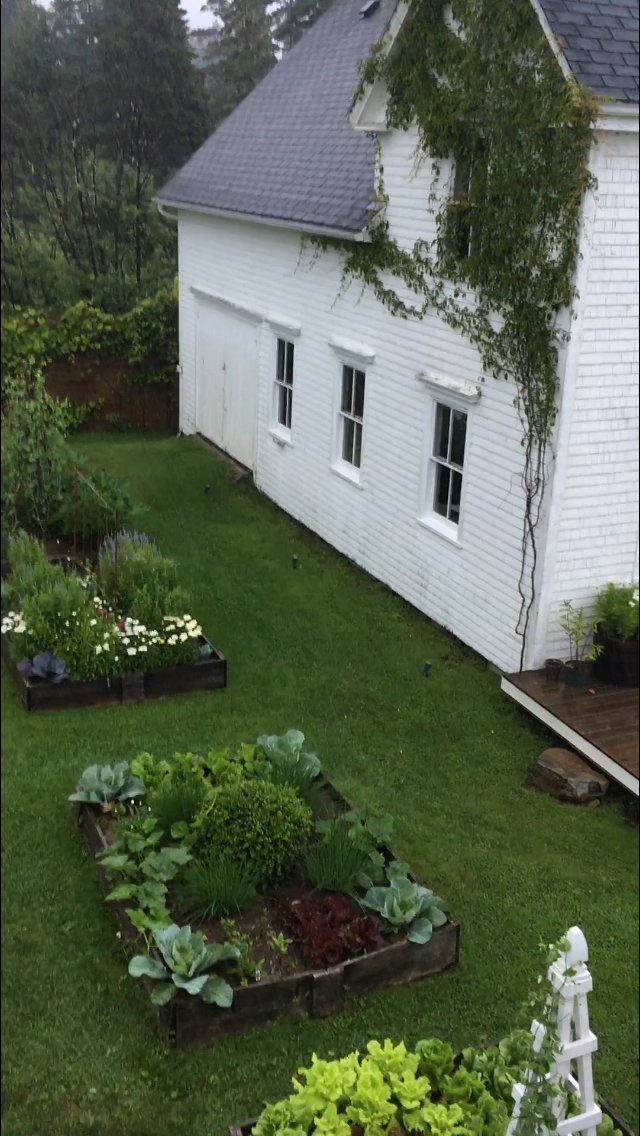
Shortly after we built the potager garden we added new porch decks to the house and barn, designed to also connect the two buildings via a ‘boardwalk’. This has been transformative - its such a simple luxury to go back and forth between both buildings without walking through wet grass - grass which is wet here a lot! (in the image below the ‘boardwalk’ connecting the two porches is to the left, just out of camera view but we usually call it the cat walk because it was needed as much (more) for the cat than us.

Above, my Niece basking in the sun during a past very warm Thanksgiving week. We put a new pair of glass french doors on the side entrance of the barn (this is the side facing the house) behind the original storm doors. We added a secondary set of screen doors too but rarely use them and this year didn’t even put them on because the summer was so rainy.

The view looking out from the barn (above), this was when the new porch decks were still being worked on. The beach is in the distance although fog was coming in, when its clearer you can see it more clearly and beyond out to the ocean..

On the inside the first thing we did was partition off an area at the back of the main level of the barn so we could continue to use that space as a workshop, it has large double barn doors that open up into the potager garden. We built the wall as a simple horizontal plank wall with jib door. This separation created a good size lounge space to furnish, with access to the second level. Next we replaced the existing steep ladder-like steps that led up to the second floor with a more functional staircase, and finished it by enclosing the staircase. Then EVERYTHING except the ceiling got coated in paint.

The first pieces of furniture we put in were a pair of day beds that I designed, each are Twin XL in size which can be butted together to make a king bed. Currently we mainly use them like sofas for lounging since we now have a guest bedroom in the upstairs of the barn. Ultimately I hope to move these upstairs too into separate bunk nooks.

A few local antiques and lots of vintage nautical and marine pieces and a striped jute rug make up the rest of the decor. Macausland wool blankets from PEI covered the day beds initially.

A 19th century nova scotia pine jamb cupboard and an windsor chair from the same era.

An antique organ that came with the barn but are impossible to find anyone to haul away even if you pay them,,,, a nuisance to move around, it got a coat of paint. For now its just taking up space as a plant stand and display ledge until we’re ready to embark on more changes in the space. Eventually the organ will get moved out piece by piece with the assistance of a sledge-hammer.

An antique wicker chair and a vintage model of the Bluenose schooner were the first finds for the space, both from local antique shops. My late brother and another brother made the coffee table from salved planks we pulled from the house’s attic years ago and an old wharf beam we found washed up on the beach. Last year I had custom mattress covers and pillows made for the beds (above) but not all of the pillow covers were finished before the end of the season (fabric stock issue) so this summer was our first full season with them.

I used a true mattress ticking fabric for the bed covers and stone washed cotton for the pillows. (Sources and details were in our Summer Newsletter!).

Back in 2021 we built a mini bar under the staircase. We used salvaged antique boards for the shelves and countertop, clad the walls in shiplap and hung a linen curtain to conceal a a fridge and some open shelving for ice buckets, trays and recyclables. I painted the ship lap a deep dark brown. I’m on the hunt for a marine style vintage bulkhead light.

This compact mini bar has really worked big for for us, the fridge holds a huge supply of canned and bottled drinks plus more, and the shelves hold plenty of spirits and glasses. We’re always serving up snacks in here so small plates and bowls are on hand too. This fall I lined the shelves with brown transferware which swapped out my great great aunts plates with wild rose pattern which created a very english garden tea party vibe. The antique ladder chair was a recent roadside freebie, just resting here before it heads into the workshop.

The fall is always my favourite time to use this building, here in Nova Scotia its the most enjoyable weather of the year and October gifts us with spectacular autumn colours and summer-like temps. The barn provides a cozy sheltered space to extend the outdoor season and a casual place to socialize when friends or neighbours drop by. Its also the perfect hang out space when family visits (yahtzee and puzzles being the fave pastimes!). I’ll share a peek of the upstairs bedroom space in a Part 2 post.

Here’s a previous post with a look at the Barn BEFORE we began updates and added the potager garden.


UNTIL NEXT TIME you can….

follow us on Instagram and Pinterest!

ROUND-UP: Kitchen Counter Accessories - Contemporary

Essential kitchen countertop accessories for a contemporary or modern kitchen

Outfitting a kitchen after a brand new kitchen install is a project in itself. Whether this level of detail is included in a designer’s scope of work or not, (it is never included as part of any kitchen supplier’s design or fees) I always aim to provide recommendations for the key countertop accessories because they’re critical to the success of the new aesthetic and function. It saddens me to see a newly renovated kitchen loaded up with random and often unattractive 'stuff' after enormous amounts of money and months or years of planning were invested in the new kitchen build-out and details.

Getting kitchen countertop items and accessories wrong can significantly spoil the impact of the brand new kitchen space you just invested in. Getting them right enhances everything in the space and elevates the kitchen design.

When it comes to deciding what items will live on your counter, as a rule of thumb if you use it daily, especially multiple times a day - its a countertop essential. Use it once a week or less, also, could be a countertop mainstay. Everything else - plan to store within a cabinet/pantry or purge it. If you have many small appliances you use daily (or ones that are too awkward to stow away), I highly recommend incorporating easy access appliance storage such as*; countertop cabinets with retracting doors, full extension roll-out shelves, magic corners, or hydraulic lift shelves. Otherwise you risk your kitchen looking like an appliance store display. (*most of these can be added to existing kitchens too)

Because I find myself recommending the same countertop items over and over again, I’ve began compiling round-ups, like this one, on our Amazon storefront. What I love about the storefront platform is it allows us to create a collection of items for any project or product category which saves the product image and specifications with their individual links ALL IN ONE PLACE. Once, and done! I can also see at a glance if the item is no longer available so we can update the link. Its a HUGE time saver on our end and a freely available page for clients and anyone who follows us. I know personally how Amazon is a primary shopping source for clients especially for those in rural areas - where many independent and brand retailers won’t deliver. Whether you order from there or not the key benefit this will provide you with the exact product info and pricing to go purchase elsewhere if you prefer.

  1. Espresso Maker / 2. Pour-over Coffee and tea Kettle / 3. Carbonator / 4. Electric kettle / 5. Butter crock / 6. French butter crock / 7. Salt & Pepper mills / 8. Salt cellar / 9. Truffle Oil / 10. Wood utensils / 11. Utensil holder / 12. Premium Olive Oil / 13. Round Wood tray / 14. Cutting Board / 15. Toaster

All of the above items along with more options can be viewed on this list titled

Kitchen Countertop Essentials - Contemporary.

CONTEMPORARY AND MODERN STYLE:

For contemporary and modern kitchens I recommend countertop appliances and accessories in blacks, greys, white, stainless, brass, stone and natural wood., and don’t typically stray from this unless there is a particular colour in the kitchen’s palette that would work as an accent. Wood items add a warmth to painted kitchens and stone counters. Natural and neutral colours won’t become a visual distraction with your kitchen scheme.

This  round-up doesn’t represent the full scope of essential accessories but just some of the most key pieces that you can easily find on Amazon or any homewares store.  We’ll be sharing more product round-ups on our newly updated The Design Shop website going forward to compliment the virtual design packages. And including other sources and favourite products beyond Amazon.

It can feel overwhelming thinking all your kitchen things need replacing, prioritize the countertop items first, then move on to updating things within the cabinets and drawers beginning with most often used; ie; dishware, cookware etc. Once you begin, the choices narrow and selections become simpler.

From The Garden: Chive Pesto

A Hero plant: chives

I’ve written before about some of my hero plants in our raised bed potager garden, chives would be at the top of that list. We currently have 8 mature plants in 4 different beds, which were originally 4 plants that have been split as they’ve matured and expanded. They thrive in our conditions here and are the first sign of green to pop through the soil in Spring, and the last plant we’re still cutting from in the Fall. They’re completely low maintenance - we cut them right down about 3 times per season, and they quickly grow right back. I love the plants radial shape and how much fullness they add to our beds but especially love the burst of purple blooms so early in the season. The only issue is, they produce such an abundance of chives that its more than we can possibly consume ourselves, they don’t last long once picked and it’s too much of a chore even to give them away (I’ve tried). This year I vowed to find a way to make better use of them and after seeing recipes for garlic scape pesto I was instantly inspired to try the same method with chives. We love basil pesto and use it often so I imagined we could use a chive pesto in all the same ways. Since we have zero success growing basil here due to cold and wet conditions, I was hoping this could satisfy my basil pesto craving.

There are loads of chive pesto recipes online, each different in some way, so based on the various methods and ingredients other recipes used, I created my own version. Well it turned out so incredibly GOOD, from the first batch and every batch after that I’m excited to share it for anyone else that’s growing chives. Its better than any store-bought pesto I’ve tasted.

Since we have a continuous supply of chives at the ready I’ve been making continuous batches of this pesto all summer. Its so fresh and so flavourful, its addictive - we’ve been using it on everything. It’s better than any store-bought pesto I’ve ever tasted. Delicious as a condiment or baste on grilled fish, chicken or pork,,,, tossed with pasta, on homemade pizza, on eggs, on sandwiches, for bruschetta and with cheese and crackers. Here’s the recipe:

CAROL’S GARDEN CHIVE PESTO

ingredieNTS

2 Cups - Finely Chopped Fresh Chives

3/4 to 1 Cup - Extra Virgin Olive Oil

1/2 Cup - Fine Grated Parmesan Cheese

1/4 Cup - Sliced Almonds

Juice of 1/2 a Lemon

1 Small Garlic Clove - minced

method

  • add 1/2 Cup of the olive oil to a blender

  • add in the chives and blend on high until combined

  • add in the nuts and blend on high until combined

  • add in garlic, parmasean, lemon juice and blend on high, gradually adding in remaining olive oil plus more until desired consistency

Notes: You can make the texture of pesto as chunky or smooth as you like depending how long you blend it. Use as much oil as you like, I find the consistency of 3/4 C of oil is just right for bottling to use as a condiment or baste on meats etc, but for other uses you might want more oil,, just add as needed per use. I used a blender but you could use a mixer or food processor, you don’t have to finely chop the chives or garlic in that case. You can substitute the almonds for walnuts or pecans but I like that the almonds are mild in flavour so they don’t overpower the chives.

This recipe makes enough for a 270 - 300g jar.

After harvesting the chives, separate/remove the thick flower stems from the bunch, set aside some of the buds for garnish, rinse, pat dry the chives, then cut off any brown tips or white ends.

Finely chop the chives if your using a blender, otherwise if using a food processor just loosely chop. Once finished mixing all the ingredients scoop into jars and garnish with a flower bud.

I added tags to these bottles and gifted them to friends. Some other batches I spooned into plastic lined ice cube trays instead of jars and froze them into cubes before turning them out into a zip lock bag to store in the freezer. (Line ice cube trays with plastic wrap first to prevent your tray from taking on the taste of the chives.)

One of my favourite creations was a pesto goat cheese ball where I coated a ball of goats cheese with chive pesto, drizzled it with olive oil and garnished with chive flowers, served with crackers. It was devoured before I even thought to take a photo - next time! Our most common use for the pesto is to toss it with hot pasta then add in some goats cheese just before plating, and a squeeze of lemon. So fast, so simple and absolutely chef’s kiss delicious.

I’m not great at remembering to take photos of food before serving it but I’ll keep it mind next next time I make a dish with the pesto so I can update this post.

Our garden beds from 2 weeks ago, in the never ending July rain. A raised bed with a boxwood and 4 chive plants flanking it, this was the 2nd growth of these plants after being cut right down at the end of June.

We’ve got months of fresh chives still ahead of us, and now the pickling cukes, snap peas, and zucchini are exploding, its just the best time of year when we can eat something from the garden every day. Beyond that Its challenging to keep up with getting things jarred, canned or preserved if your not eating it all fresh - ours is a relatively small garden so I can totally understand why people set up roadside stands.

If you grow chives, I hope you enjoy trying this recipe or creating a version of your own.