Beautifying an old barn by the sea
Our 150 year old gothic farmhouse sits on acreage that backs onto a shoreline of grassy dunes and a salt marsh meadow beside a long white sandy beach, we have views out to the ocean from most parts of the property. The only part of the property that isn’t covered in wild sea grass or trees is the large front lawn and perimeter yards around the house. An antique barn sits next to the house, slightly set back, its not as old as the house as its only 125 years old and pretty much in its original condition. The house and barn were built by a carpenter and we’re now good friends with his relatives who are neighbours. A few years ago after having spent 4 years renovating the interior of the house we turned our focus to the exterior of the property, its sad to think it took us that long to get around to it because it was in such a neglected state. When we purchased the property the decks and paint were literally falling of the buildings and there was a surplus of dead trees and wild overgrowth surrounding the house - the grounds were ROUGH and bare, there was no landscaping to speak of, no garden beds, no shrubs, not a single flower or specimen plant. There wasn’t even a proper driveway - they just drove on the grass. Looking at the exterior was overwhelming (and still is!), especially for our limited experience with landscaping (none) but a few summers ago two things became top priority; a paint job for the old barn and …. a vegetable and flower garden - a potager garden was what I envisioned. It was a small goal in light of all that the property needed to look inhabited and loved, but it was a start at least and we had a small window of seasonal weather to get it done.
We started the project in the early fall because its just the best time for exterior painting work here and then that would also give us a head start on getting raised garden beds built so they’d be ready to go the following spring.

Here’s a peek at a corner of the finished garden shortly after the first plants were put in, although it looks pretty simple you can’t truly appreciate how beautiful it is to us unless you understand what it looked like a few months earlier. Below is a glimpse of what the barn and garden area were like just as the painting of the barn got underway which gives you an idea of what we started with…..(click through the slides for more before photos).
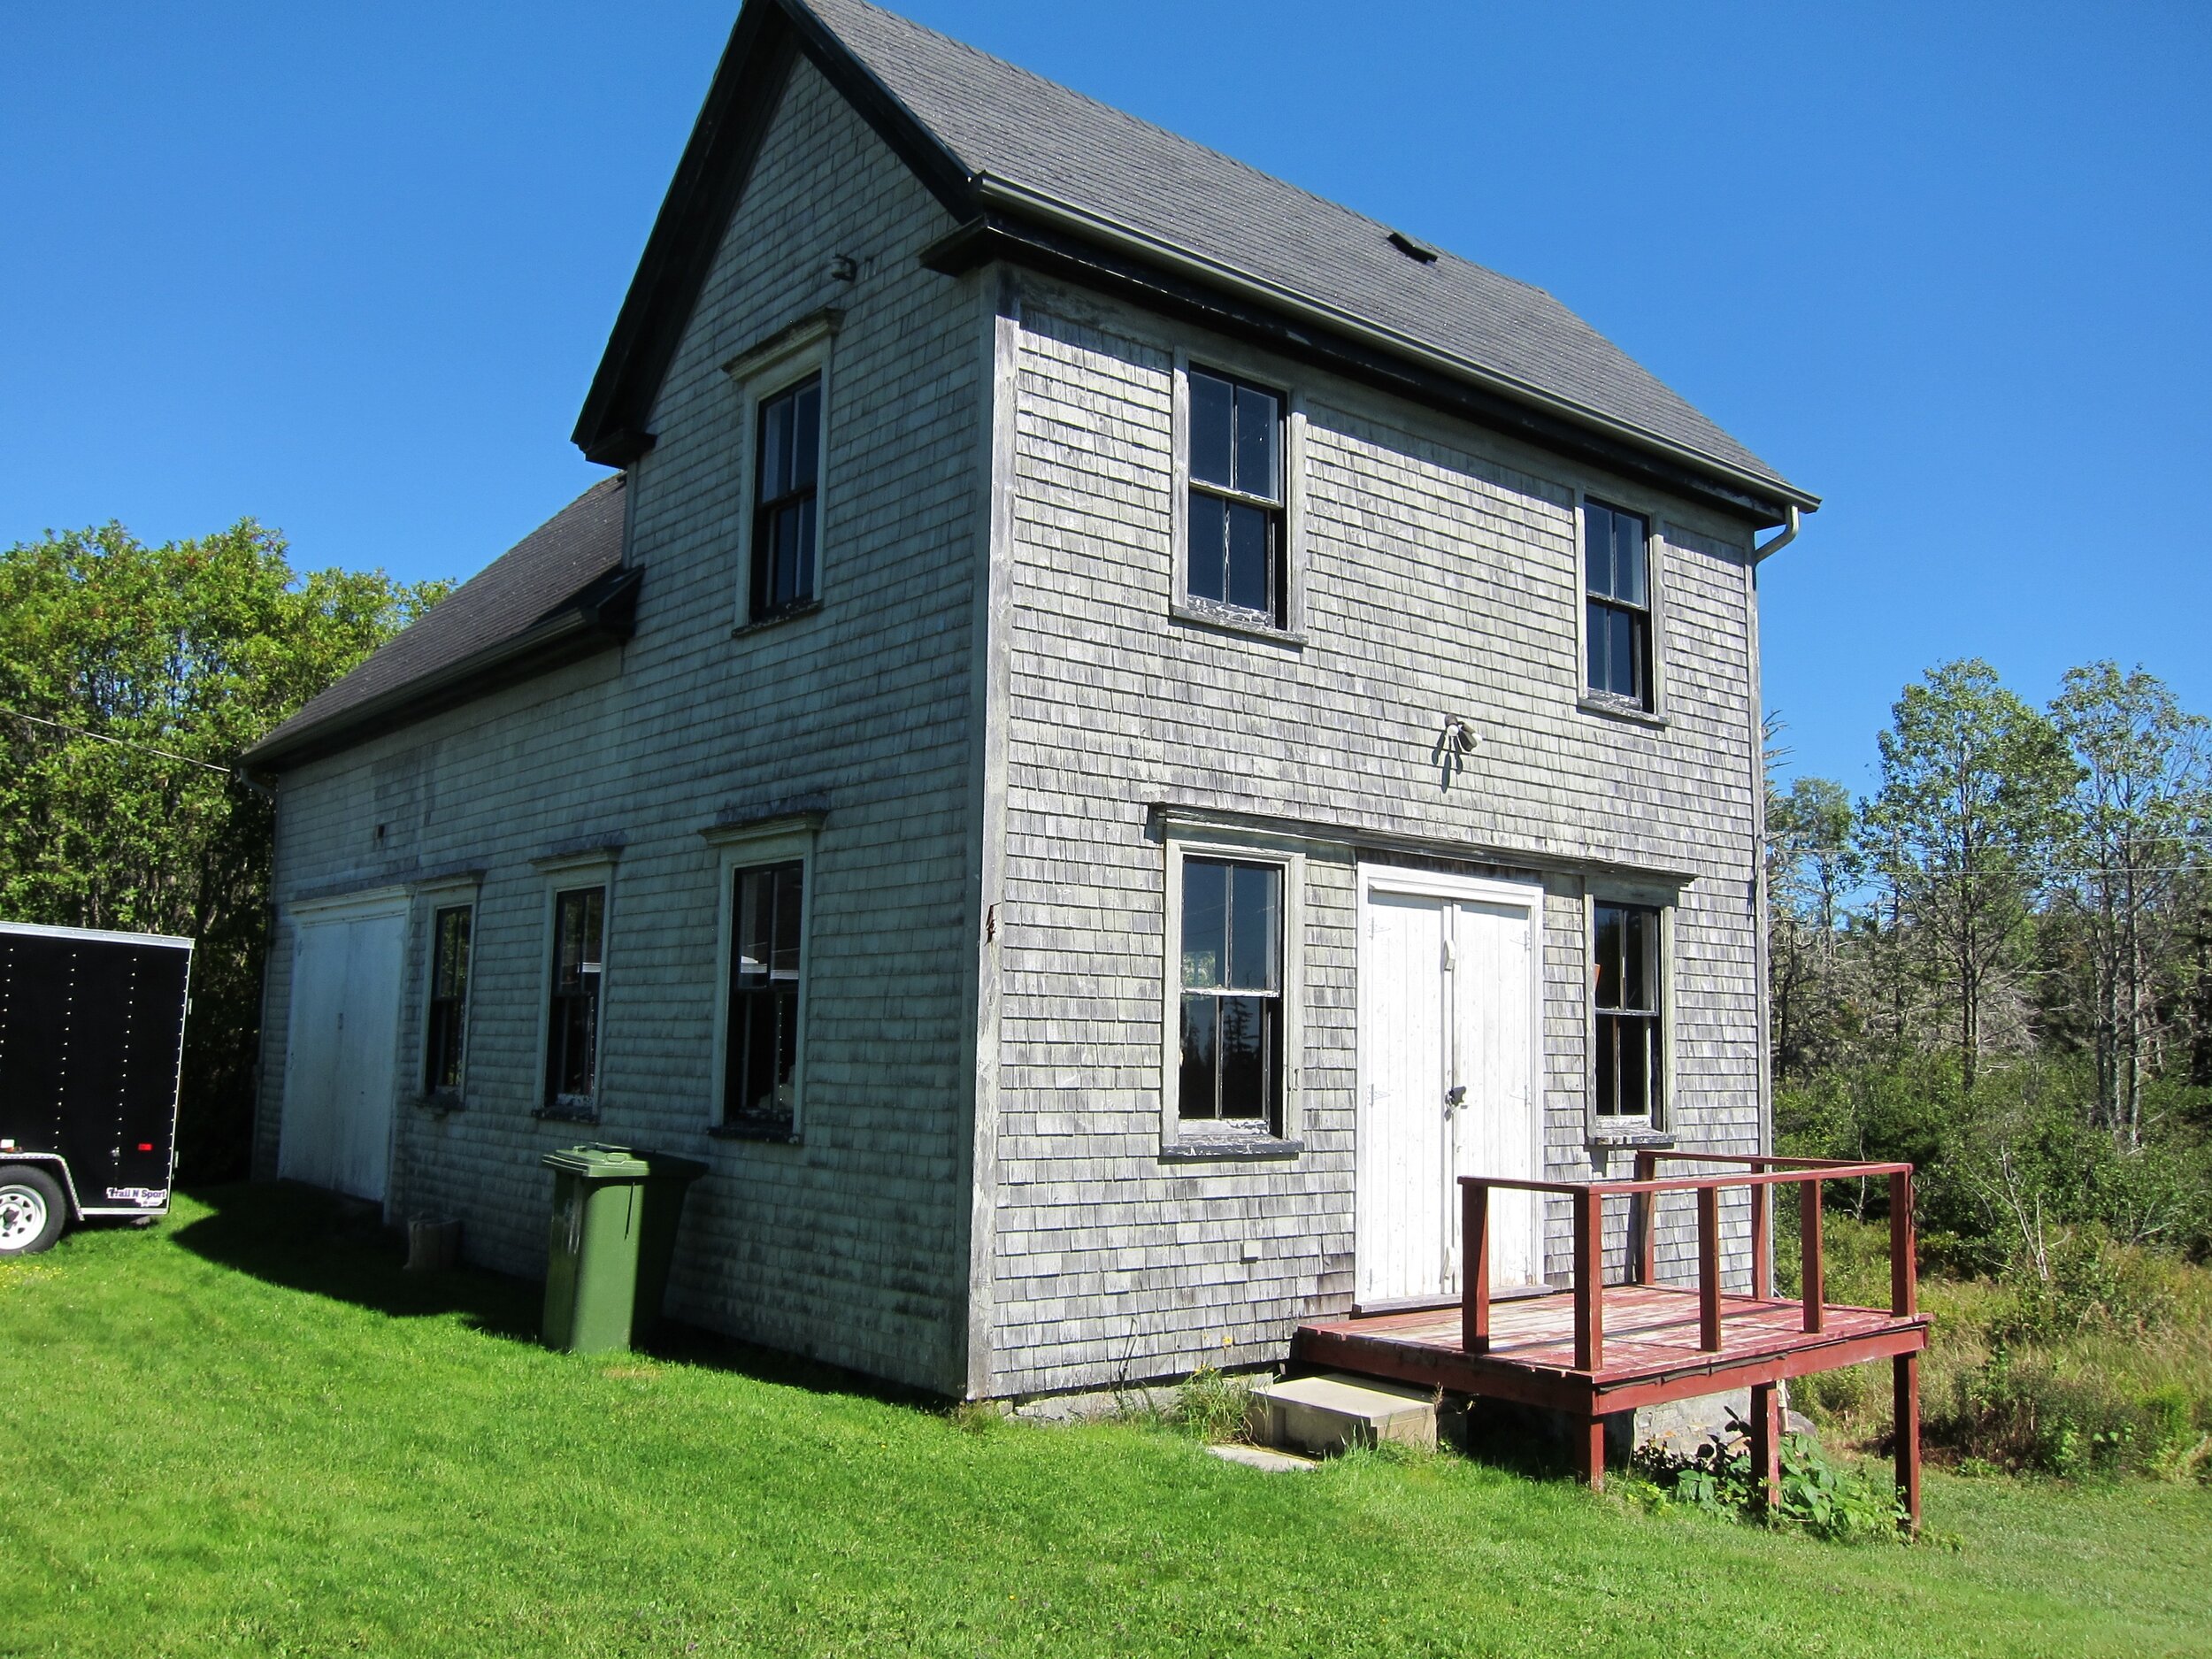
There was a large area of mixed grass, gravel and dirt to the side of the house in front of the barn. It was like a no-man’s land and by default it became the parking area and home for the recycling bins. Whether we wanted it to be the parking area or not,,,that’s where everyone who ever came to the house would park, and they literally would drive the car right up to the door at the back of the house, it didn’t seem to matter if there was grass or not. There’s sloping yard on the other sides of the house so this level area was a prime spot for a garden and it would give some purpose to this barren space. My plan was to transform this area into a enclosed garden and outdoor lounge area.

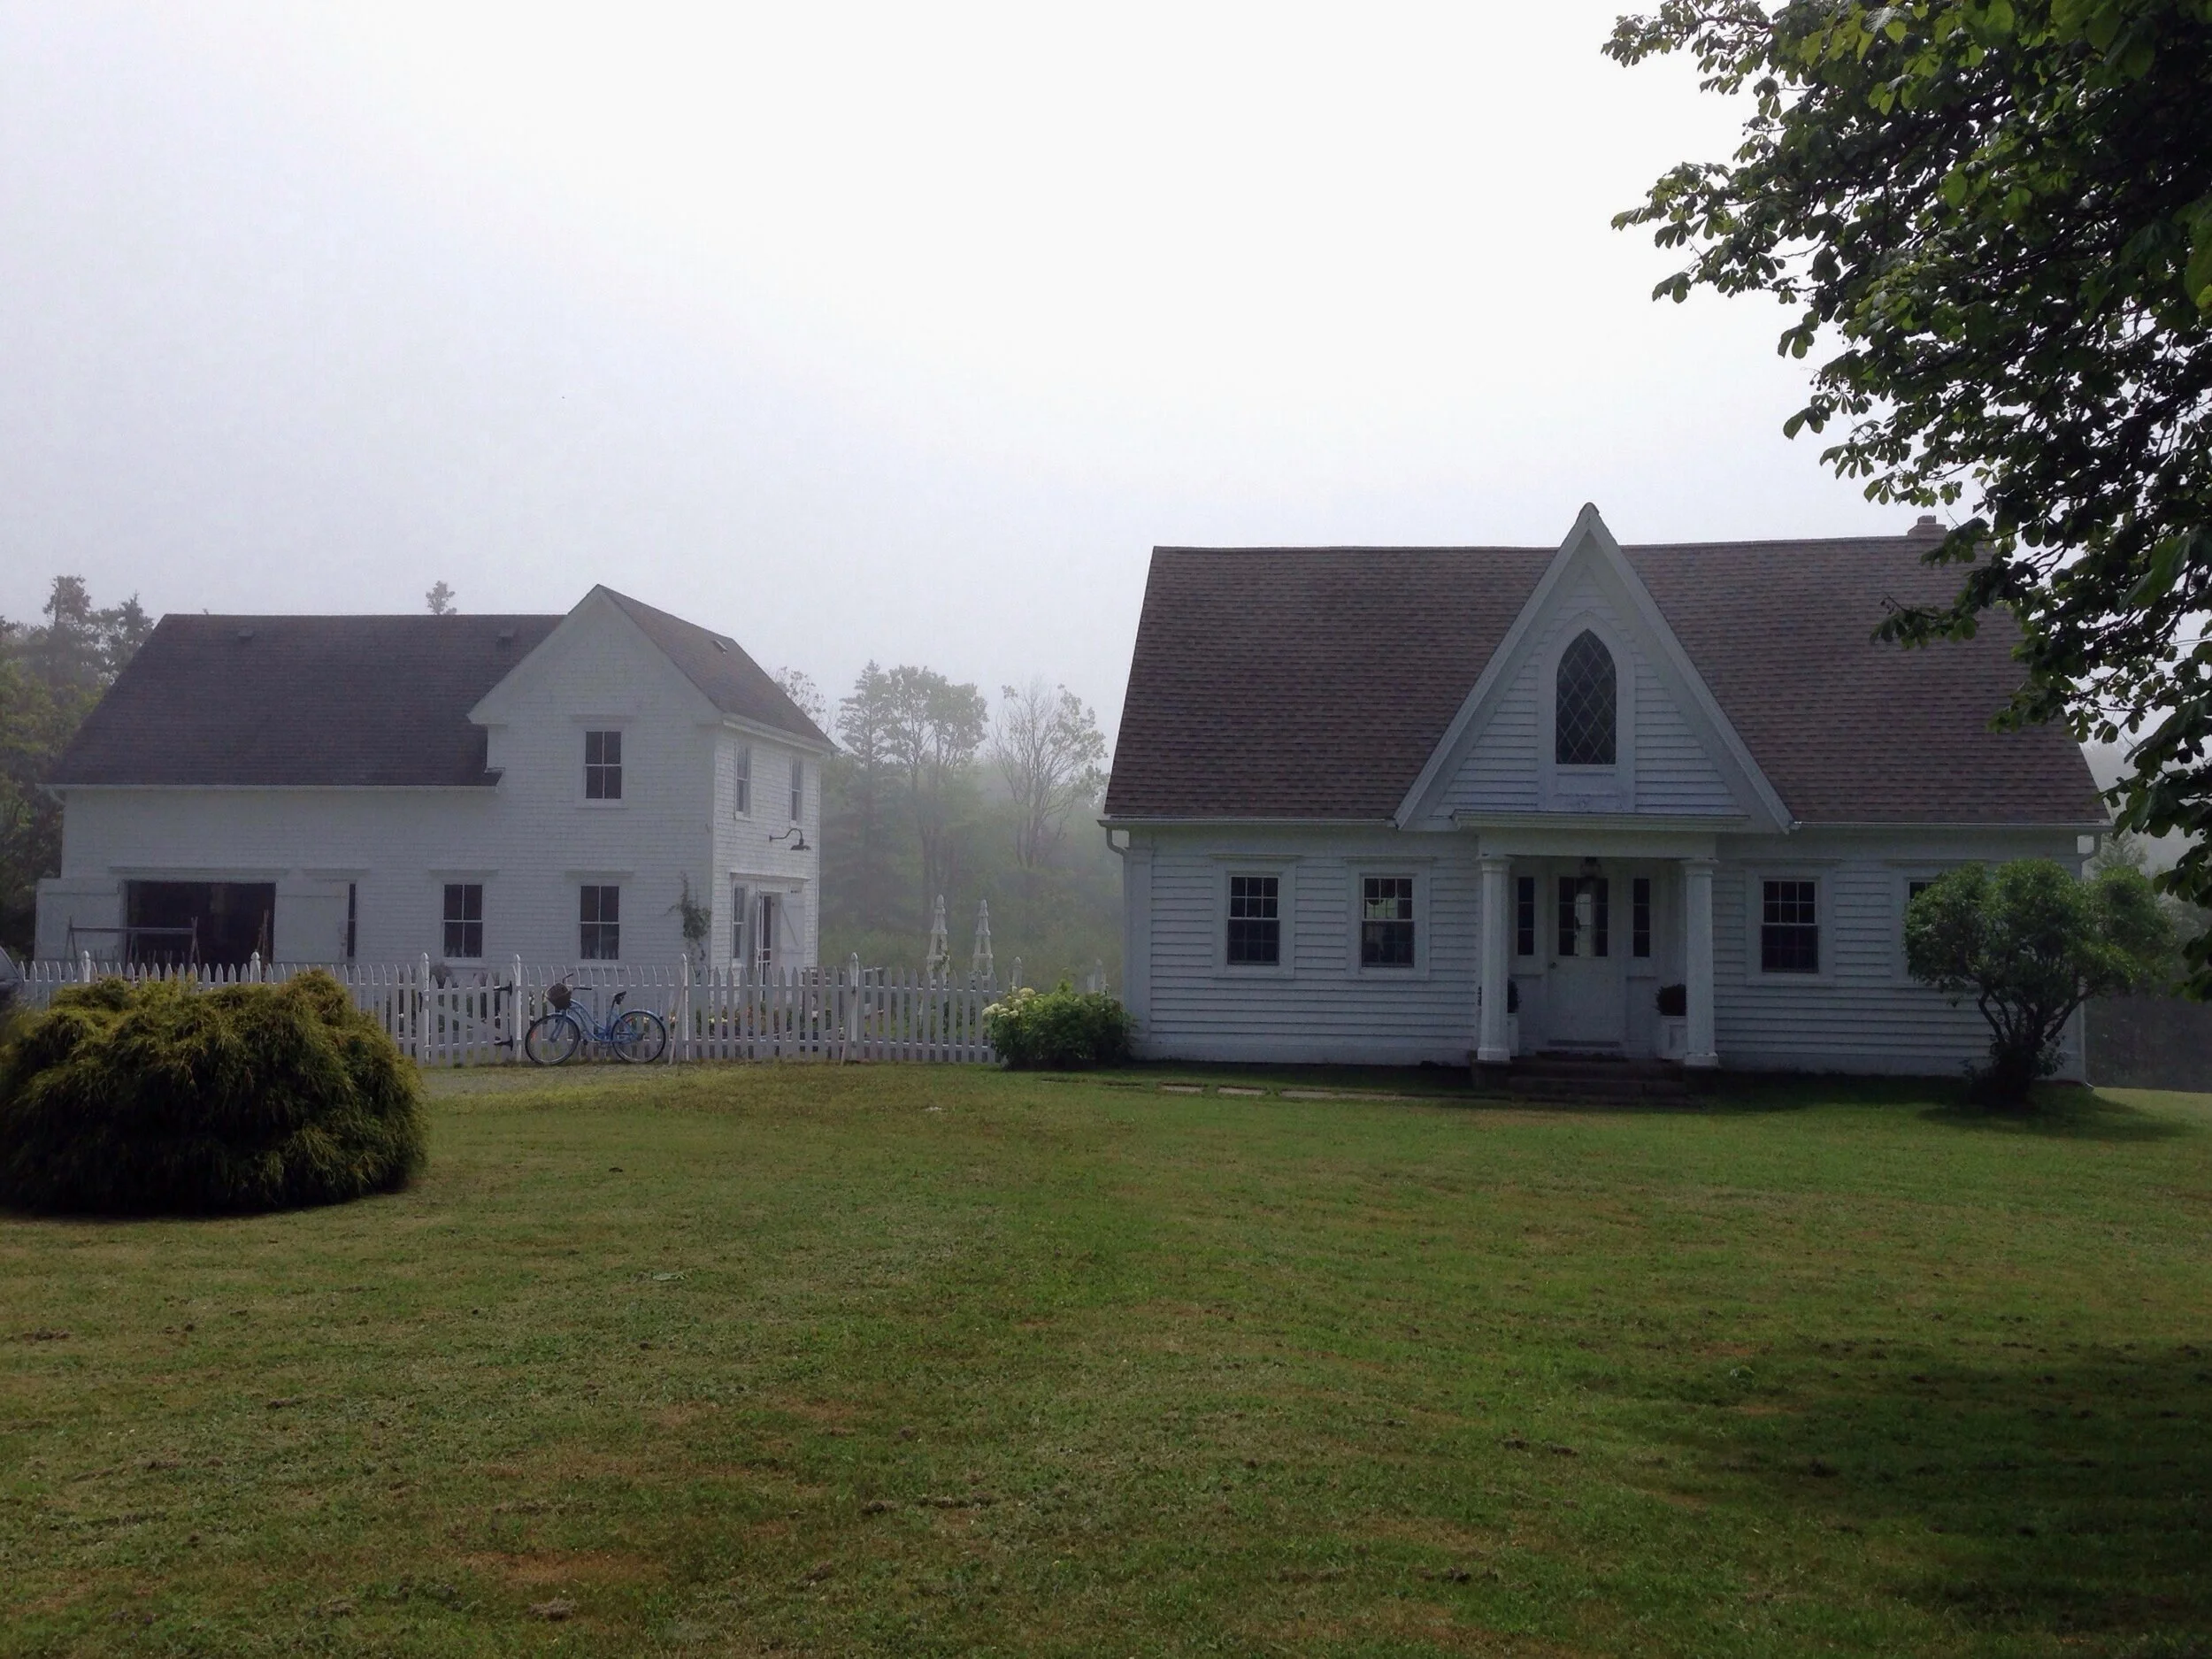
We approached the paint job of the barn as a necessary cosmetic fix, but bigger picture it needs a longer term solution if we want to use it for anything other than storage or a workshop. Our immediate goal was to make it not look like an eyesore anymore, which it clearly did…..as you’ll see below.. The new paint was sprayed on, the cedar shakes were the original and since they’re heavily weathered there was no primer needed they just did some scraping, cleaning, some minor repairs, and away they went. White. everything. The painters kept asking me repeatedly, everything white? Yes. Everything. White. I pointed to the house, just like the house.

We had no option but to use raised beds for the garden since the property is mostly on ledgerock. I had come up with various layouts for the bed shapes and garden design but ultimately decided to do a series of simple rectangles in a grid of 8. The wood for the beds was milled for us by a neighbour who has a saw mill, we went to his lot and picked out some boards from an old growth tree and he milled them to size, 12” H x 1.25” thick, 8’ long. Ideally we wanted all single lengths so no sides would have a seam/joint but we ended up needing to use cut pieces so I decided to put them on the ends and create a detail for the seam which I repeated on the corners.

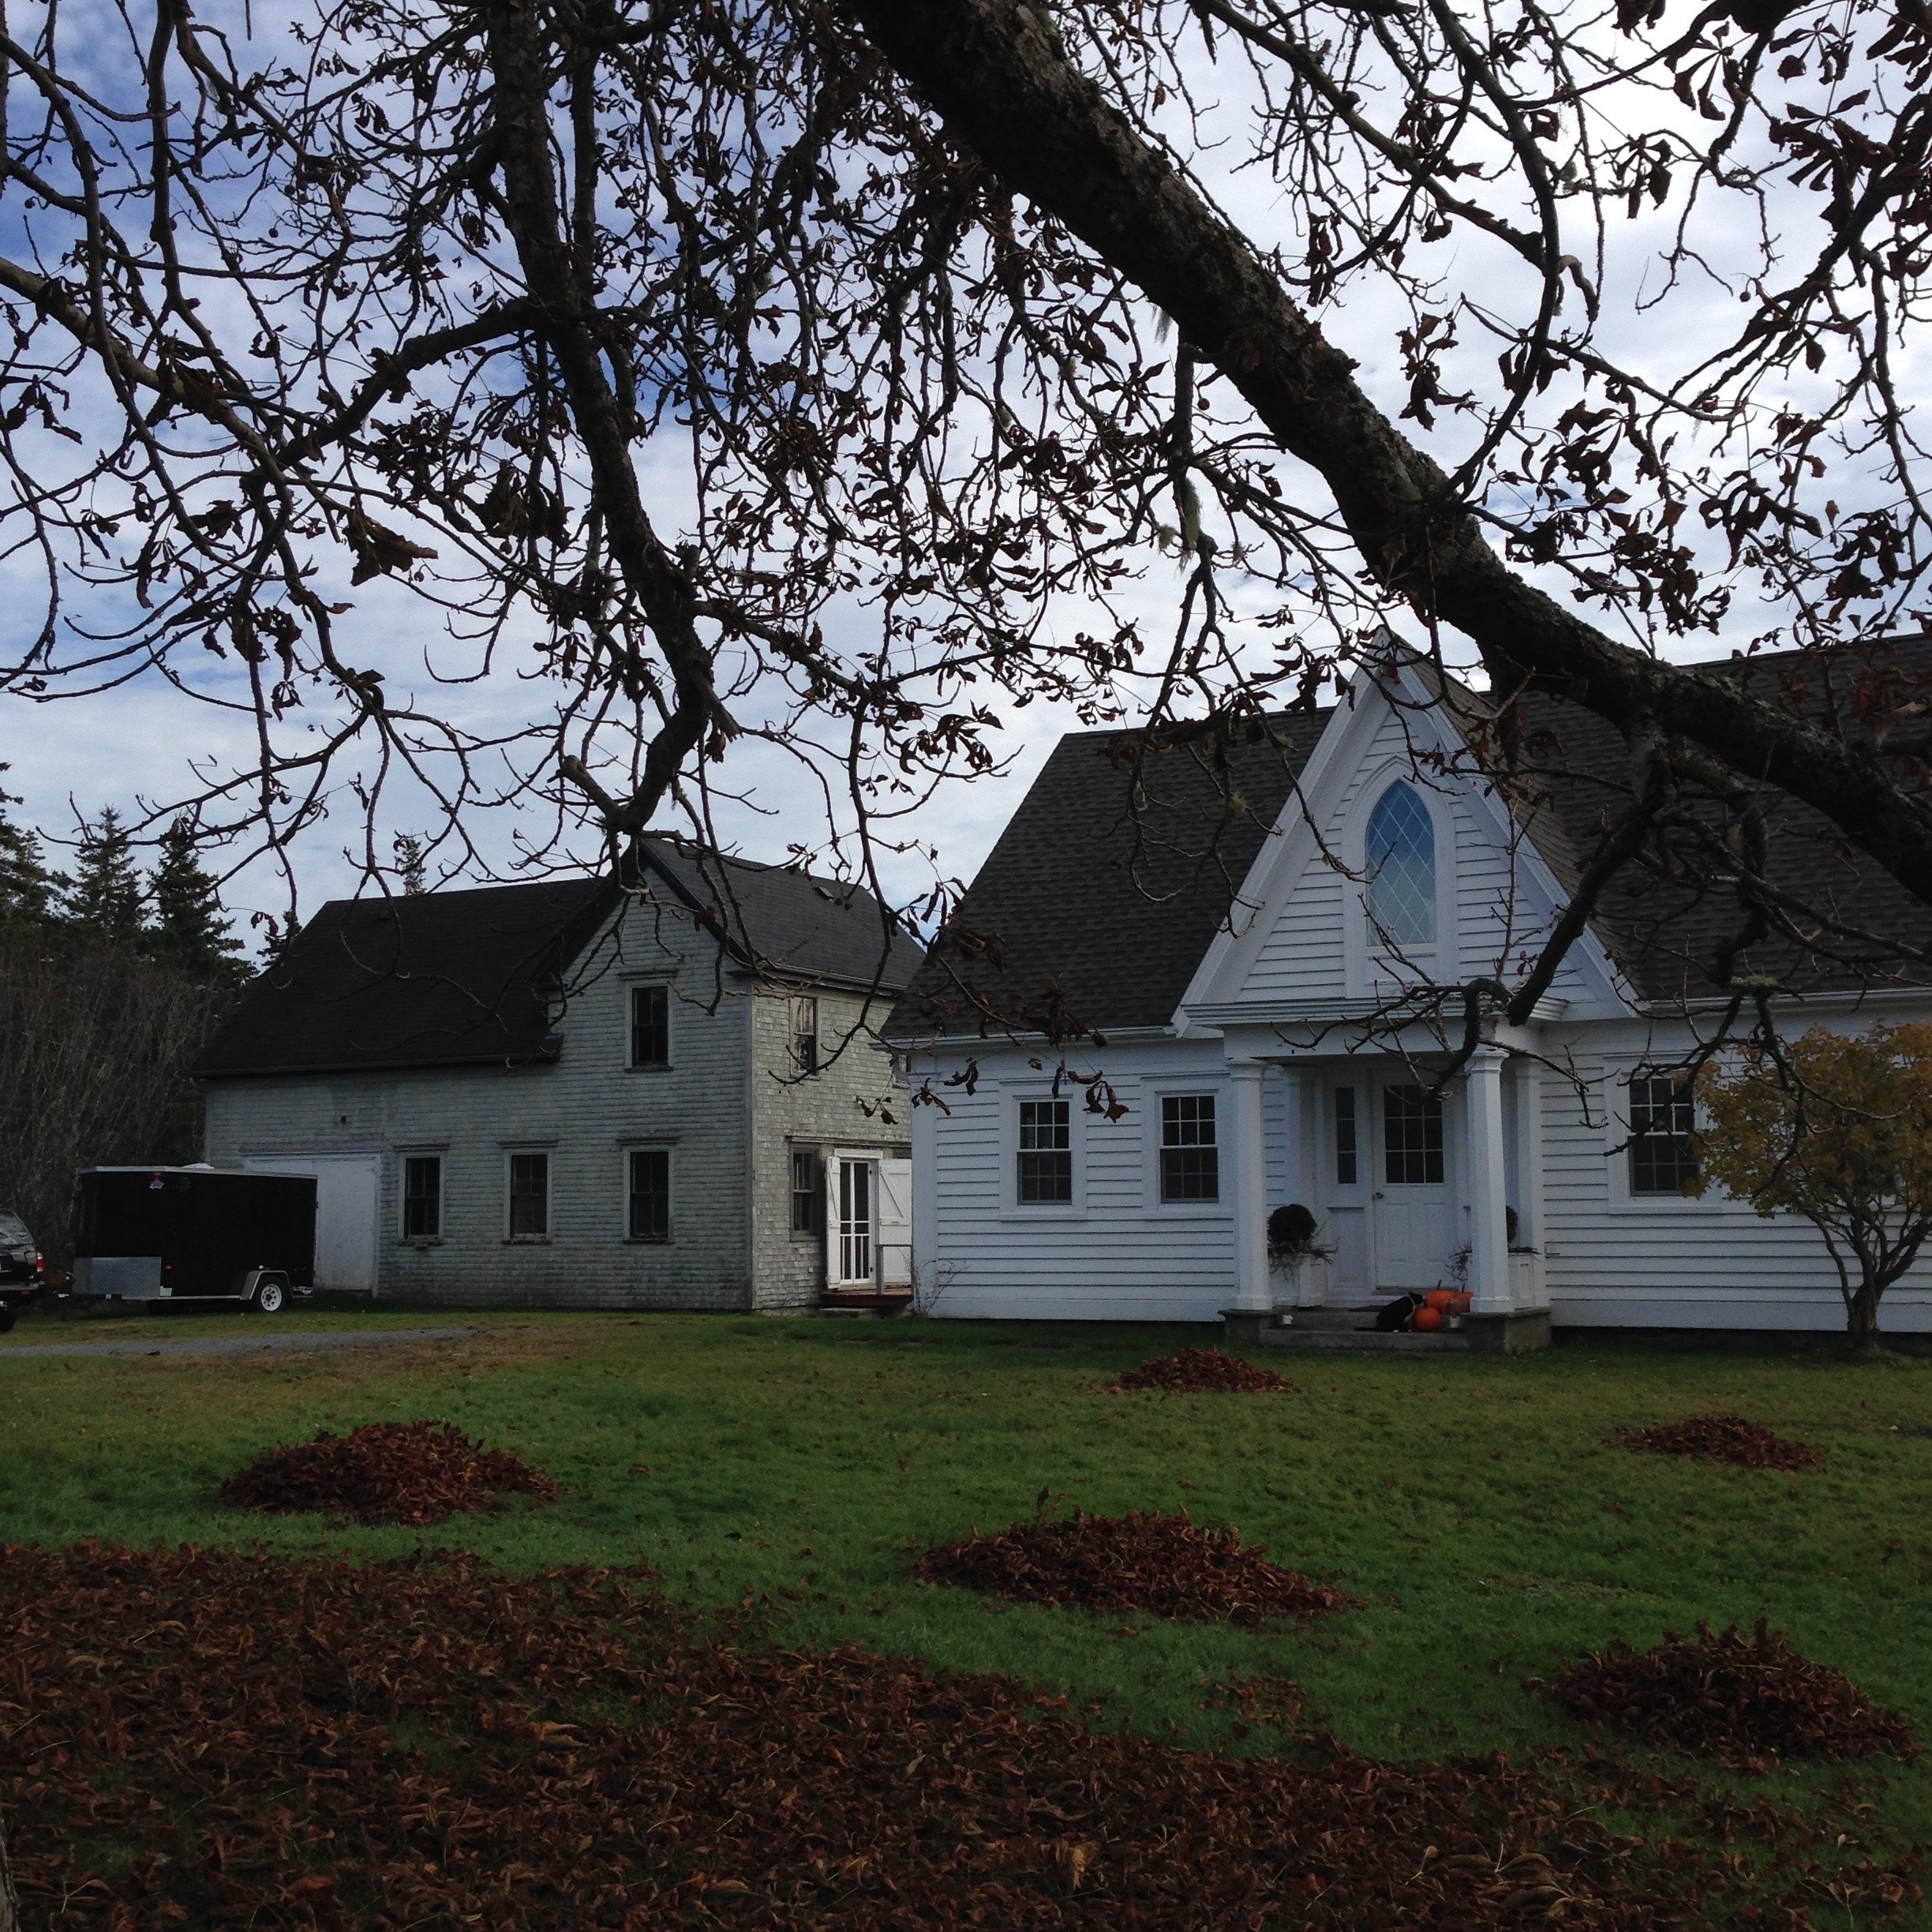
AND here she is!! The newly white barn (late evening pic, hence all the shade) and beds in progress! (actually lmost finished paint job, this was awaiting final coat on the end of the barn and part of the back). Without a doubt this was the single most satisfying and impactful update we’ve done to the property. Definitely worth every penny even if its a temporary solution. So how long did it take and how much did it cost? In total it took 2 painters 4 days to complete the job, but due to a pause for some bad weather, the duration from start to finish was about a week and a half. They used a sprayer for the application which took almost double the paint I had anticipated so the project in total including paint and labour was about $4500 - I think this is useful to share because how many people know how much it costs to paint a 125 year old shingled barn? And in case you were wondering, yes ,there was a lot of overspray which I was concerned about before starting, although I was assured multiple times there wouldn’t be any overspray on the roof,,,, there was. A LOT, thankfully the worst is on the back. So if you ever have a building exterior sprayed be sure to insist, insist, on covering up your roof if its not being replaced. I was also then assured over my distress about the overspray on the roof that it would wash off with the next good rain. It didn’t. After many many rain storms (incl. hurricanes) it hasn’t. Although we did plan on a new roof in the near future, it’ll now be sooner rather than later.

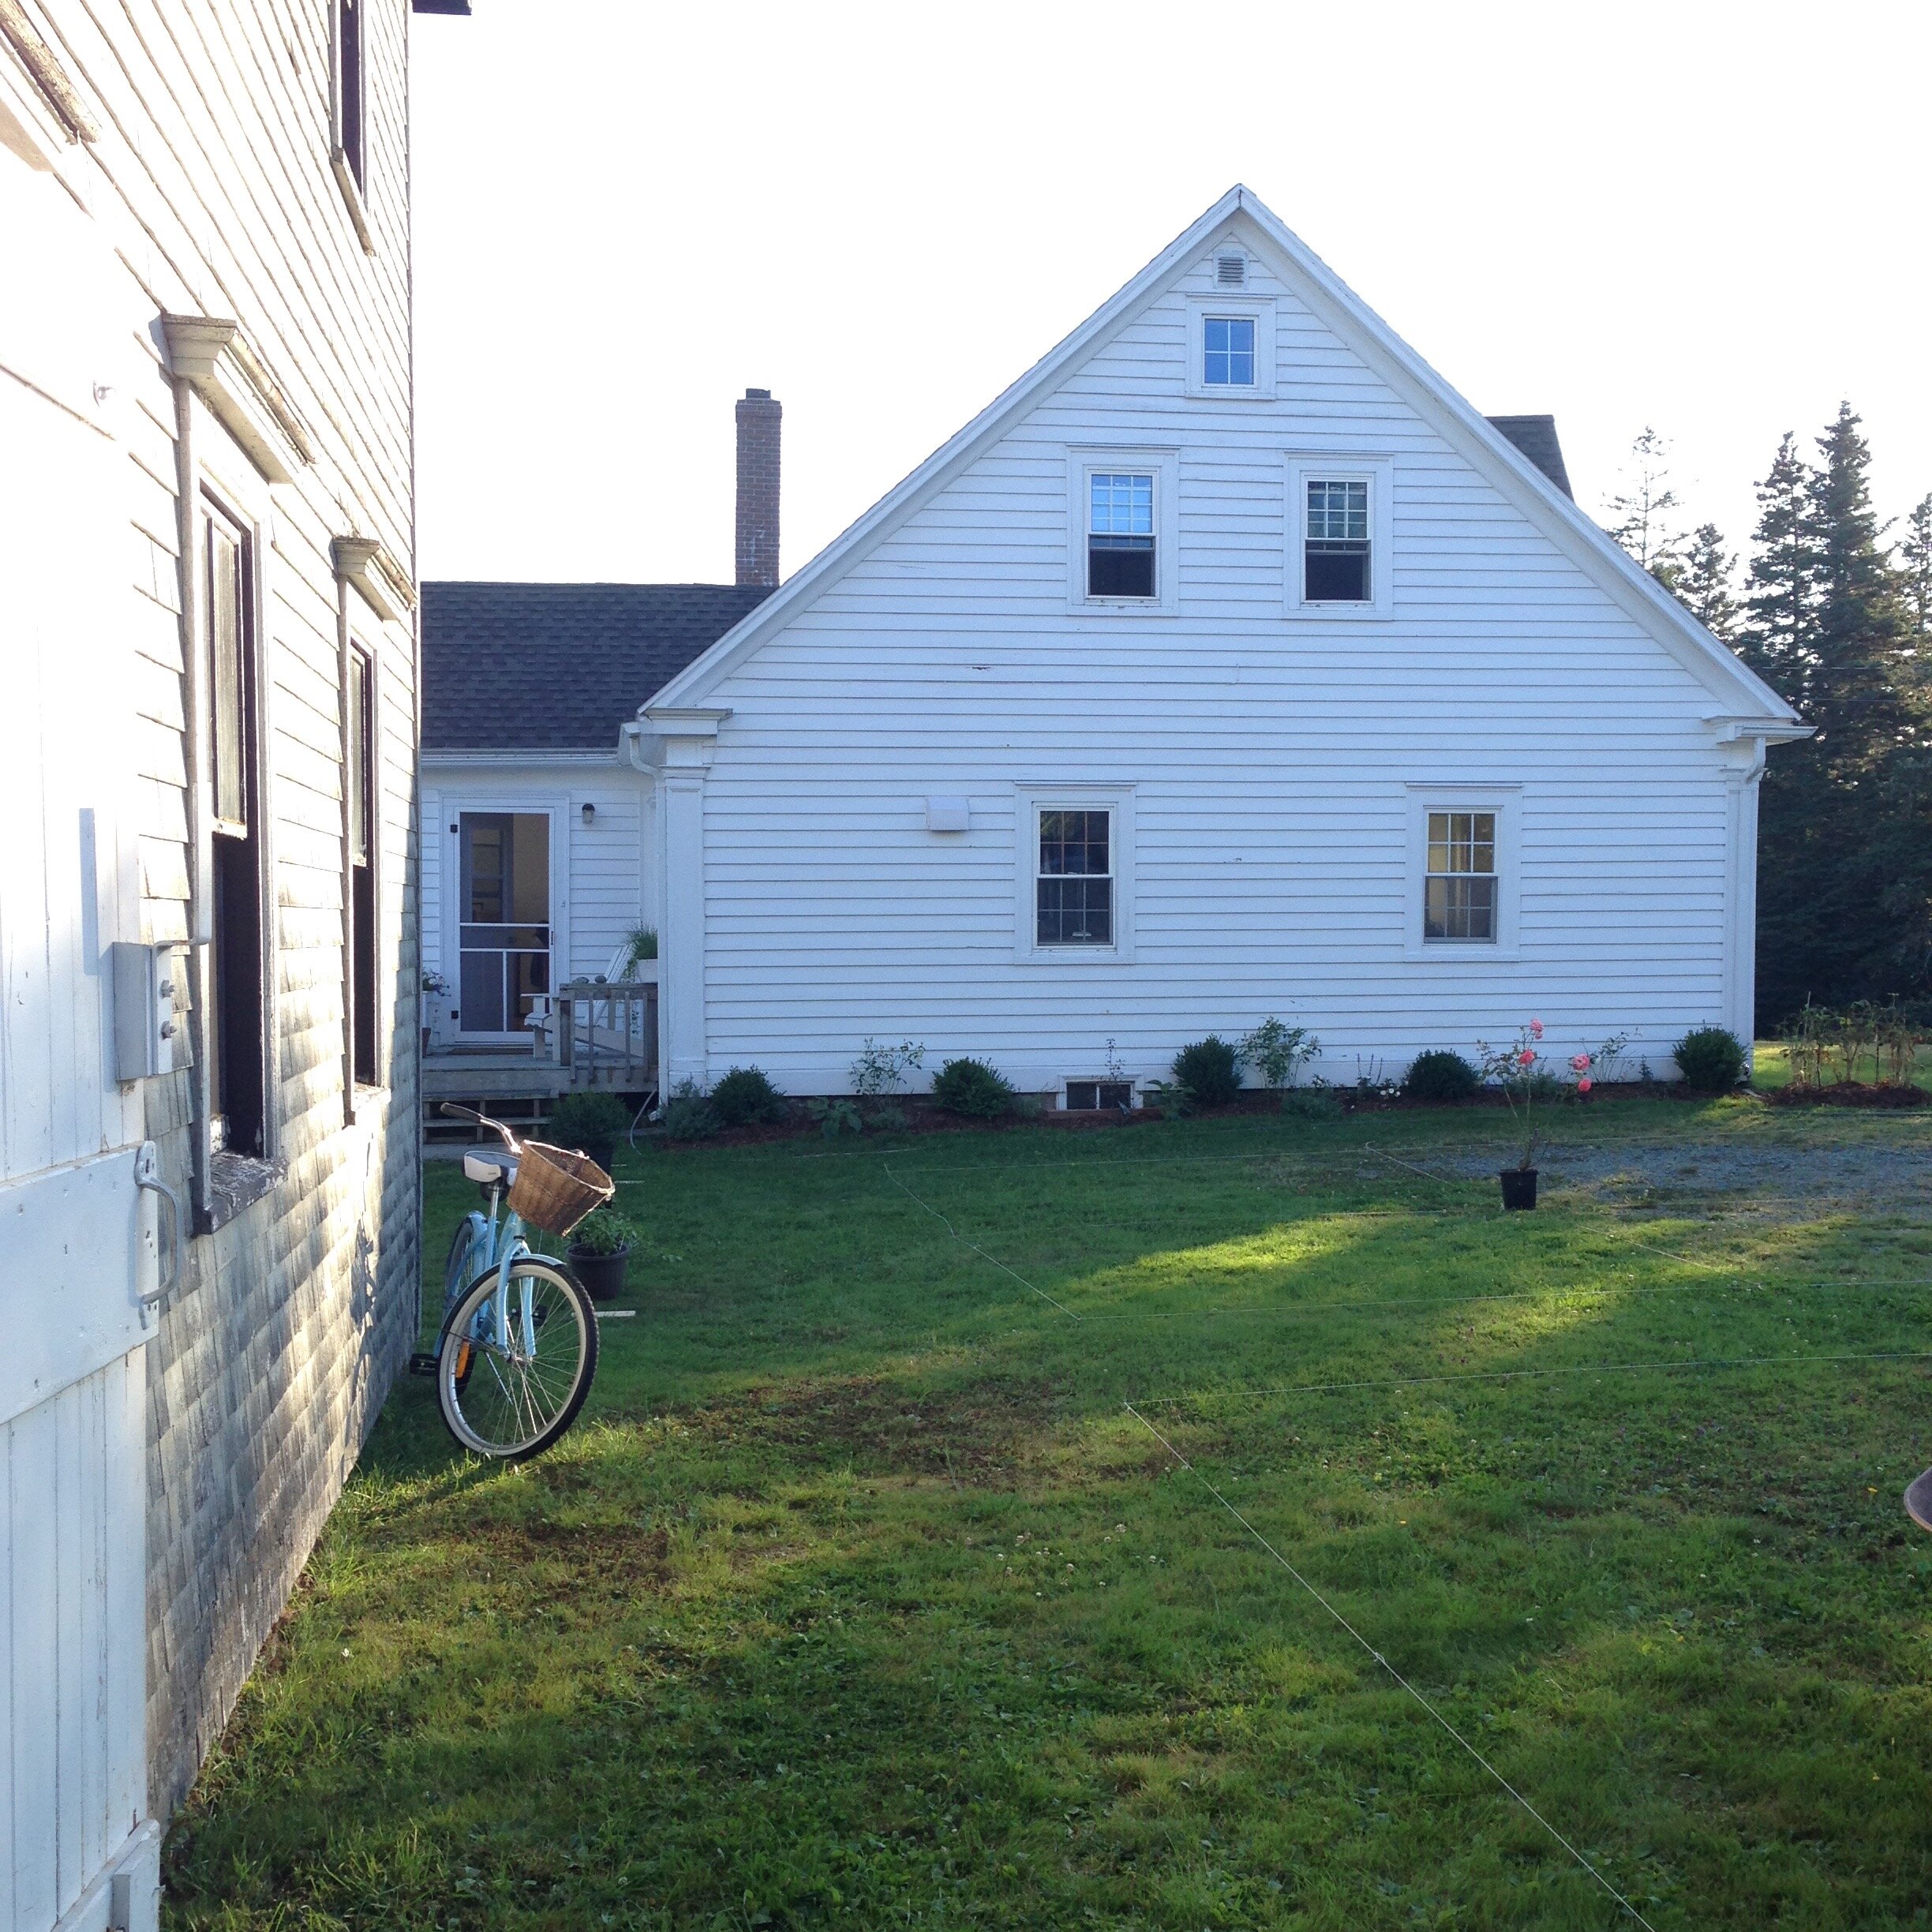
The painting was finished just a few days before Thanksgiving, at the same time the raised beds were in midst of being built and loosely laid in position. This is a great opportunity to test out your spacing. At this point we were super excited as we could now see and experience the physical transformation of the space as the beds created a new boundary which defined the pathways and traffic flow and created a distinct purpose to the area. And magically, in combination with the new paint this unified the barn and the house, one was now an extension of the other.

One of the best features of this garden is this view, from the centre points in the garden you can see out to the ocean. Its also where gusts of winds whip through the area,,, so there’s that challenge we have to deal with….along with fog and salt air.

Before the ground froze that fall we fixed the beds in position, lined them and filled them with soil before the freezing temps arrived, this would give the freshly cut wood frames a chance to weather over the winter. And I would have the winter months to research and plan out how we would fill each bed.

Flash forward to the spring, the first thing we did was create a garden bed along the side of the house where we planted a series of globe boxwood, catmint, hostas and some salvia or sage? and climbing roses (which didn’t survive the year). Then the first long weekend we built a pair of obelisks for the two raised beds closets to the house. The key was ensuring they were anchored securely into the ground and I’m happy to say these have withstood countless nor’easters, a winter bomb cyclone and a hurricane! Although sadly we’ve had zero success finding a climbing plant to grow/thrive on them.
Filling all the beds is another post all together, It took weeks, almost months,,to plant all of the beds. (garden centres are few and far between around these parts so it was also a hugely time consuming process that involved endless driving to various garden centres, often not finding what we had in mind so making lots of substitutes.)

Soon as the plantings were done we installed a picket fence across front side of the garden including two two gates. Sigh, the picket fence. . I have to say this was the single most impactful change of the garden and barn makeover. it transformed the property aesthetically and physically as it created this ‘new’ private outdoor area, an extension of the house that didn’t exist before. This wasn’t a space we ever spent a second of time in before this (or wanted to). Now its the central hub, a space where we spend many hours of our days, its where we go first thing in the morning, where we spend the last moments of daylight every day. And it supplies us with amazing things to eat!! The fence confines the garden and makes it a ‘private’ zone even though its at the front our property, not the back. Although this area was always here before, we felt like we just gained this expansive addition to our home, not to mention, a new pastime.

Not only do we enjoy spending time in the garden, it provides beautiful sight lines from inside the house, inside the barn and of course, from the street. We’ve had a quite a few people we hadn’t met before stop in to comment on the new additions and many cars stop to take photos. i think everyone is happy to see the old haunted looking barn gone! It often gets mistaken as the house now.

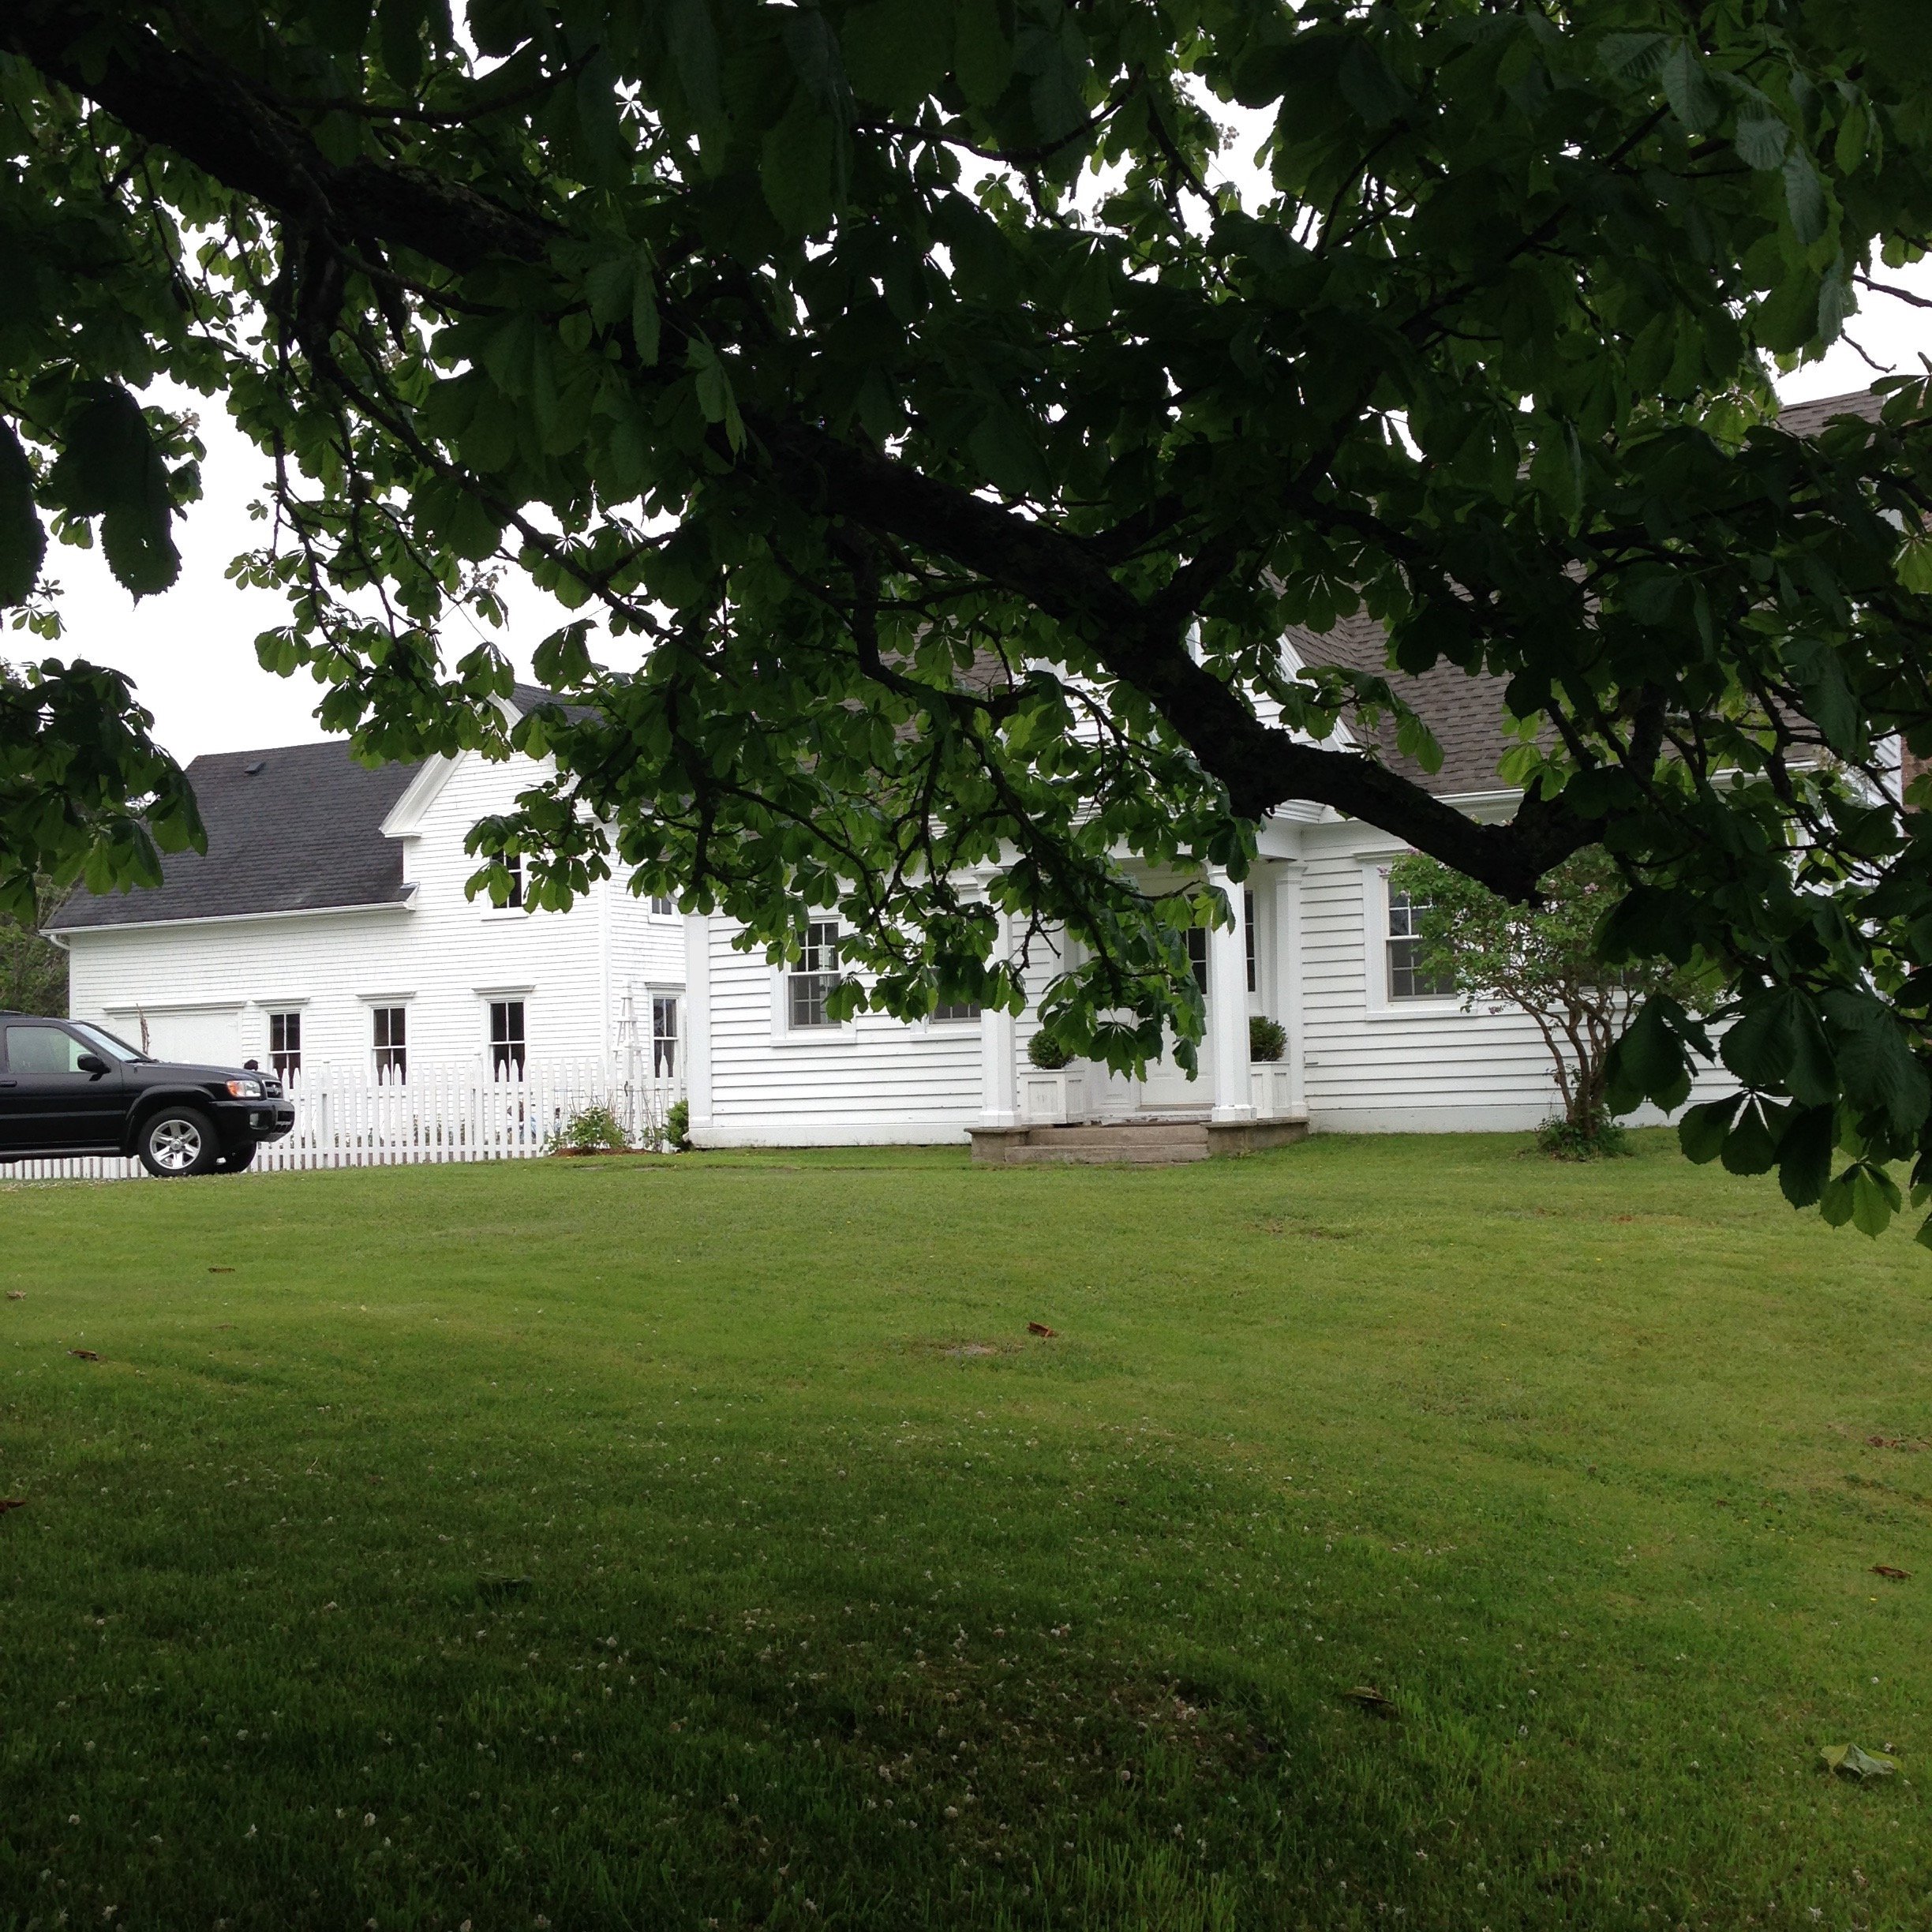
On the other side of the fence ….here’s a view of the front of the house. Not gonna lie,,,,I can’t say we grew the hydrangea, we bought these plants already this size,,,and with blooms, for instant impact. They’ve struggled every year since, , but they finally seem to be getting better established after a few years. The front of the house is another landscaping project, with hardscaping involved, Iv’e had plans done up with the help of a local landscape architect but logistics just haven’t worked out as yet to get it done (did I mention, small window of seasonal opportunity, shortage of contractors!).

Here’s a view from the far end of the garden, standing at the barn workshop doors, furthest away from the house. I think this may have been from the second year. We keep a couple of muskoka chairs here and its where we have a pre dinner drink every night (weather permitting), eventually there’ll also be a garden shed at this end of the fence.

The beds have a mix of evergreen boxwood, flowering shrubs, herbs, vegetable,s and annual and perennial flowers.

Late August or early September of the first year (possibly second?)……
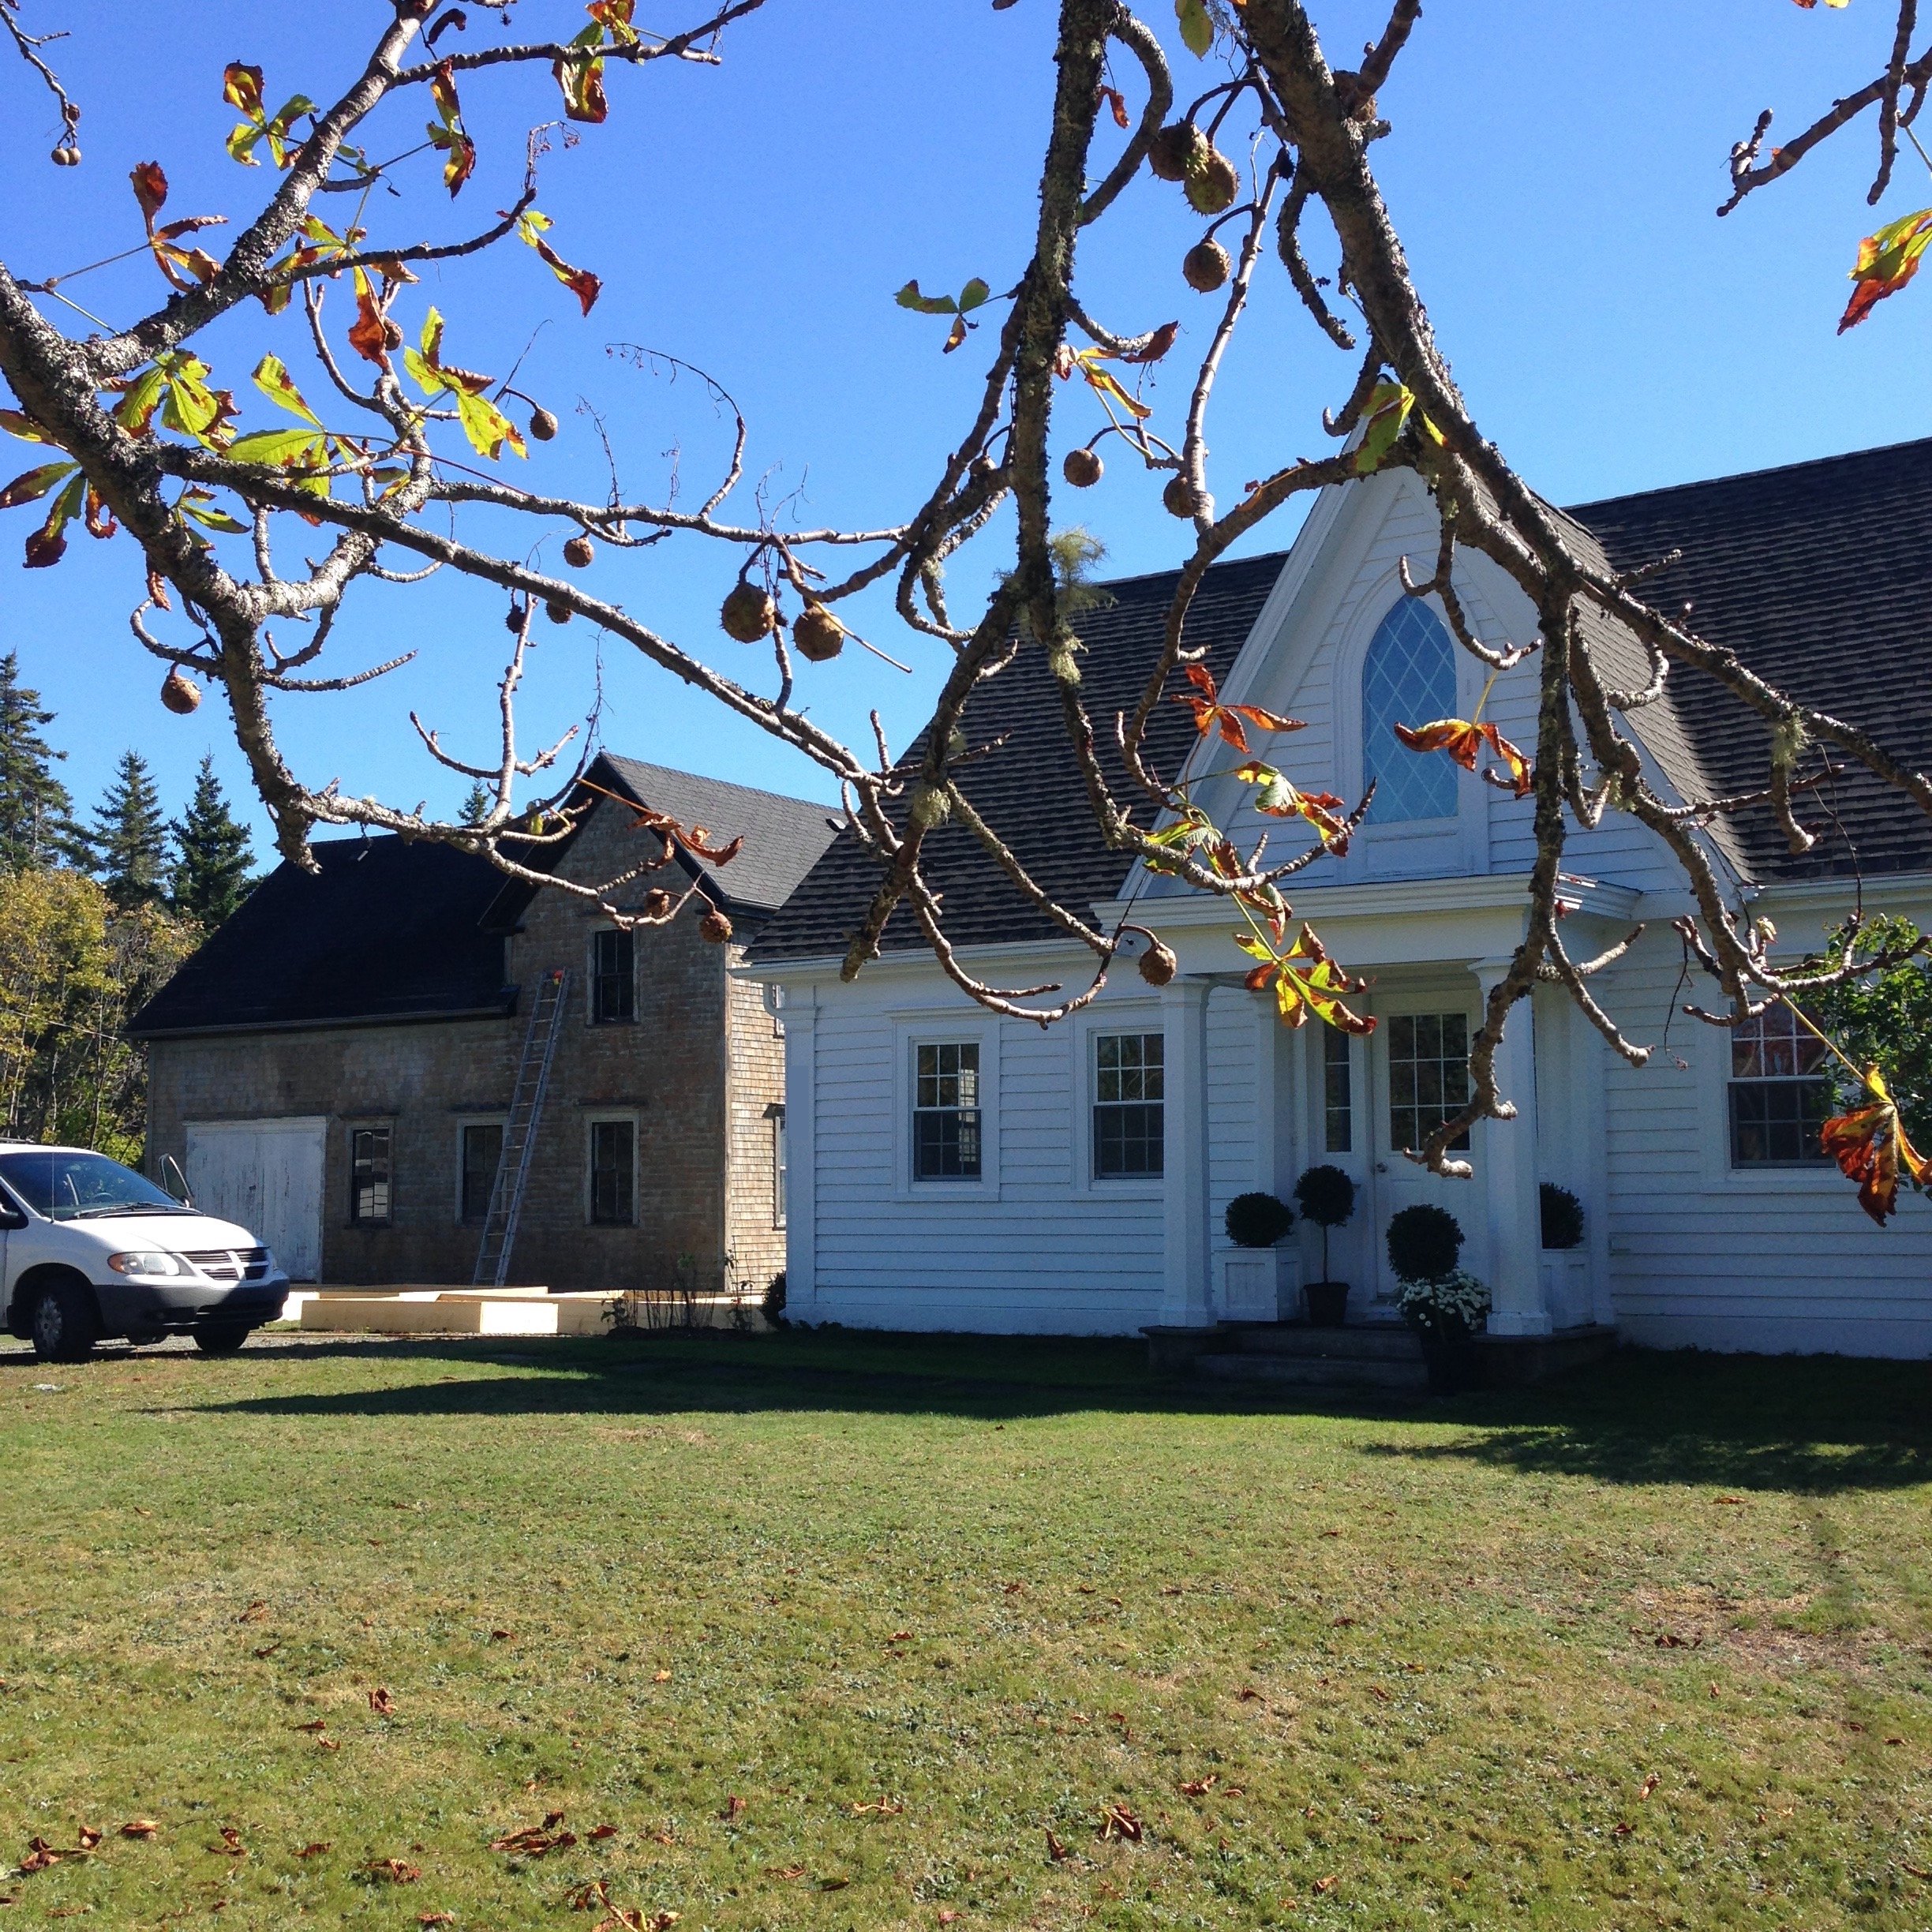
This before and after slides show how much of an impact a new paint job can have on a building. Its that time of year I spend every minute I can out there so I hope you enjoyed the before and after tour, stay tuned for the next post on what we planted in our beds, what worked and what didn’t.
If you don’t already, please follow us on Instagram, Facebook and Pinterest for more daily peeks from the garden or client projects.
@carolreeddesign