welcome to a Before & After tour of a nova scotia Heritage home’s kitchen renovation
Its long past due to share the after photos of the Dutch Colonial kitchen renovation that we designed for a young, new retiree who loves to cook, bake and entertain. The home itself is a heritage home, circa 1784 and is located on the South-West Shore of Nova Scotia. This project involved a complete reno of the existing kitchen space and light reno of the adjoining pantry, all without tearing down any walls separating the kitchen or pantry from each other or any other adjoining rooms. Essentially we renovated these two rooms within their existing footprint. It was also extremely important for the homeowner that the renovation respected the heritage of the home and honour its authentic character, in fact we needed to revive some of what had been compromised over the last century.
Kitchen Design: Carol Reed Interior Design Inc. | Photo by: Janet Kimber Photography
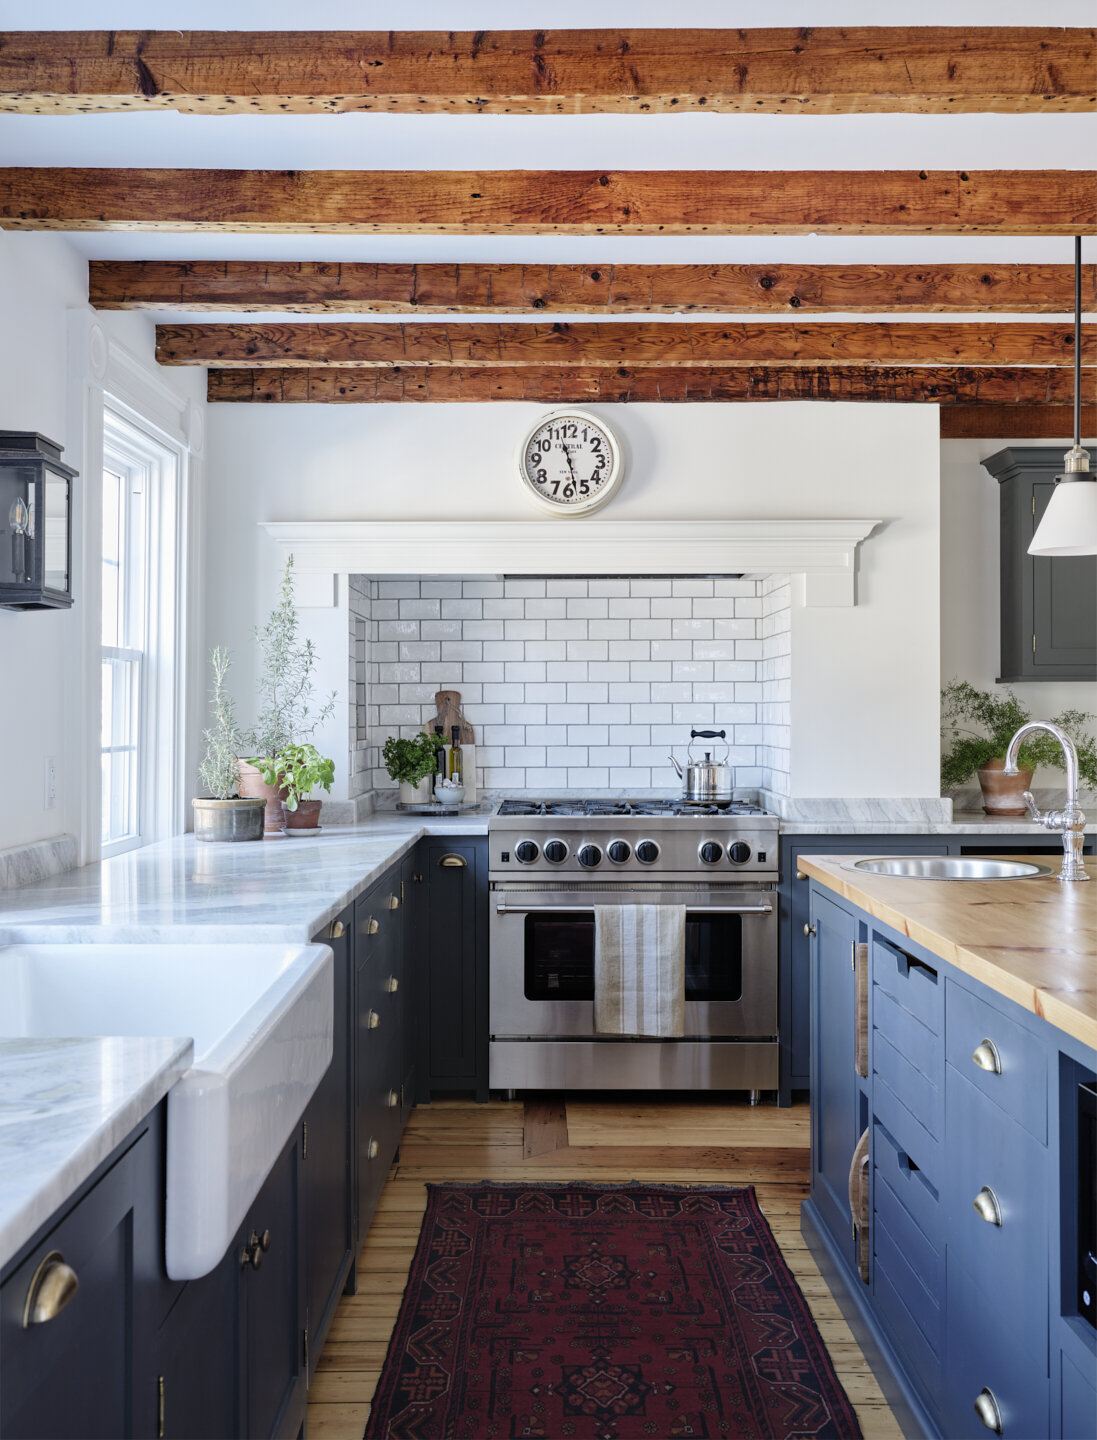
Above is a view of the new kitchen sink wall and hearth style range wall which both represent the most significant changes and the biggest challenges. Below is a look at the before floor plan. Its hard to believe the old kitchen consisted of only an island in the centre of the room, sink on one side, range on the other. As strange as it looks, I see how it might function efficiently for two people cooking, one doing wash-up and prep on one side, the other doing the cooking on the other, in tandem. Otherwise I can’t imagine a more impractical set up, no surprise it was a top priority to its new owner.
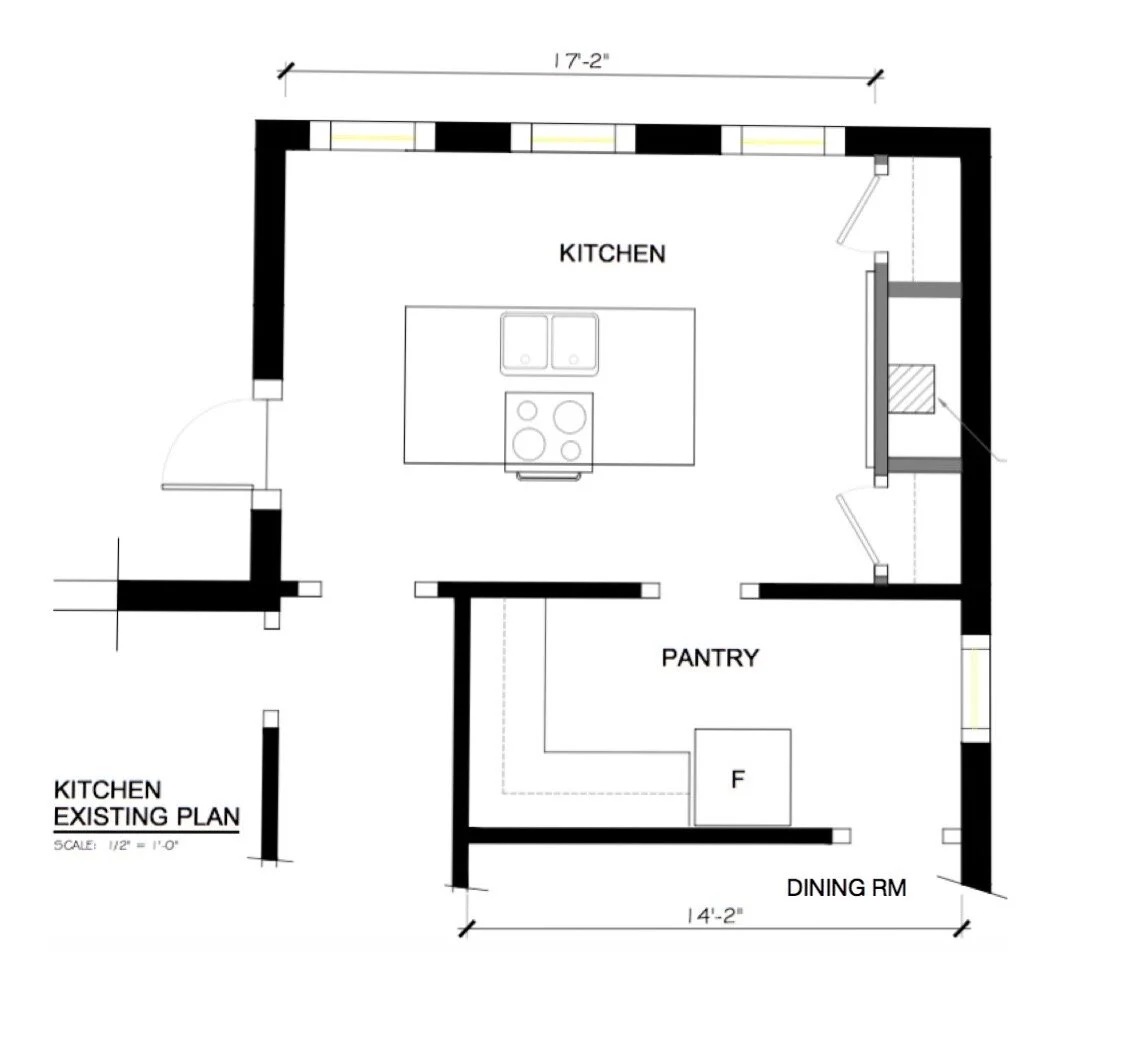

Click on the floor plan above to see the before photos.
There were two main issues that had stumped the homeowner when she tried to envision a new more functional kitchen layout; one is typical of old homes which was a lack of wall space - the room had 5 doors and a wall of three windows with low sills. The second was an old brick chimney stack that protruded about 18” into the room and which wasn’t feasible to remove.

After Floor plans, Dutch Colonial Kitchen Reno. Design by Carol Reed Interior Design Inc.
To maximize counter space and appliance locations, I knew I needed to utilize the two walls that didn’t have doorways on them - the window wall and the chimney wall. We removed dis-functional closets that flanked the old brick chimney in order to create a long continuous ‘L’ shaped counter layout with centre island. I approached the two physical challenges (low windows and brick structural intrusion) the same way I always deal with obstacles - I created features out of them. I designed a hearth style range hood to surround a new 36” range and which completely concealed the old brick chimney and dually, evoked the traditional english country design aesthetic we were striving for.

Kitchen range wall in progress.
You can see the chimney in the progress photo above. We also removed two layers of old ‘modern day ceilings’, the first layer was an acoustical tile ceiling and the second was drywall. Removing all of it gained almost a foot of ceiling height and exposed the original wood beam ceiling joists - which we had anticipated would be there and intended to leave exposed. The contractor meticulously cleaned the beams up and drywalled the between them, accomplishing beautiful clean edges requiring no trim work to cover up gaps or crooked joints.

Kitchen Design: Carol Reed Interior Design Inc. | Photo by: Janet Kimber Photography
On the window wall I planned the cabinetry and counter to run in front of the low windows with the cabinetry designed to allow space for the window sills below the counter. Taking this approach maintains the integrity of the old architecture as it retains the original window size and spacing on the exterior while on the interior its a nod to the history of the house - the kitchen is designed around the original features not the other way around. An added feature of this detail was specifying the counters to be deeper than standard so we wouldn’t lose any cabinet space to accommodate the window sills and it netted extra deep work surfaces which is a luxury if you have the room. The end result is the windows are neatly recessed below the counter and appear to float behind them, all executed with thoughtful details like the marble slab curb fitted perfectly between deep window casings.
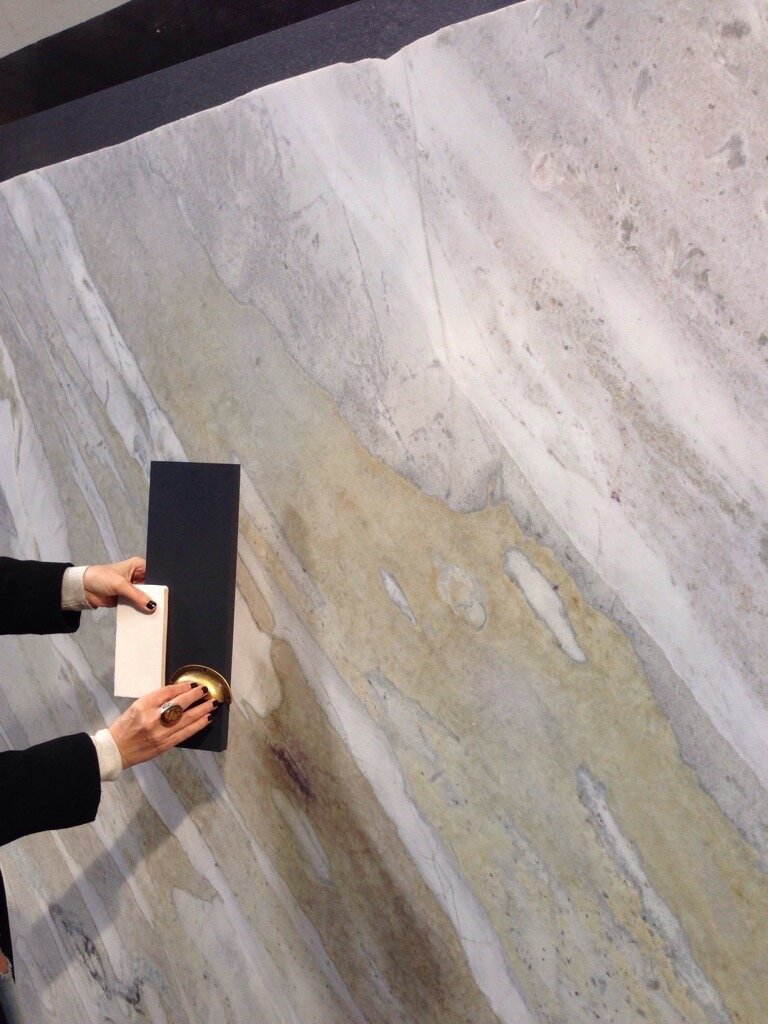
The counters are unique one of a kind natural stone slabs that were an unexpected find at the stone warehouse that quite honestly, are the most beautiful counters I’ve ever used on a project. I absolutely fell in love with the colours in the stone which are reminiscent of the coastline, the overall look is very organic and natural. I’ll admit my client was pretty apprehensive about these slabs until she went to see them in person and was instantly infatuated with them. They’re honed quartzite (part of the granite family) and I have to clarify that all quartzites will have different properties as far as hardness and porosity, so I always recommend testing for your particular use. The samples I used were sealed and tested with the toughest of spills (red wine, vinegar, lemon, mustard, ketchup) left on for several hours and longer showing no visible etching (or staining). In comparison, my honed carrara marble counters will show etching from these same spills within a few minutes. We were confident this material would be super practical, beyond my clients expectations and satisfy her desire for unique natural stone.

Kitchen Design: Carol Reed Interior Design Inc. | Photo by: Janet Kimber Photography
The baking station reflects another way we integrated the “challenging” low window sills into the design and created a feature. We dropped the height on one end of the ‘L’ counter directly below one of the windows to create a baking station, the lowered stone surface is perfect height for rolling out dough which the homeowner does regularly. The cabinet on the far left houses a stand mixer on a hydraulic lift, the drawers hold all the bake ware and tools. The homeowners own collection of vintage rolling pins (all in frequent use!) become a beautiful wall display and are hung on custom iron brackets made by a local blacksmith. The chair rail is old and window casings are new reproduced to match the original.

Kitchen Design: Carol Reed Interior Design Inc. | Photo by: Janet Kimber Photography
The adjoining pantry was transformed with new built-ins and cosmetic updates. The new cabinetry and additional open shelving was configured in a new layout which created better flow and sight lines from the adjoining kitchen and dining room. The existing plain walls were clad in new bead board panelling to add character and dually accommodated the installation of new wall shelves. The design objective for the new pantry was for all the new work to be cohesive with the character of the heritage home, like it could have always been this way. Sloped floors and uneven ceilings were not levelled or straightened, but instead, the centuries old age of the home was embraced and all the new carpentry was carefully fitted so as not to diminish this personality.

Kitchen Design: Carol Reed Interior Design Inc. | Photo by: Janet Kimber Photography
The cabinetry was all custom built to my design and was intended to be simple and utilitarian in function. The counters are made from reclaimed wood the same as the kitchen island. To the right of this cabinetry is the full size fridge, a broom closet and a full wall of open shelves that hold a large supply of dried goods and canning.

Interior of the range hearth is clad in a vintage look white subway tile, each side of the range hearth has built-in niches for essentials.

While the working side of the island incorporated root vegetable bins and slots for cutting boards, the back side of the island accommodates 4 counter seats and a cabinet for cookbooks. To the right of the range is a wall hung spice cabinet above a bank of cabinets that stores serve ware.

Simple shaker style peg hooks beside the spice cabinet and serve ware storage. The homeowner who is an avid cook and baker has a collection of aprons that get used daily. This one is saffron coloured belgian linen.

Kitchen Design: Carol Reed Interior Design Inc. | Photo by: Janet Kimber Photography
Behind the island seating is small expanse of wall space between two doorways and its was the perfect spot for artwork. The homeowner had a couple of vintage blue and white plates and so we decided to build on that and install a collage. During the renovation phase over the spring and summer, the homeowner and I hunted for more plates to add to the collection. The finished collage includes pieces that we found at an estate auction, and antique fairs and shops along the South Shore from Hubbards to Yarmouth.

A one of a kind traditional hand woven area rug adds a layer of pattern and colours that beautifully compliment the deep navy cabinets. The plank wood floors are original to the house. After this photo was taken and over the course of the coming winter the homeowner lovingly filled in all the gaps between the boards with a wool fibre material that’s designed for this purpose but I can’t recall the name off hand (or source), so I’ll do a followup on that in another post.

That was a long but quick tour of the kitchen! There’s still so much more detail that I haven’t discussed like the lantern sconces, custom slots for cutting boards, and vintage brass cabinet pulls….. but that will have to wait for the next set of photos….
I can’t express how special a project like this is. It takes a lot of thoughtful planning and one on one collaboration between the client, designer and contractor/cabinet maker, and requires everyone involved in the project to have a like-minded passion and respect for historical houses.
Previous blog post with the design plans and concept boards for this project here.
Check out this kitchen featured in Style at Home, October 2019 issue and here.
Contacts:
Contractor & Cabinet Maker - Nick Bell Carpentry, Shelburne, NS