Our East Coast Barn Makeover & Potager Garden: Part 2

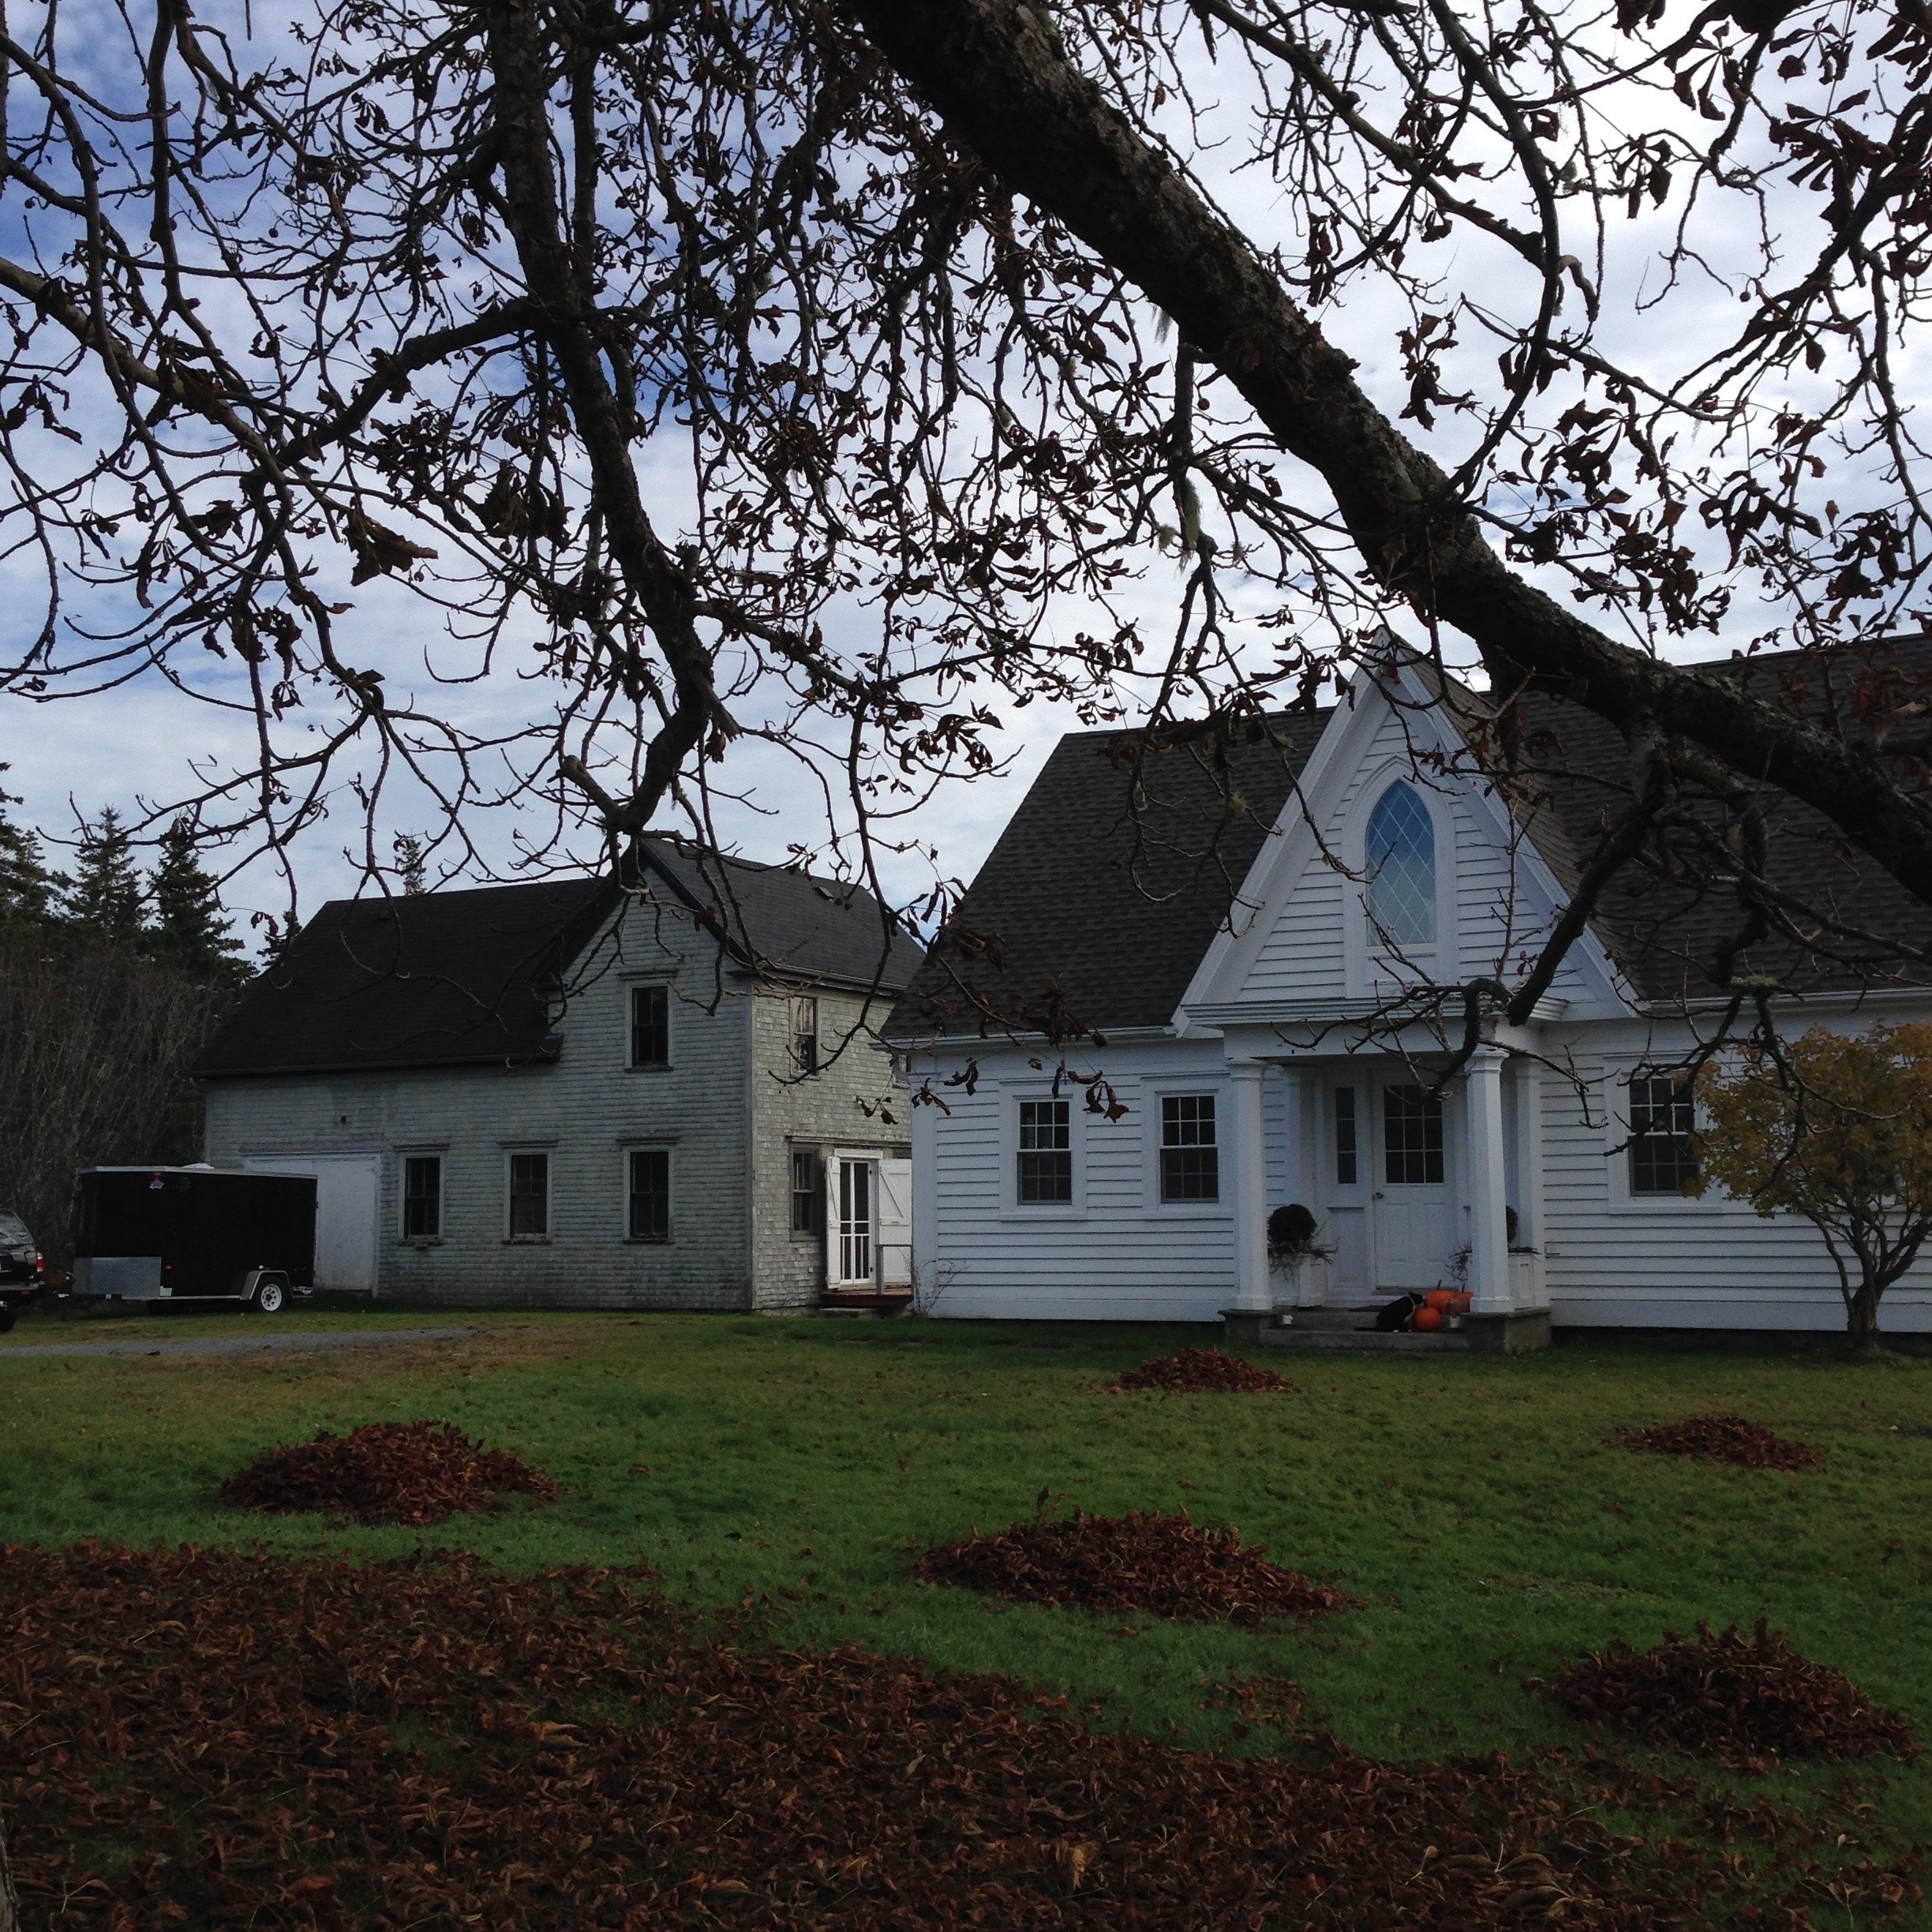
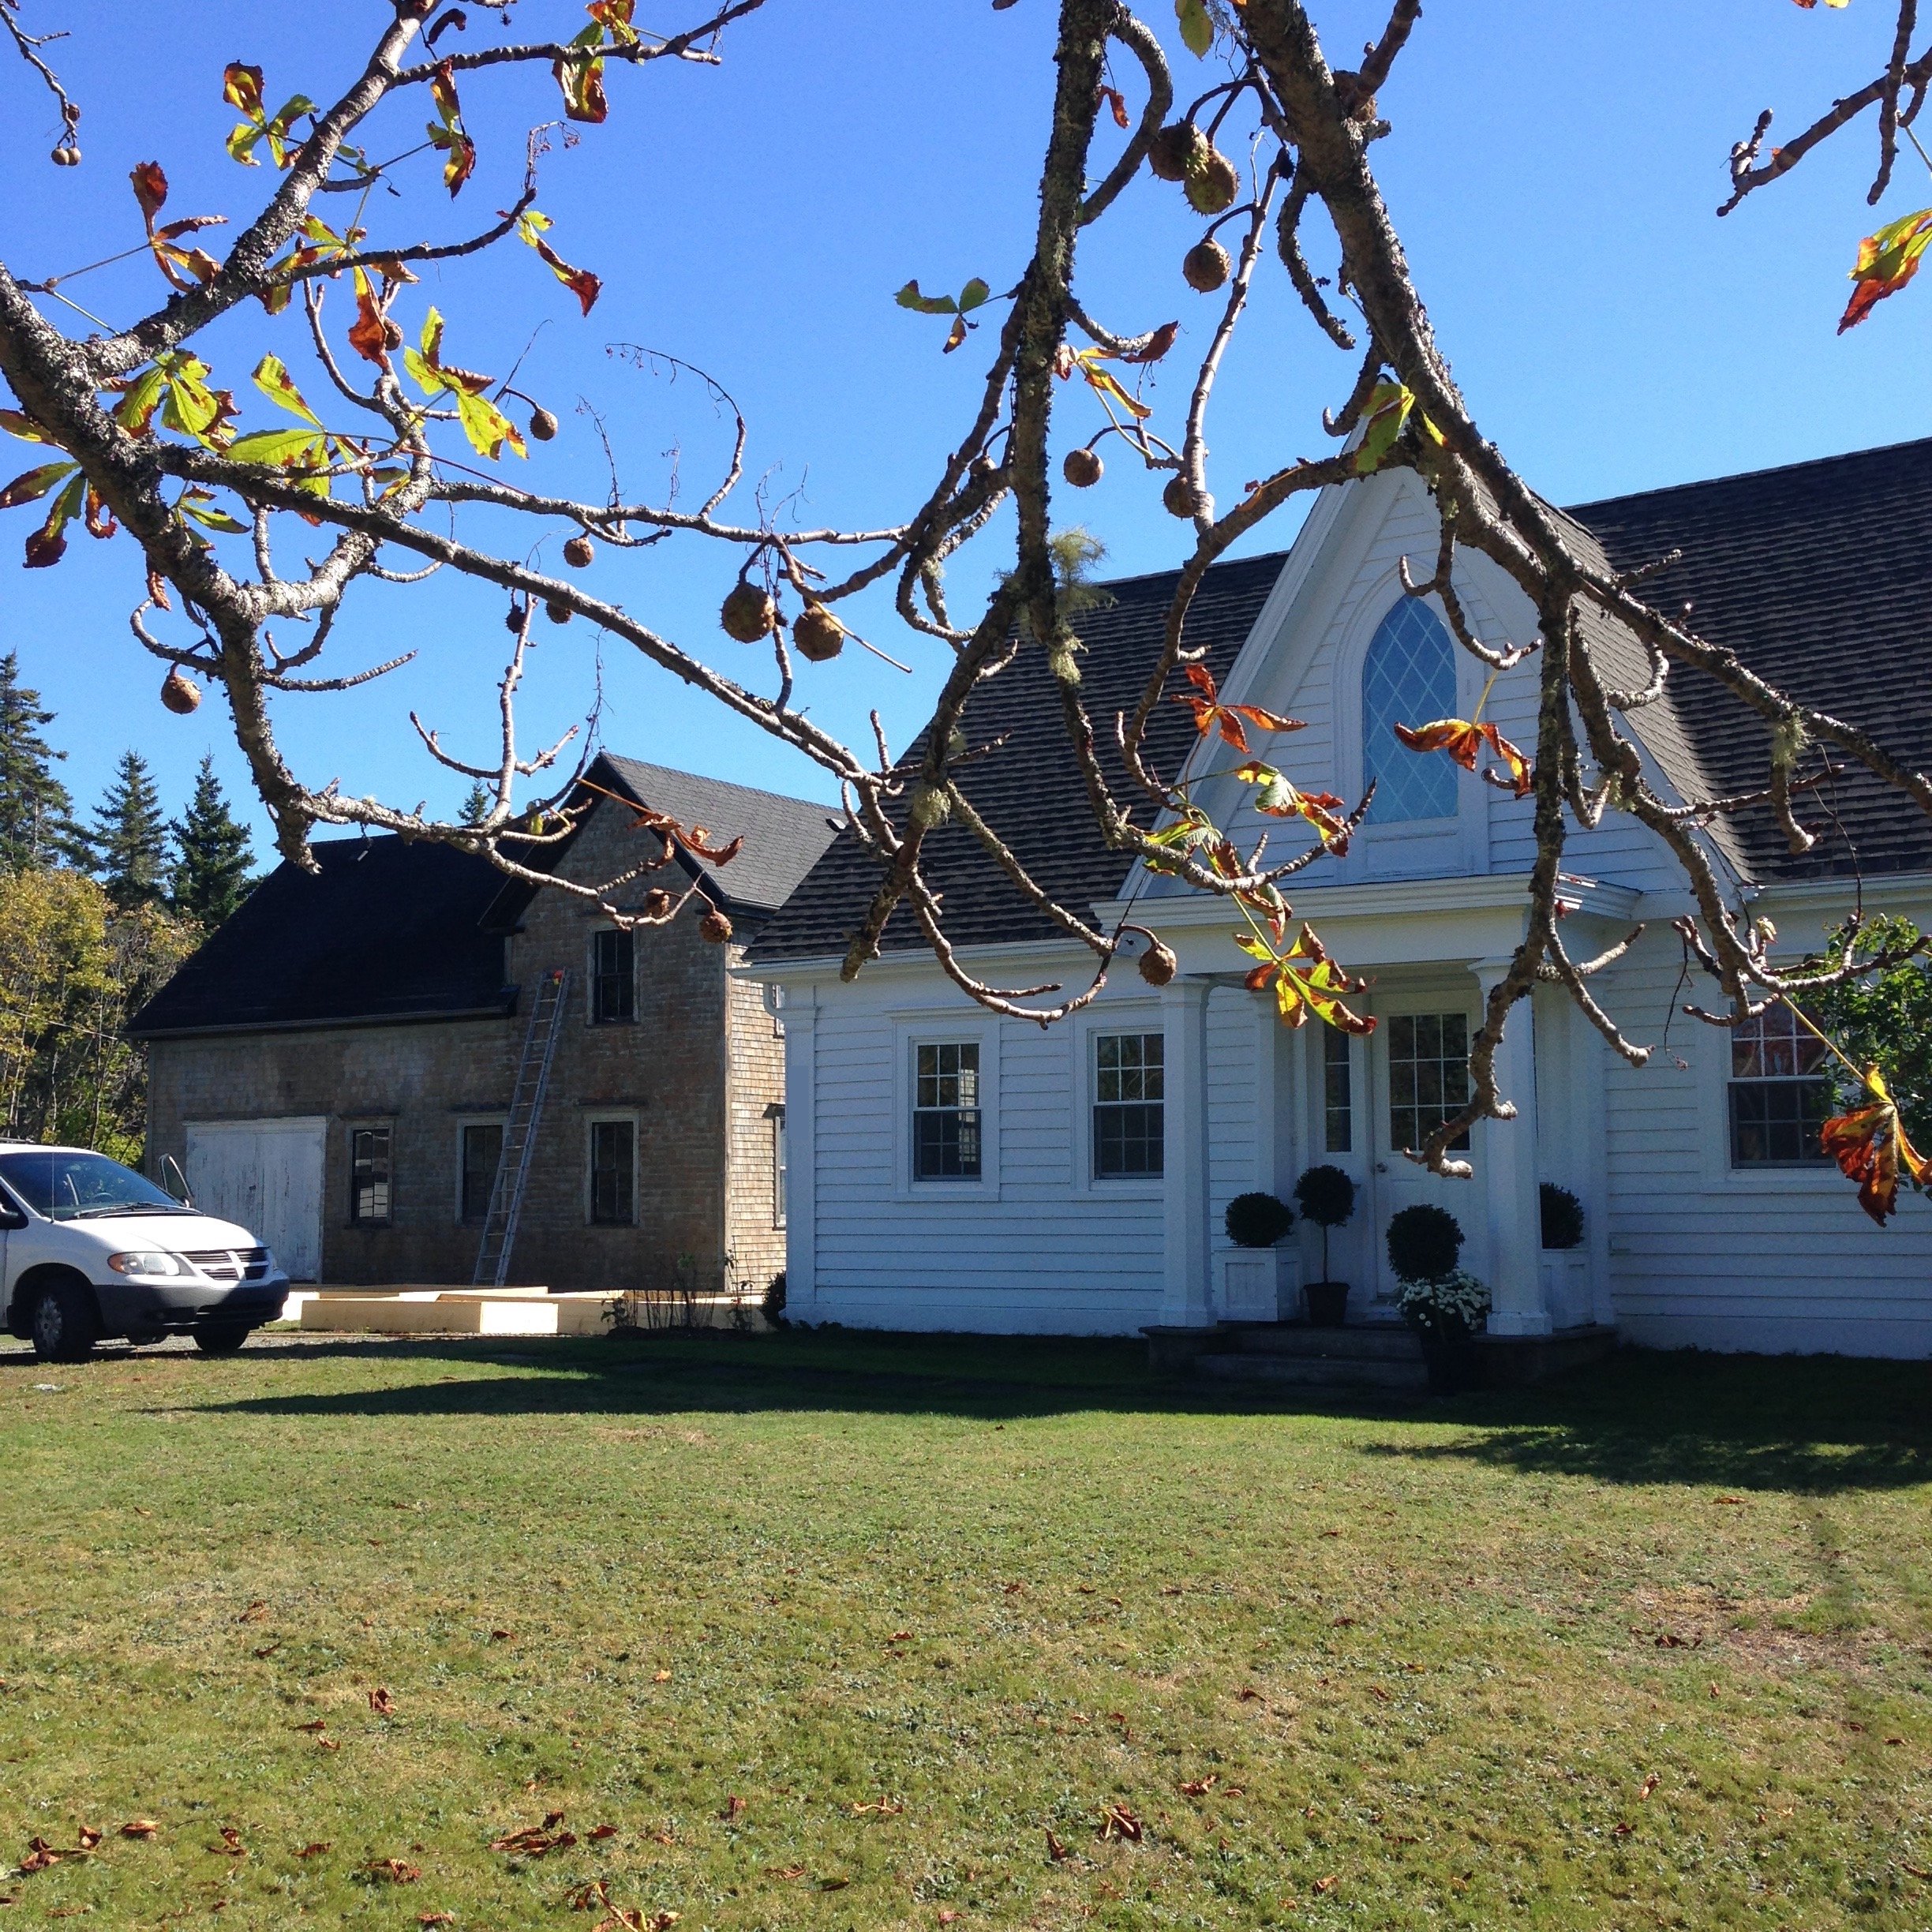
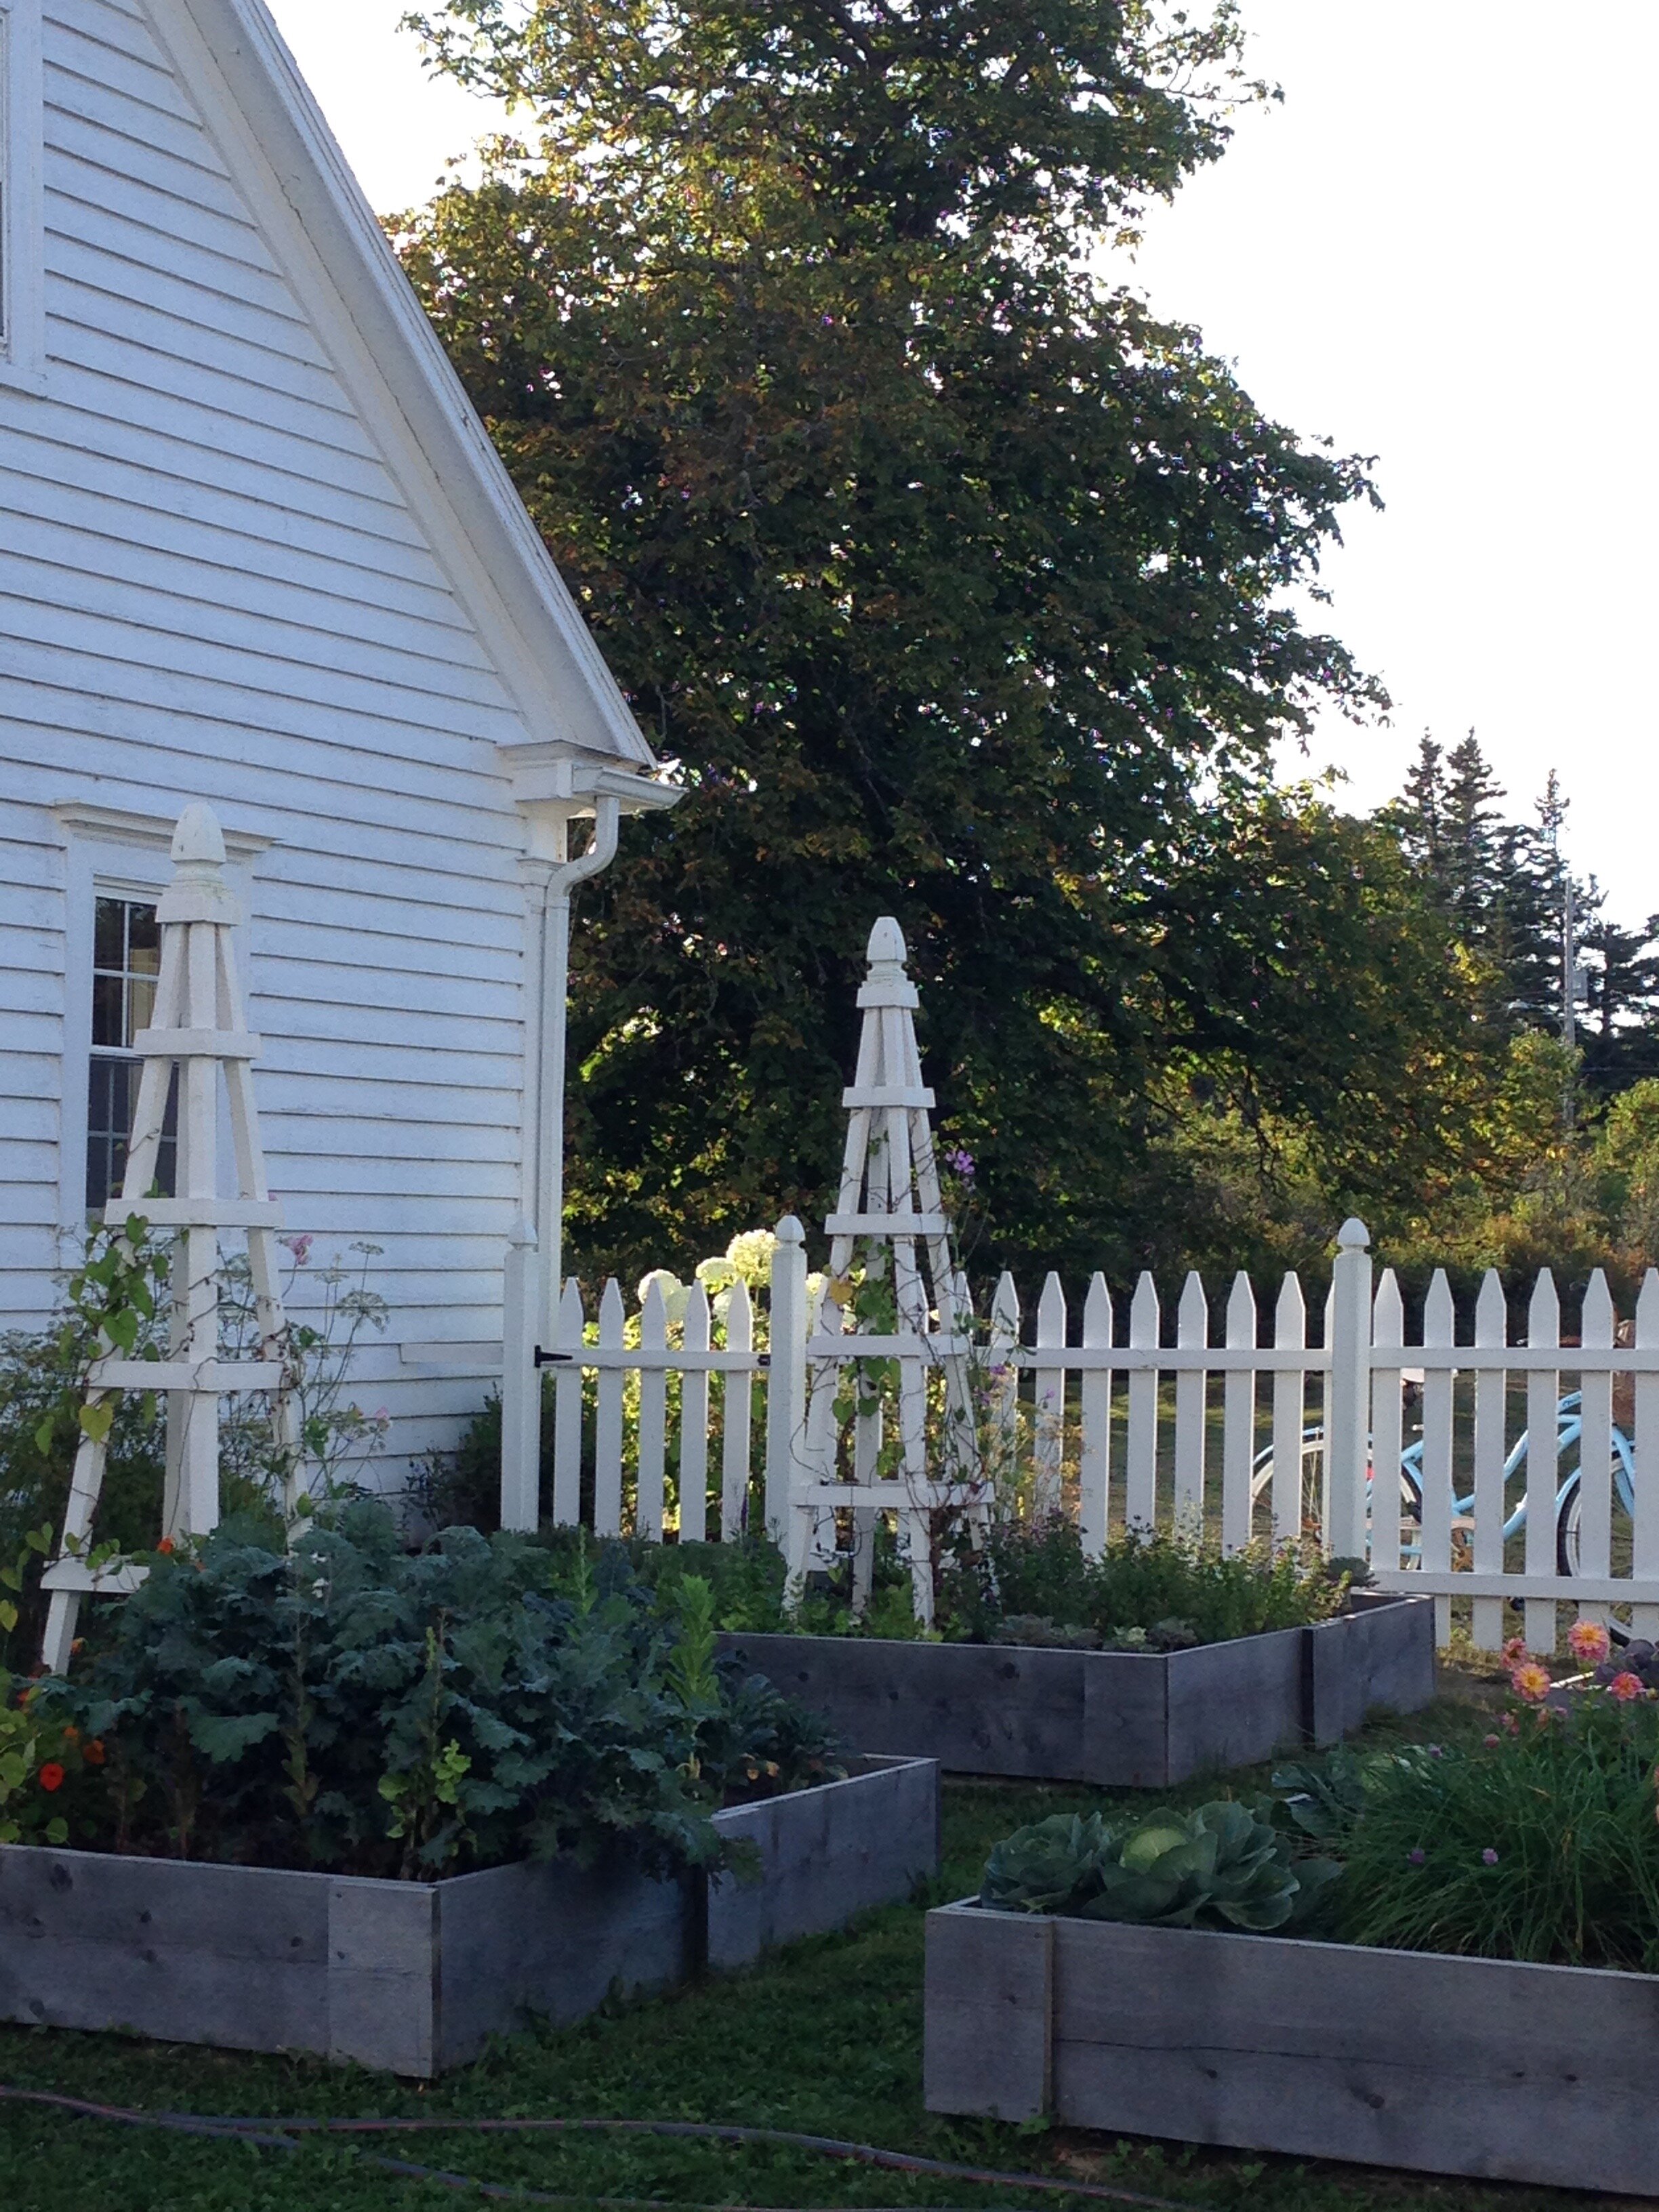
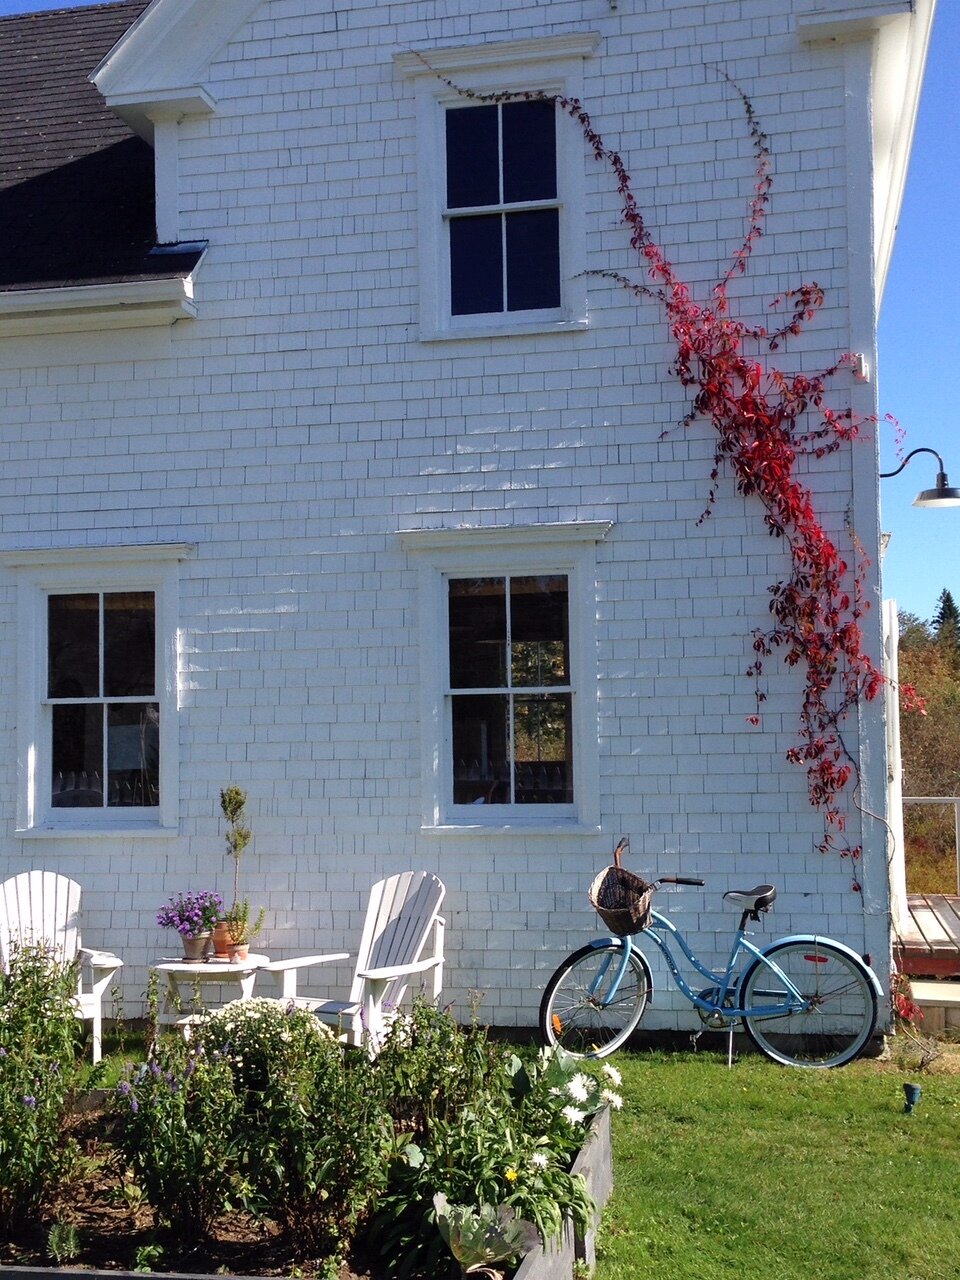
After building the raised beds and installing the picket fence the potager garden instantly had a distinct purpose and was a new favourite place to spend time. The barn is an integral part of the garden not only is it the backdrop to the garden but its where we prep all our seeds and keep all our gardening stuff.

Carol Reed Design - Barn and Picket Fence.JPG

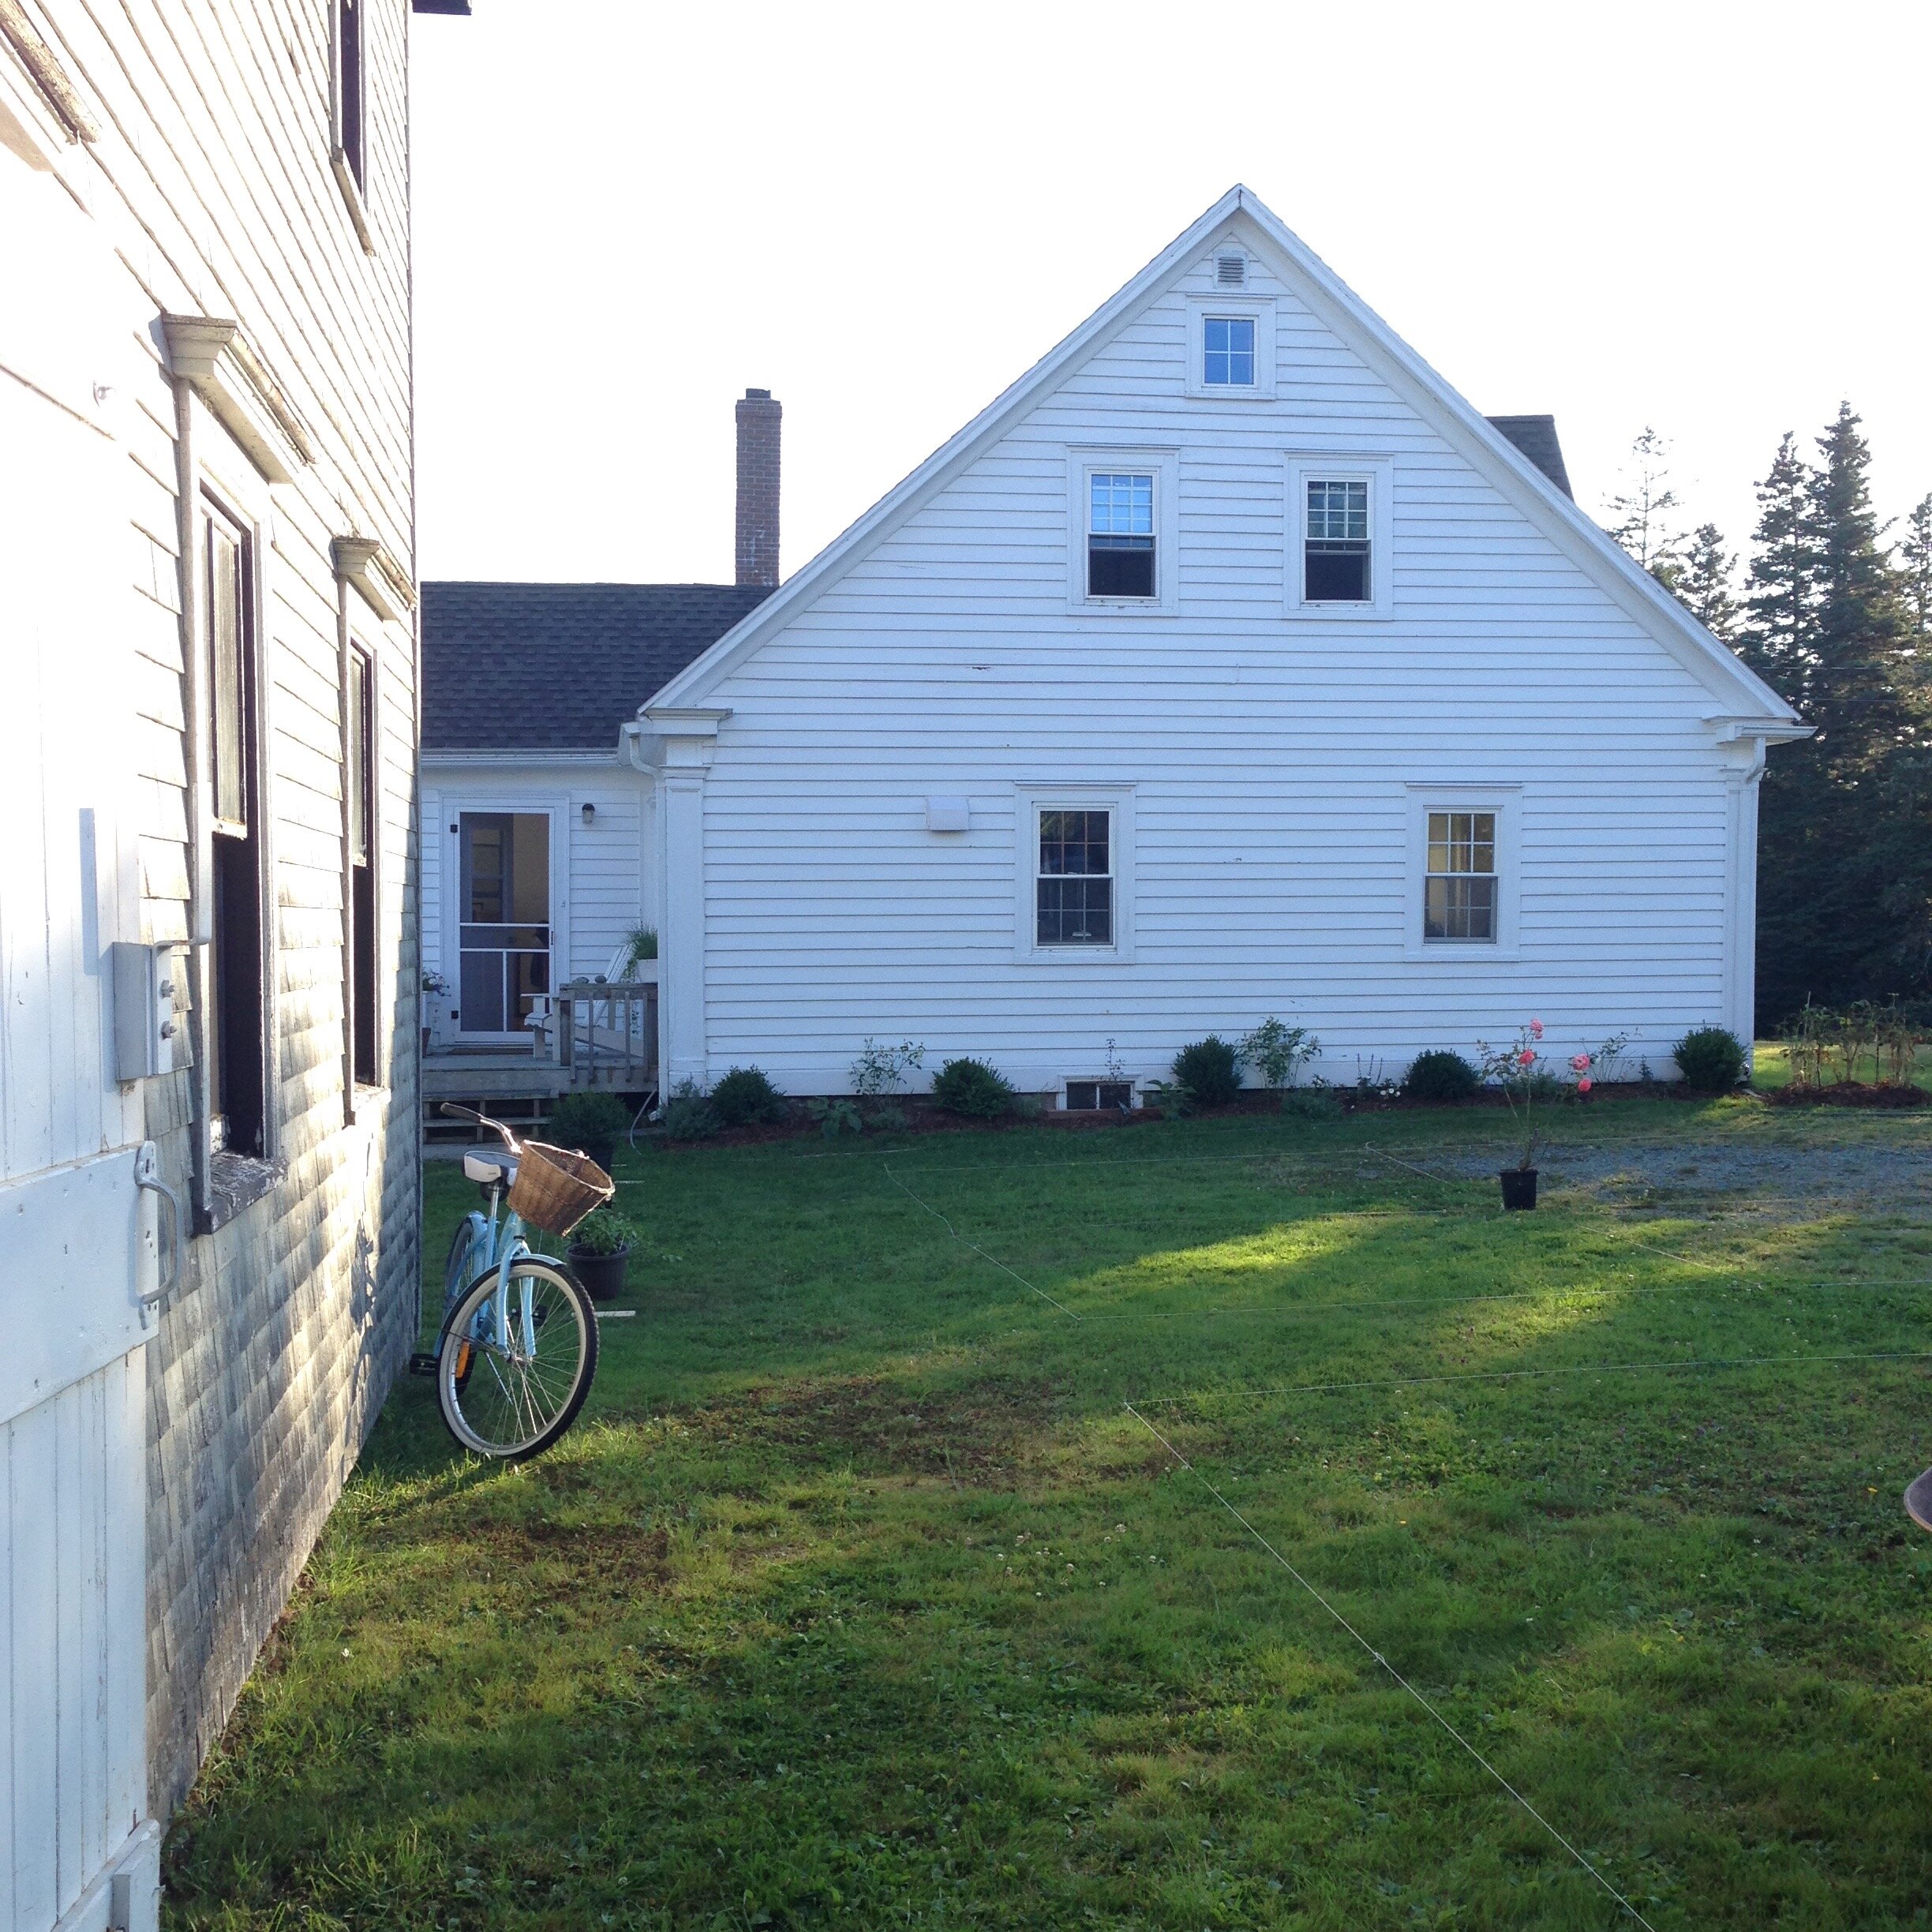
The main floor of the barn is divided into two areas, the back area with the big double doors is a workshop area, the opposite end is a lounge/bunkie area, with doors that open up out towards the house and ocean. In the warmer months this lounge area functions as a screen porch and bunkie.

Carol Reed Design - Potager Garden - SquareFootGardening.jpg

We had little to no experience with gardening before we built these raised beds in 2016 and when it came to figuring out what to plant in them I relied on some basic research and opted to go with the square foot gardening method because it made 2 things super easy for us, it clearly allowed us to see how many plants we needed because the number of plants per square is determined for you, (its easy to overlook how big you plants will be at maturity so the grids allow you to easily visualize that mature size) and you can plant in very neatly organized rows, sections or pattern of your choice. As a spacial designer it was super helpful for me to visualize colour planning the plantings and also for creating symmetry in the 8 beds. I was attempting to create a combined ornamental and vegetable garden (potager) and incorporating perennial shrubs too so planning all this from scratch using a square foot grid simplified and organized the process for me.

Carol Reed Design - Potager Garden - Planting Plan.jpg

During the winter before our first plantings I prepared a planting plan for each bed, you can see a glimpse of in the image above. I allotted categories to each of the 8 beds, 2 herb gardens, 2 lettuce gardens, 2 veg gardens and 2 cutting flowers. Mixed into each would be some annual flowers and perennial shrubs. Initially I started out creating a geometric pattern in each bed, ie; a globe boxwood in the middle, chives in each corner, a border of maigolds etc…Each bed had a different pattern. Adding to the puzzle was that I also had to ensure the plantings were compatible with each other and received the proper amount of sunlight. The best laid plans however can often unravel! After our first trips to the garden centres we quickly realized we weren’t going to be to able to follow our plans so strictly because the selections were limited particularly for certain flowers and certain colours. The plans were incredibly useful to have on hand as we knew exactly what to look for, but we also made it easy to make a lot of substitutions on the fly.

CarolReedDesign-Potager-Garden-After-Obelisks.jpg

I think this photo above was from the second summer. The original planting plan was modified from what we learned after the first season - basically, nothing that needs hot temperatures and a lot of sun did well in our garden (peppers, rosemary, basil, beans, garlic..…) essentially for season two our plan became to just buy as much of whatever plants we had success with and could find locally and figure out where to put them once we got home.

Carol Reed Design - Barn Exterior  with Climbing Vine.JPG

Early fall in the garden as things were dying off. ….fall has become one of the prettiest times in the garden, I buy loads of potted mums and pumpkins of all sizes to fill in all the bare spots (more pictures of that in the fall). It extends the life of the past-its-peak garden creating a totally autumnal vibe and when all the cabbages and ornamental kale really get to show off.

Carol Reed Design - Barn Shed Interior.jpg

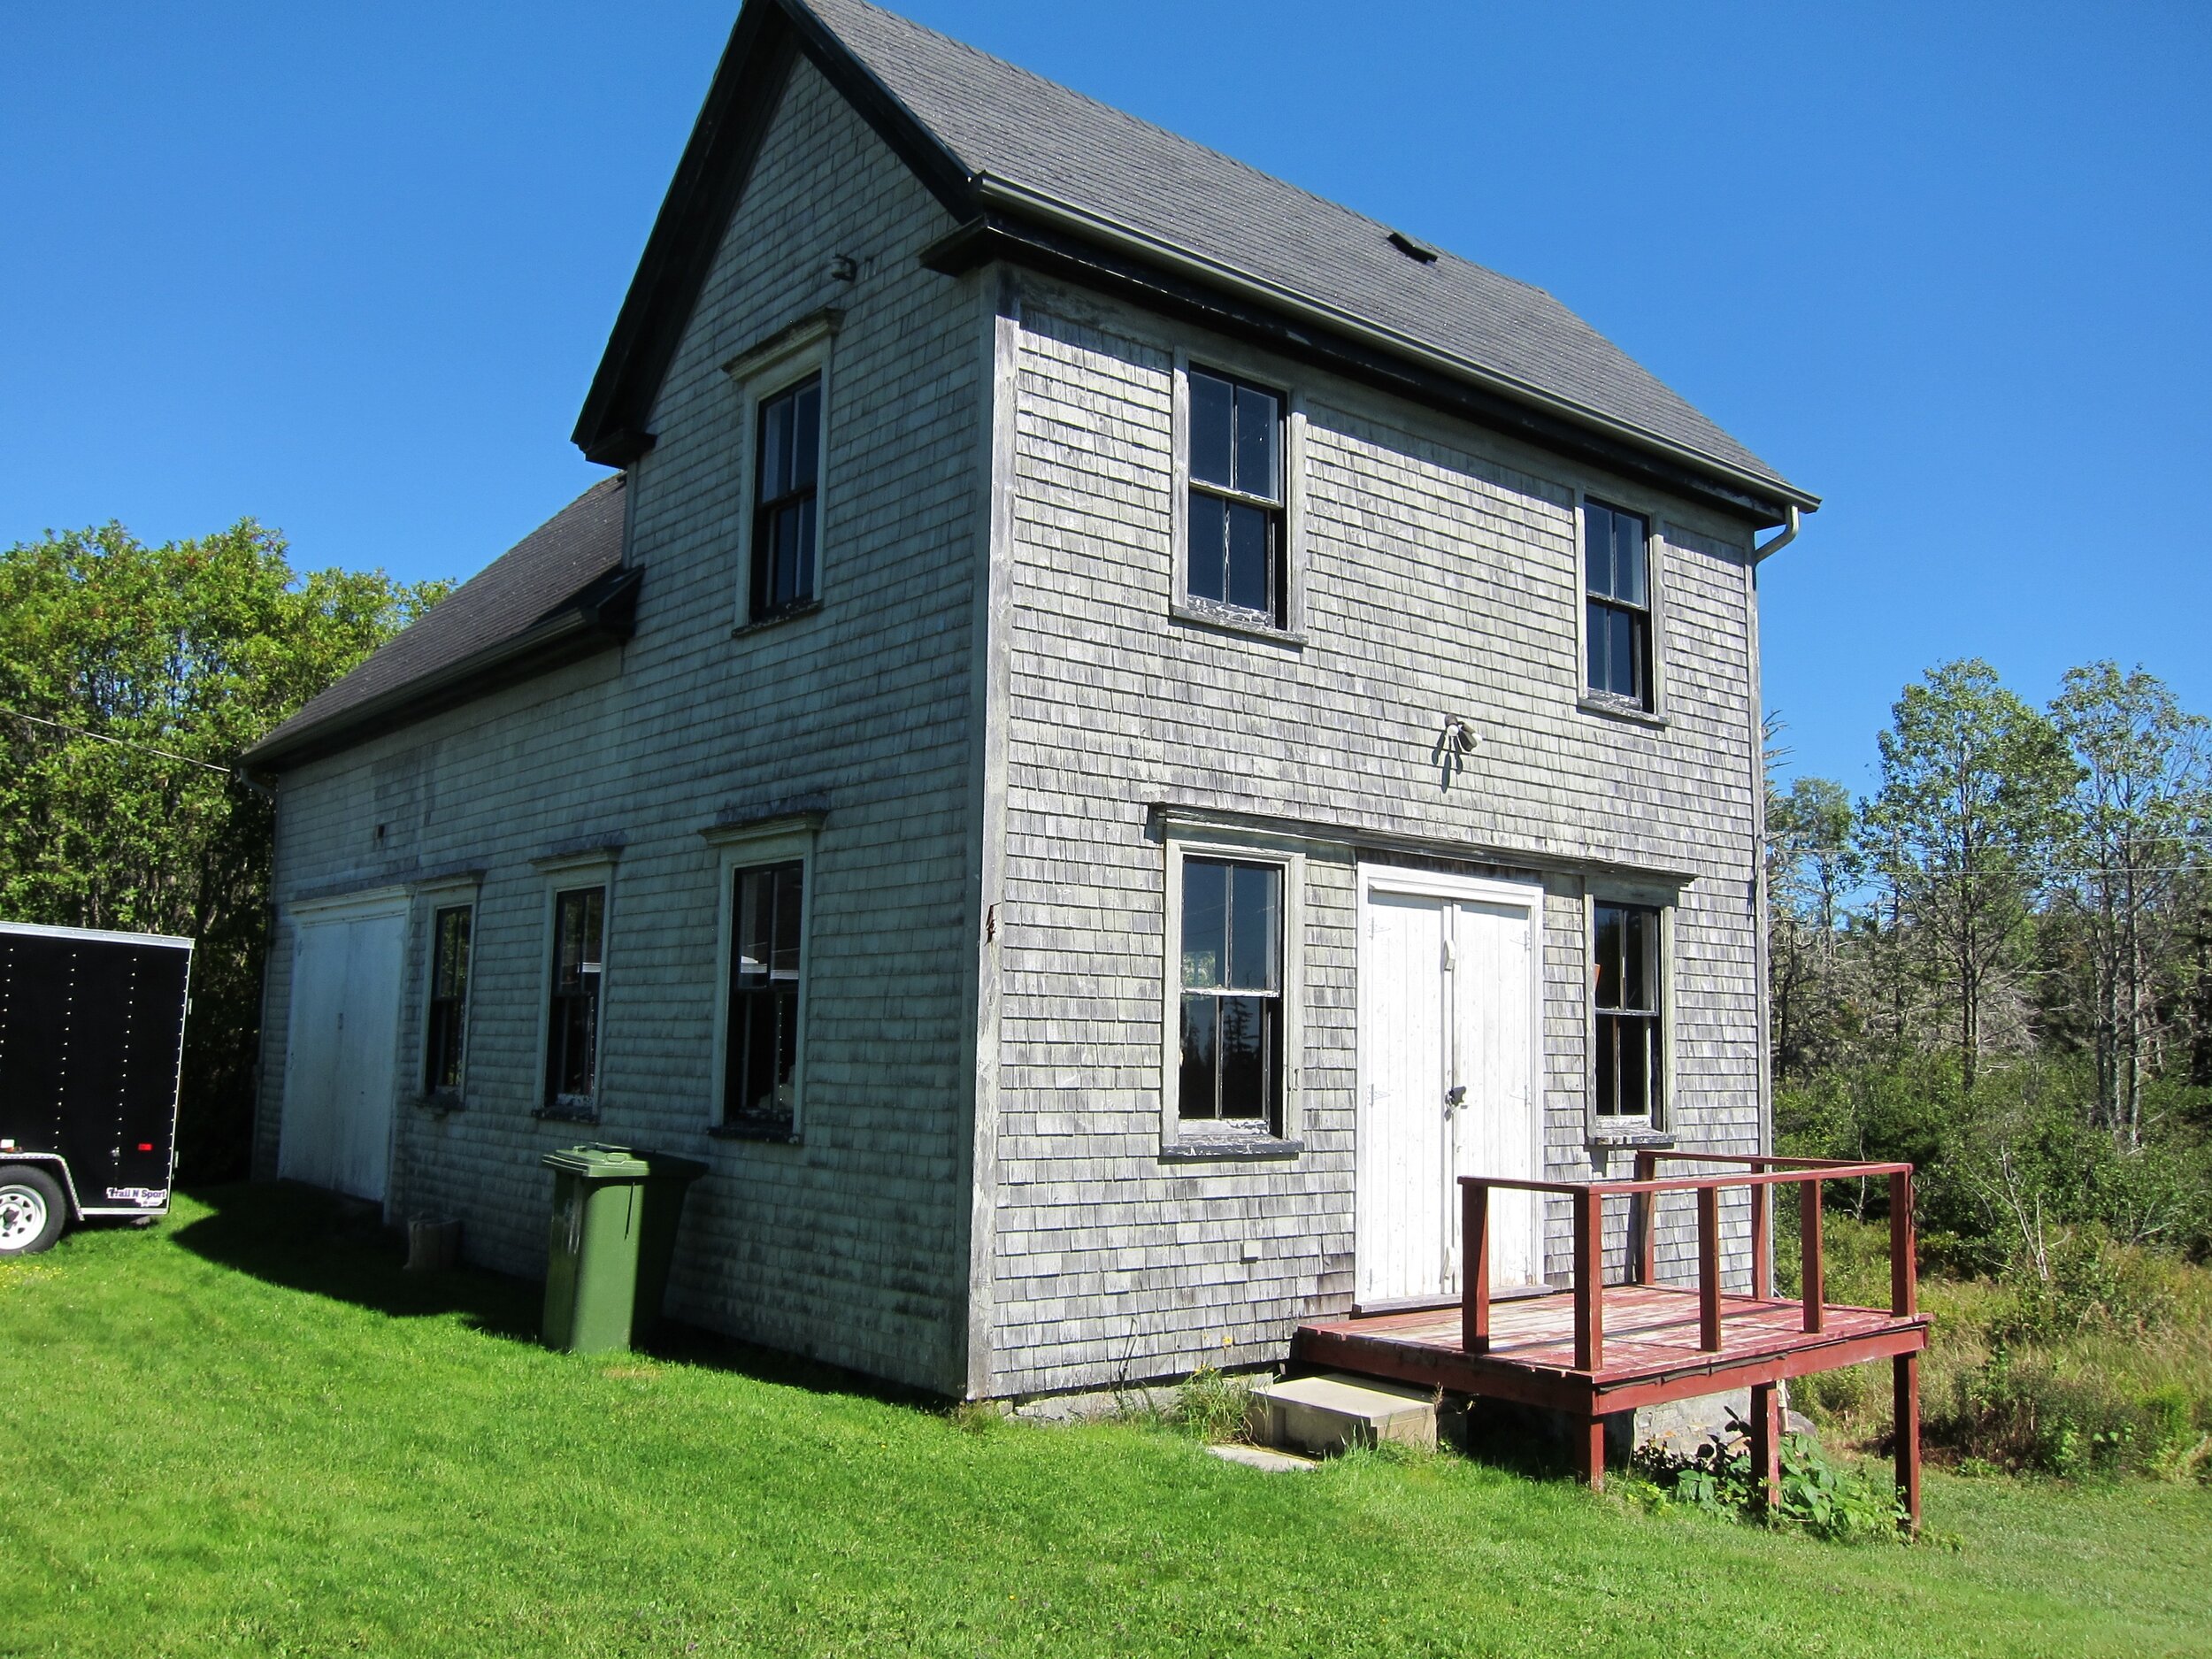
The original barn was a workshop to a carpenter who also made lobster traps and there used to be a public fishing wharf on the shore behind our property. There were a few old bouys in the barn and we’ve inherited a lot of mariner kitsch from a neighbour who’s a fisherman so the interior style has organically evolved into part fish shack part garden shed. Aside from paint the barn is in its original condition including original windows, for now we’ve simply painted all the interior walls white and the floor a blue/grey and built a new wall to enclose the work shop and also the staircase.

Carol Reed Design - Barn Shed Interior with Golden Rod.JPG

I designed a pair of day beds to fit XL twin mattresses, they function as sofas and extra guest beds during the summer early fall. Used separately as adult twins, pushed together they create a king sized bed. The coffee table was made from reclaimed wood from our house reno and an old beam we found washed up on the beach

Carol Reed Design - Barn Shed Interior TeaTime.JPG

In the spring and early summer we keep our transplants inside the barn until the weather’s warmer and we also start some seedlings in the workshop. This pic is from last year shortly after returning from London (with a huge supply of tea!), the long weekend in May was so cold and wet I spent a lot of time in the barn enjoying hot tea and planning out the raised beds. A shiplap wall encloses the staircase to the upper level.

Carol Reed Design - Barn Shed Interior with Straw Hats.jpg

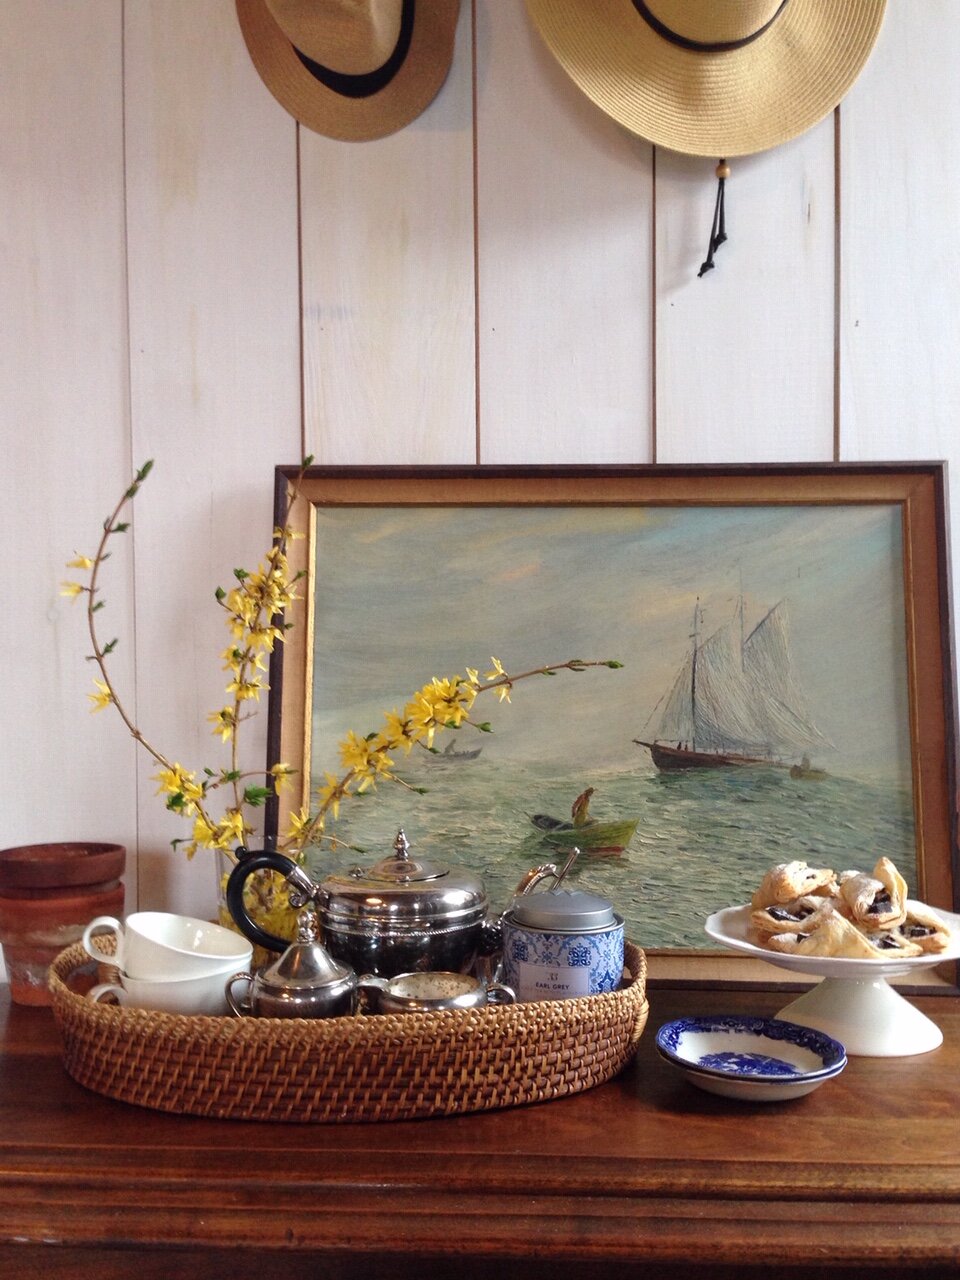
A vintage mariner painting found locally, and an antique cedar chest that was my grandparents, from my childhood bedroom.

Carol Reed Design - Barn Shed Interior Tea and Pastry.JPG

I had recently returned from England where I became addicted to cream tea, a tradtional afternoon tea served with scones, clotted cream and jam. I brought loads of tea home with me and so I continued the afternoon habit with whatever pastry or sweets i could find and until all my wonderful tea’s ran out. On this day we had no scones or baked goods in the house so I whipped up these treats in literally a few minutes using thawed frozen puff pastry sheets, some banana slices and chocolate chunks - baked until golden and gooey. Hot tea and baked sweets in the barn made a rainy long weekend not so bad.

This year will be our fourth season planting the beds and we now rely on some tried and true, no fail favourites. These are the plants that pop up in early spring even if there’s snow or frost, or are still thriving long past thanksgiving - they are maintenance free, and produce such great tasting food that they’re total winners for us in a very challenging environment.

MY POTAGER GARDEN FAVOURITES:

THESE SIX NO-FAIL PLANTS WILL LOOK BOUNTIFUL, TASTE DELICIOUS AND THRIVE IN EARLY SEASON COOL TEMPS

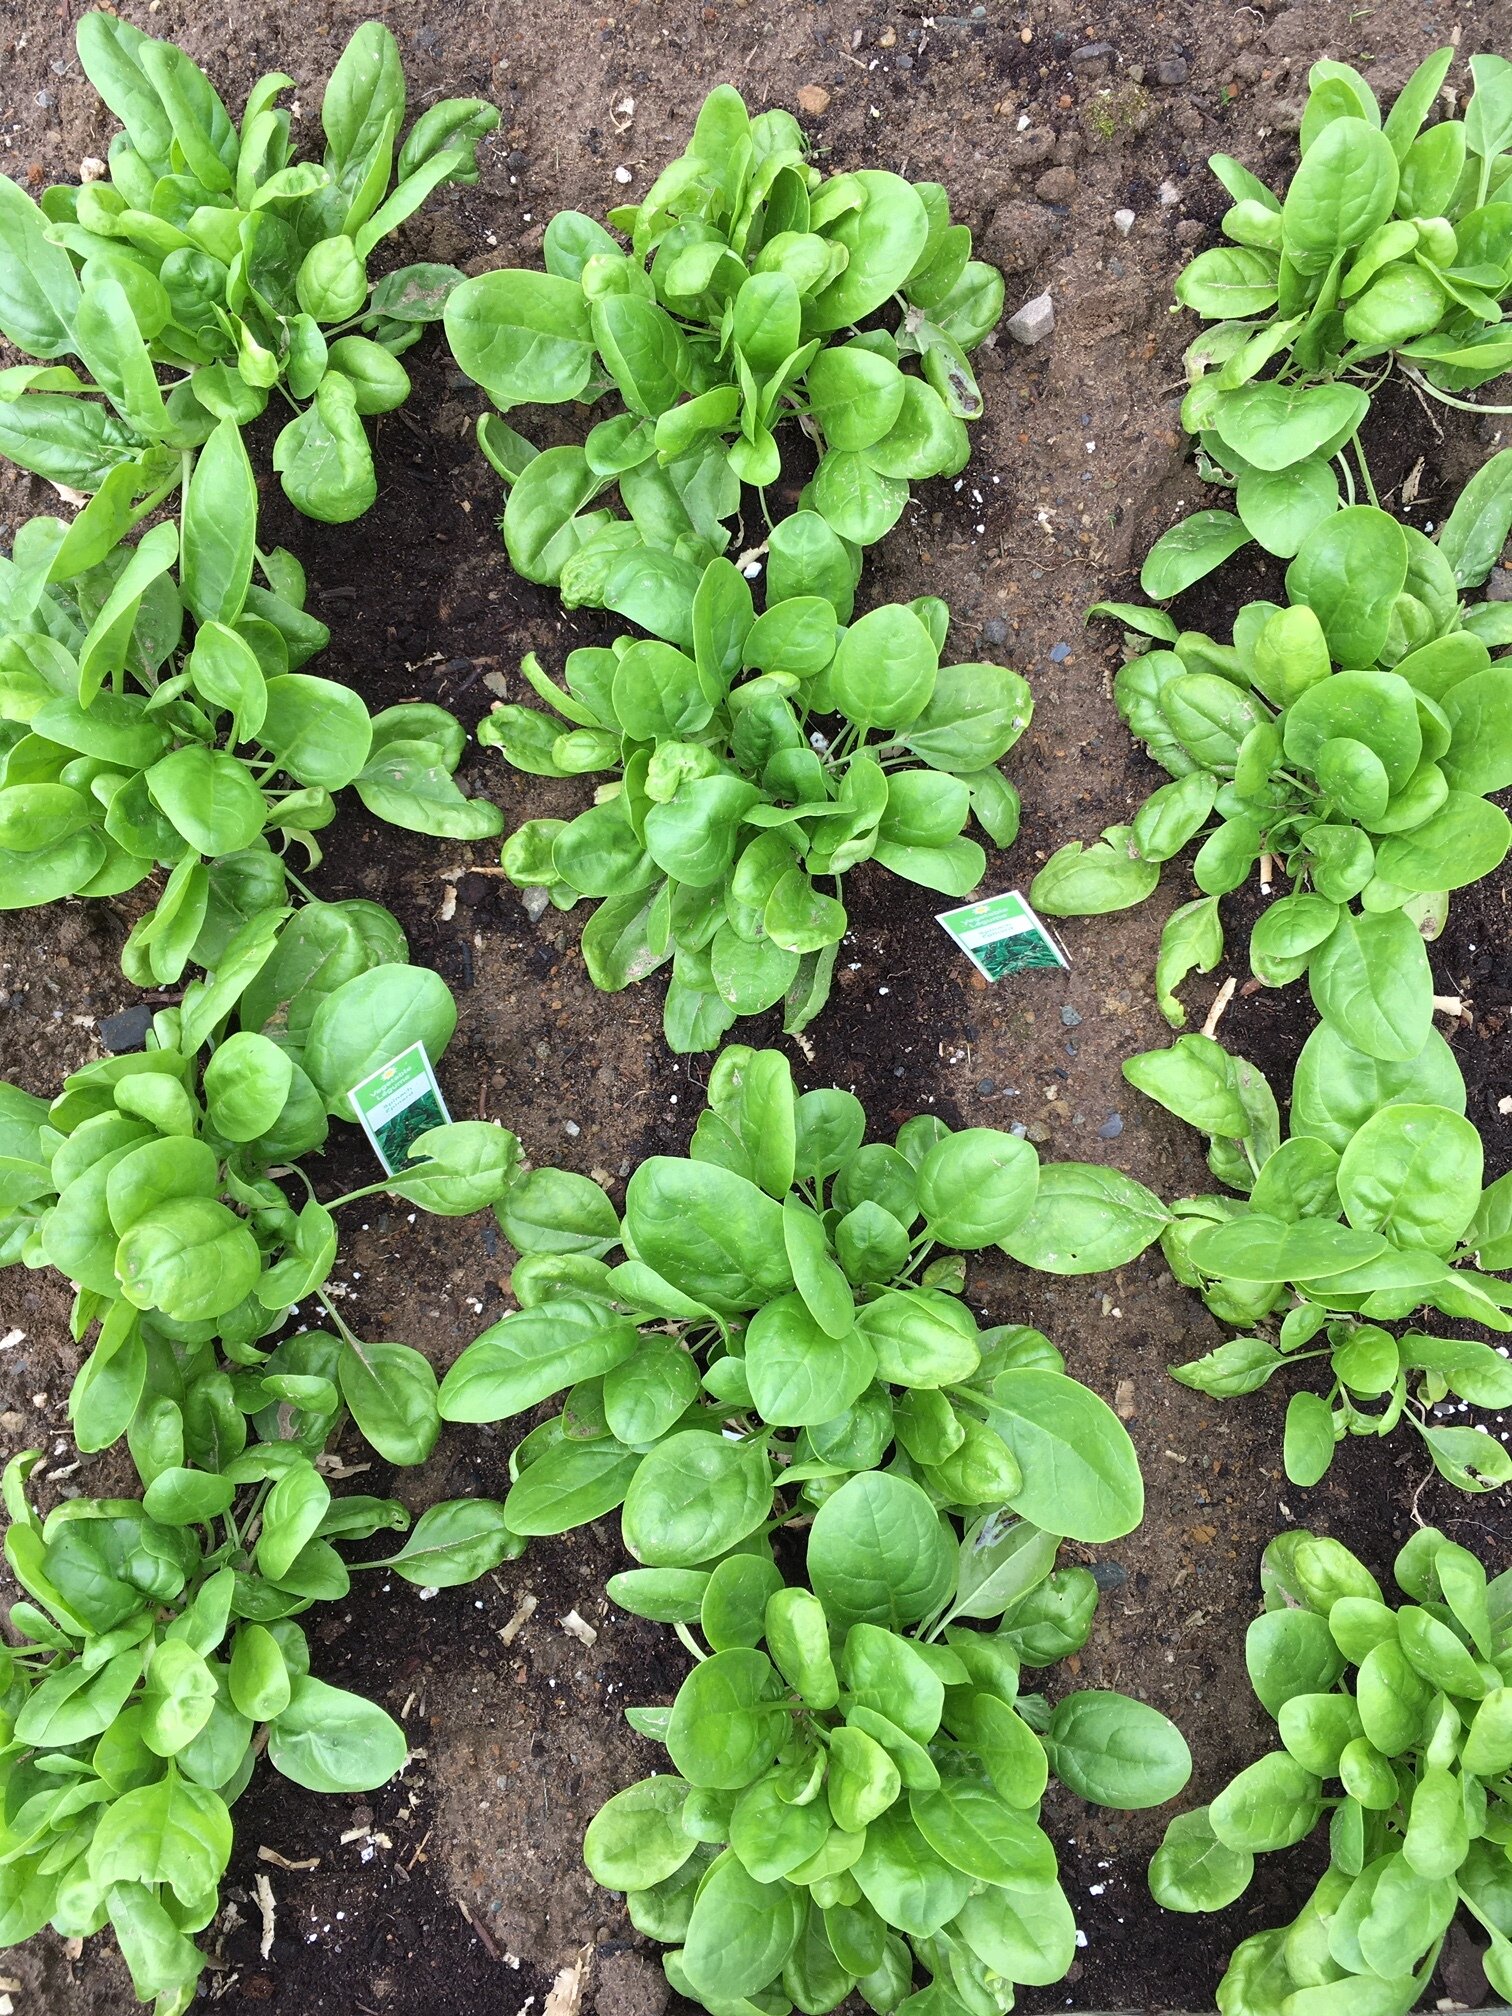
We have cold wet springs here on the coast and being right on the shore our garden is exposed to lots of fog, salt mist, rain, and high winds but none of that seems to have any negative effect on these plants. What I love even more about these is that they’ll fill your garden with fresh green and purple during those times of the year when your garden might look pretty bare.

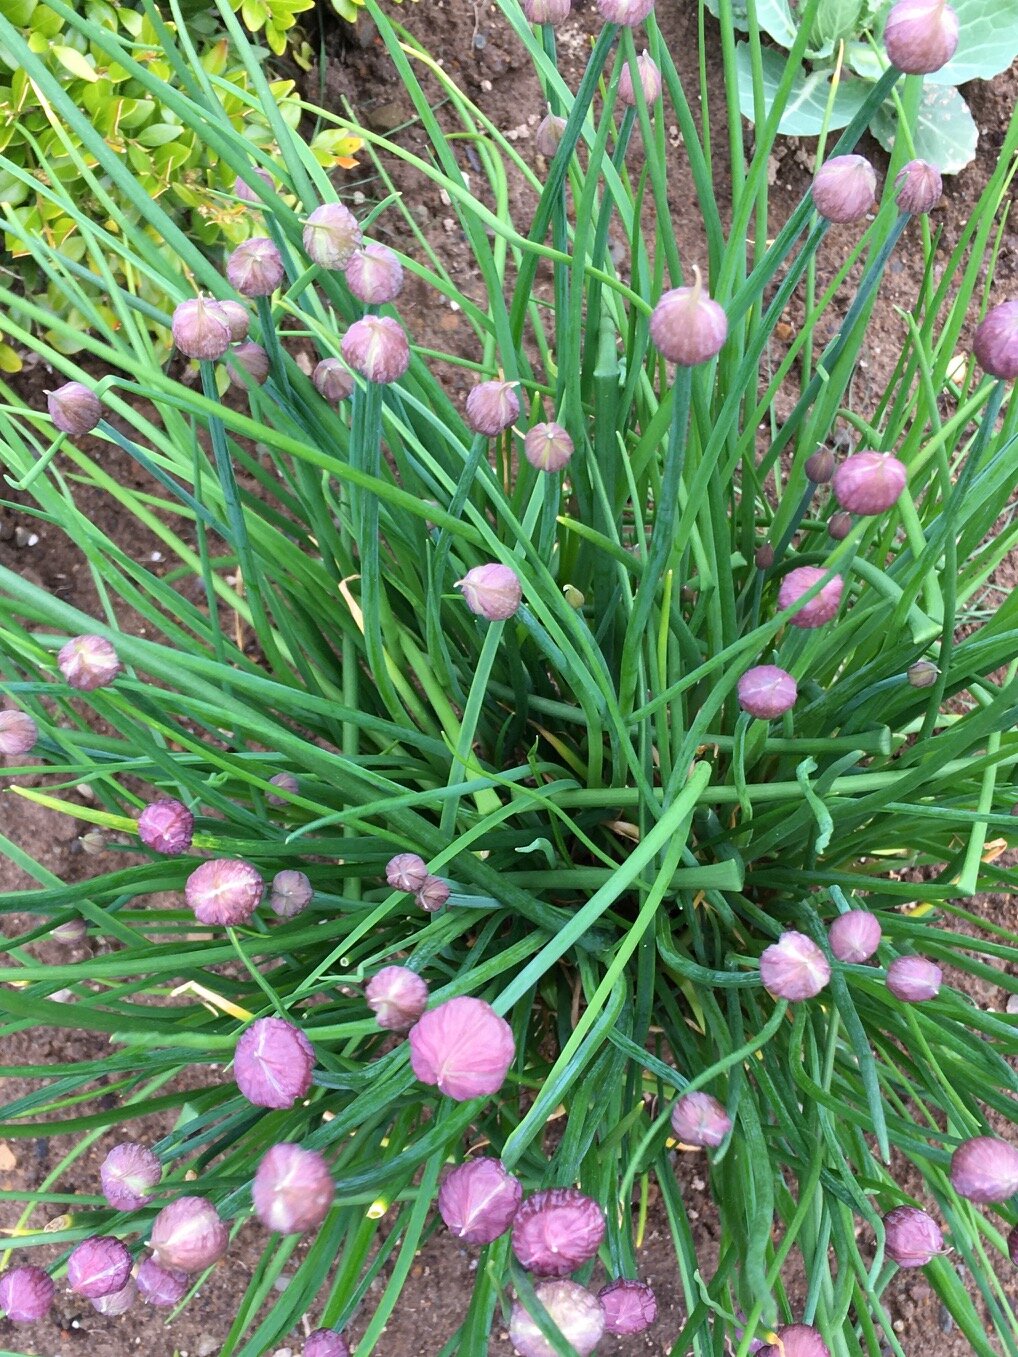
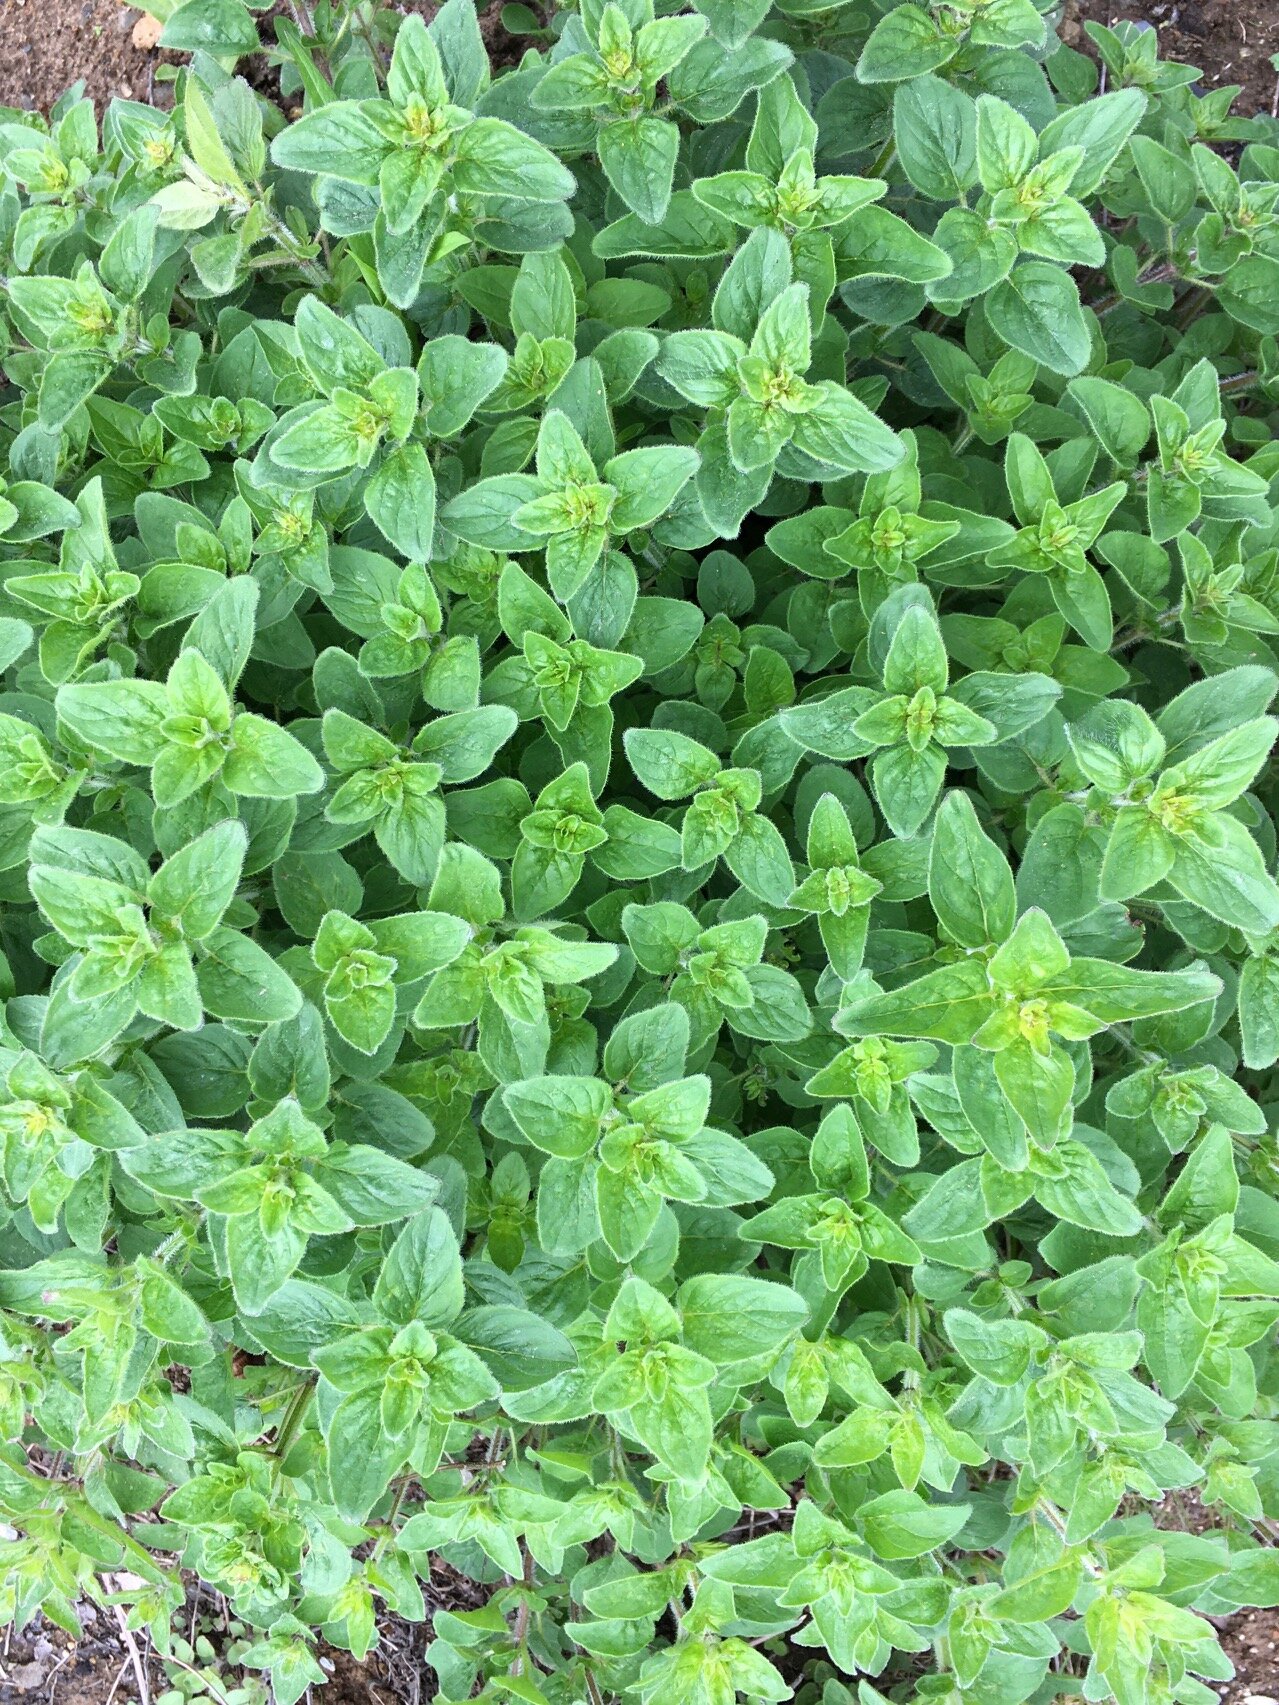
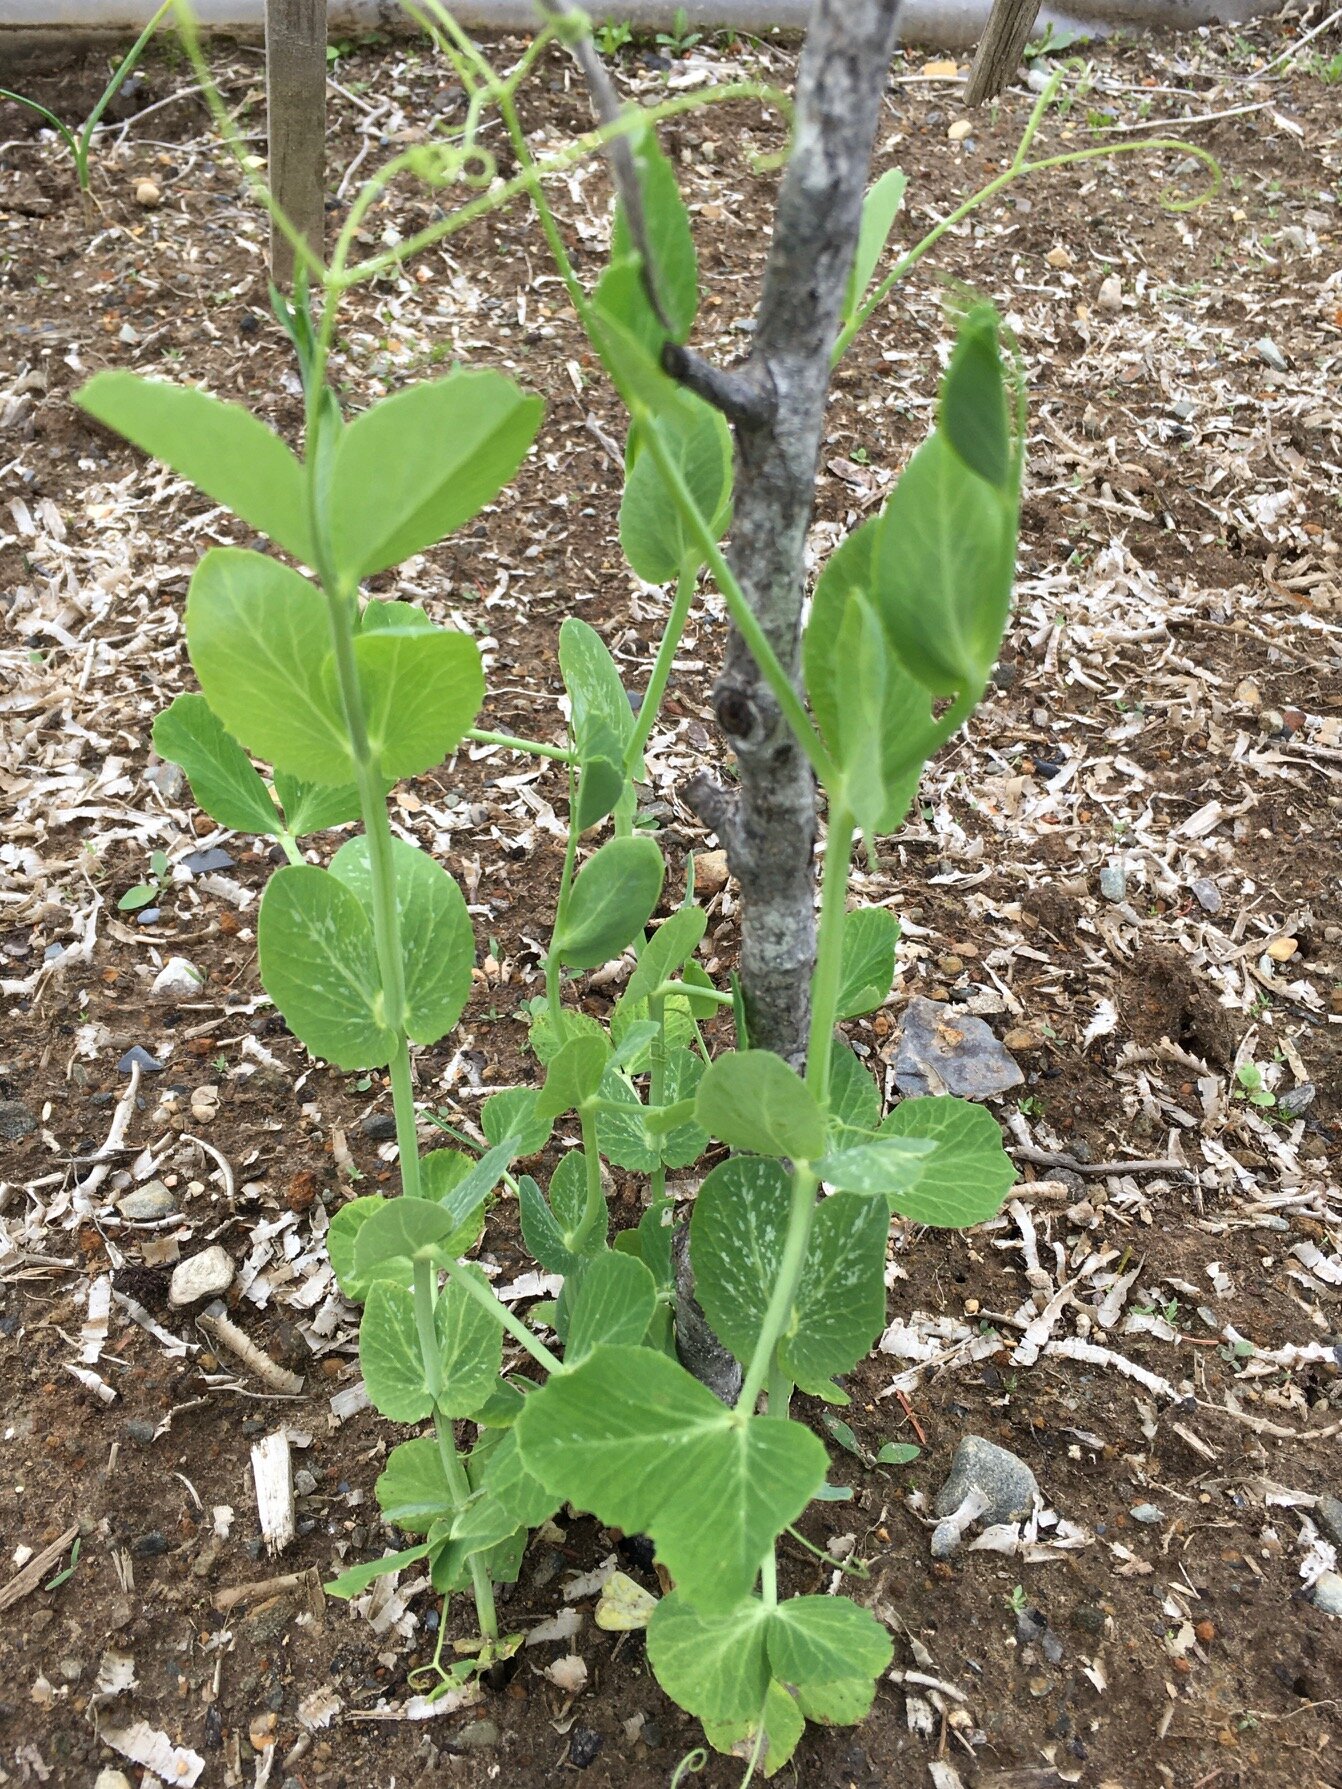
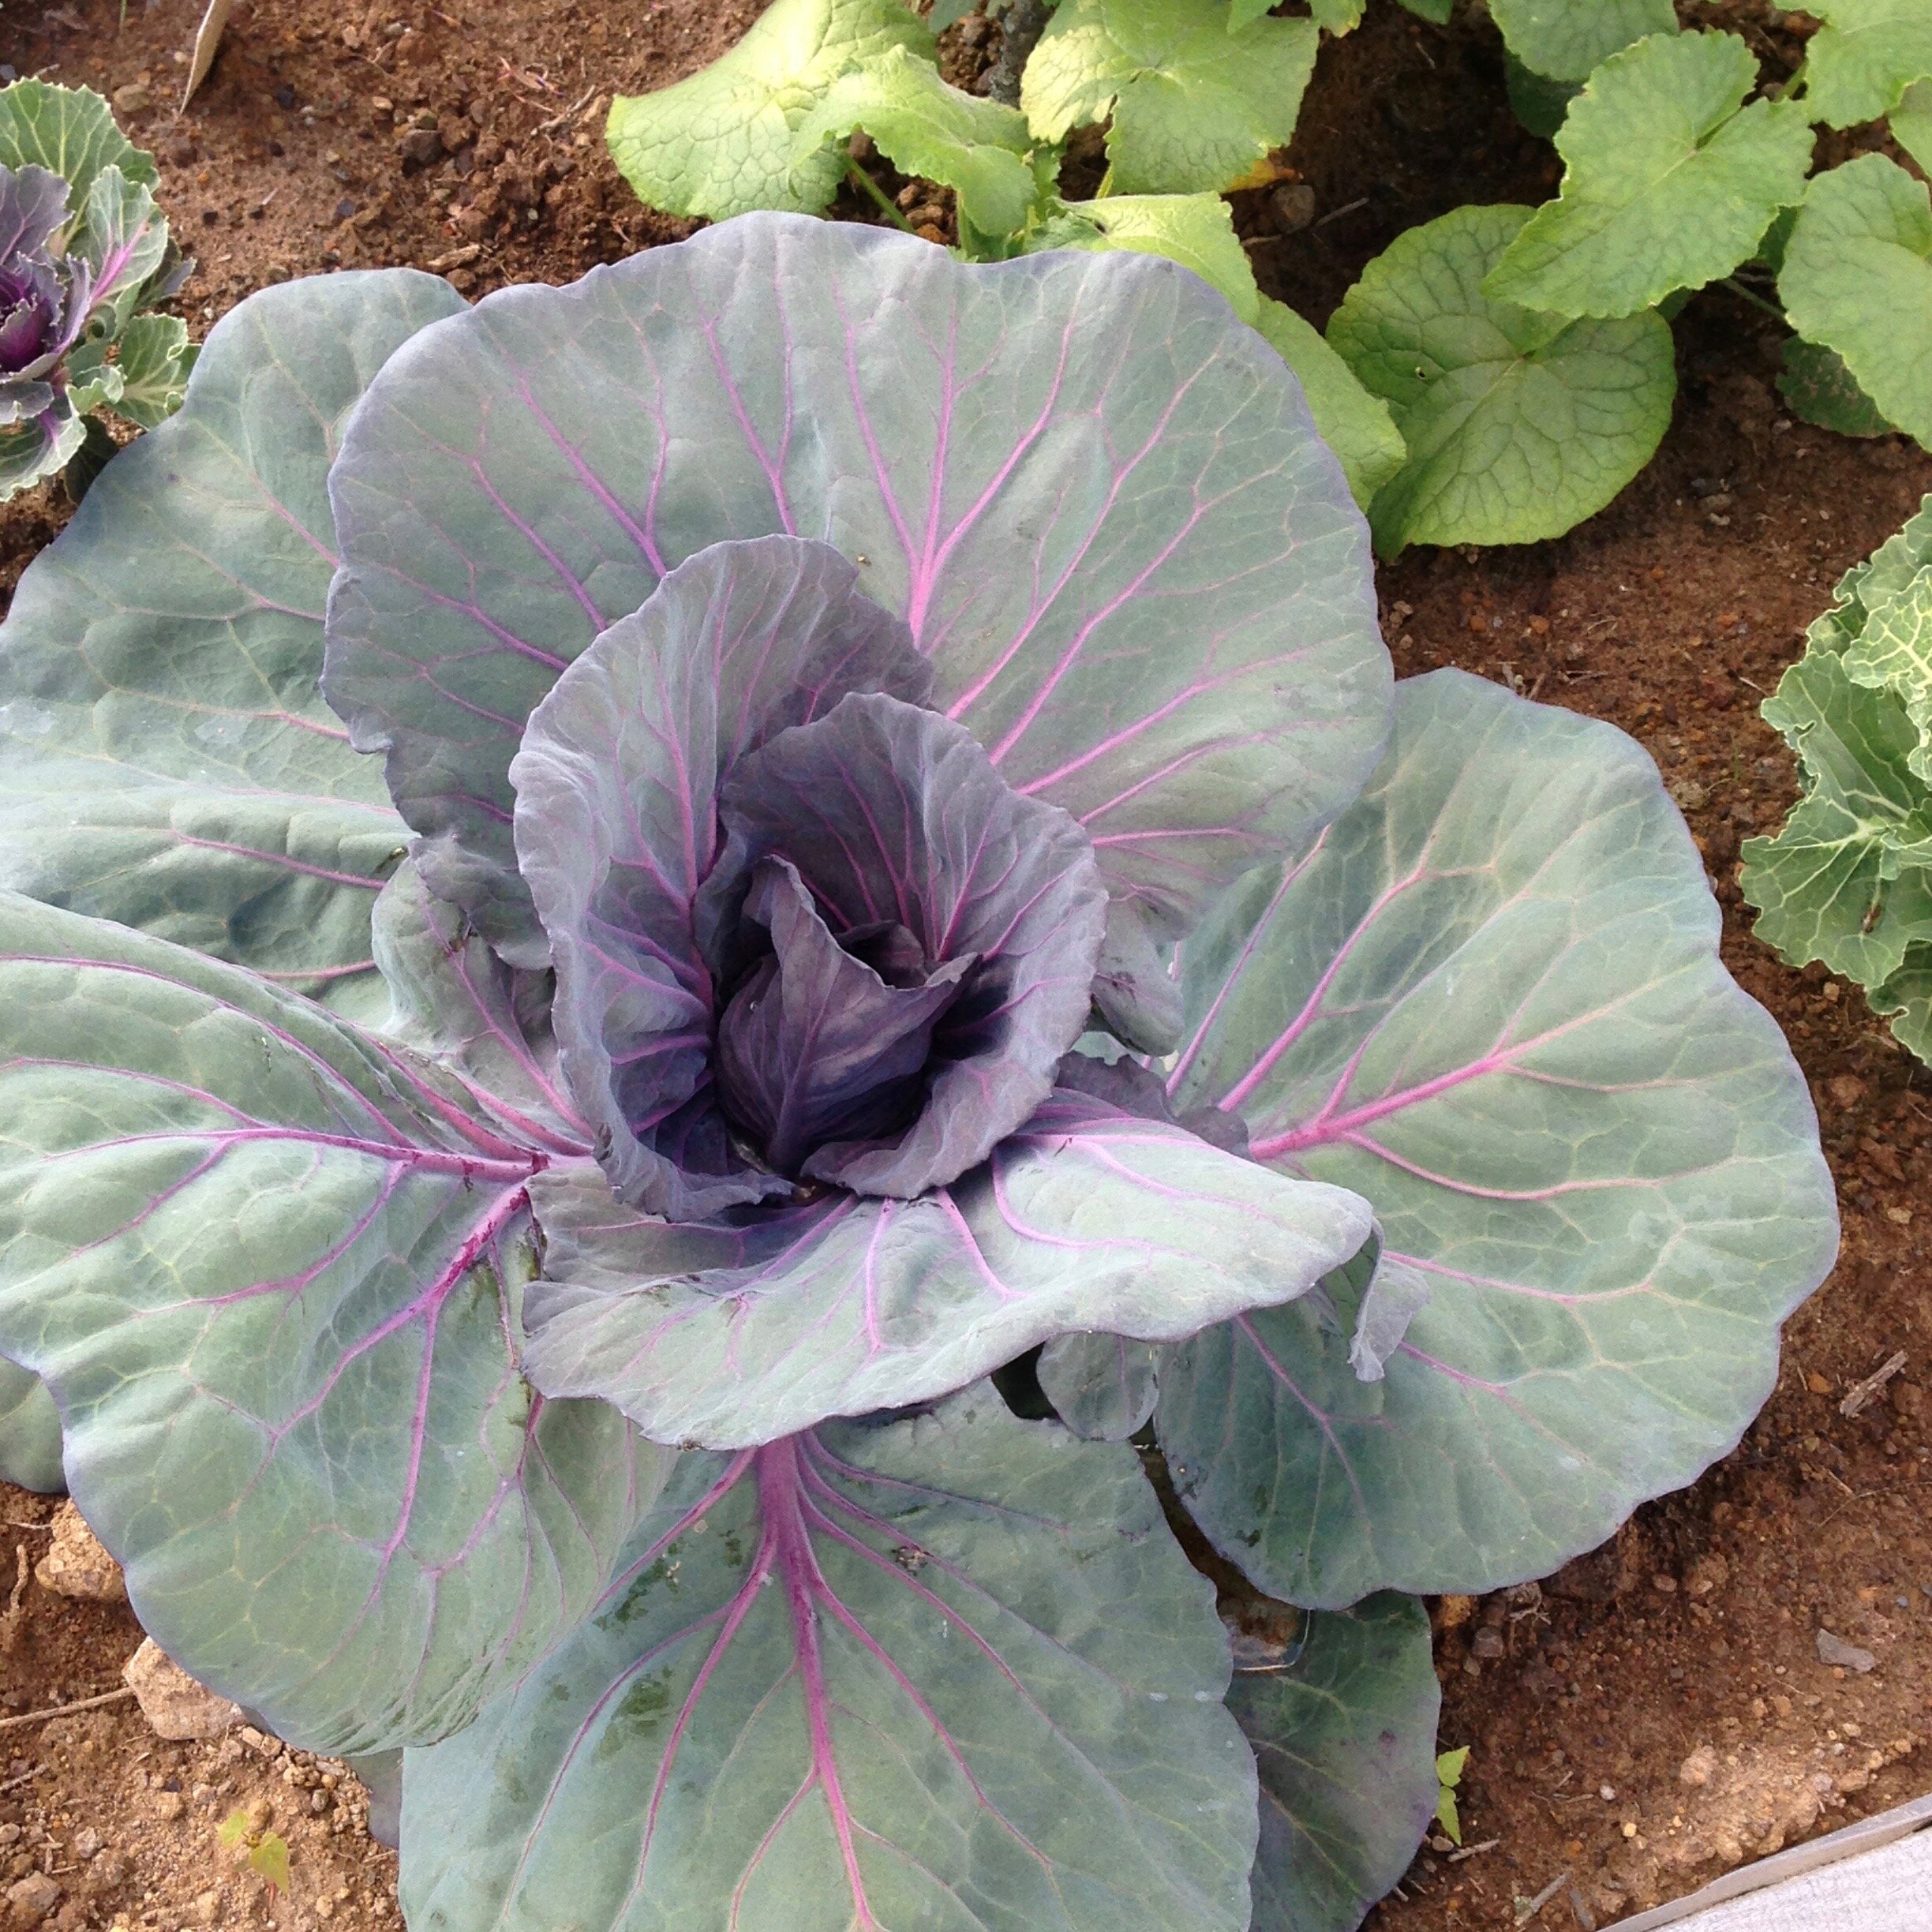
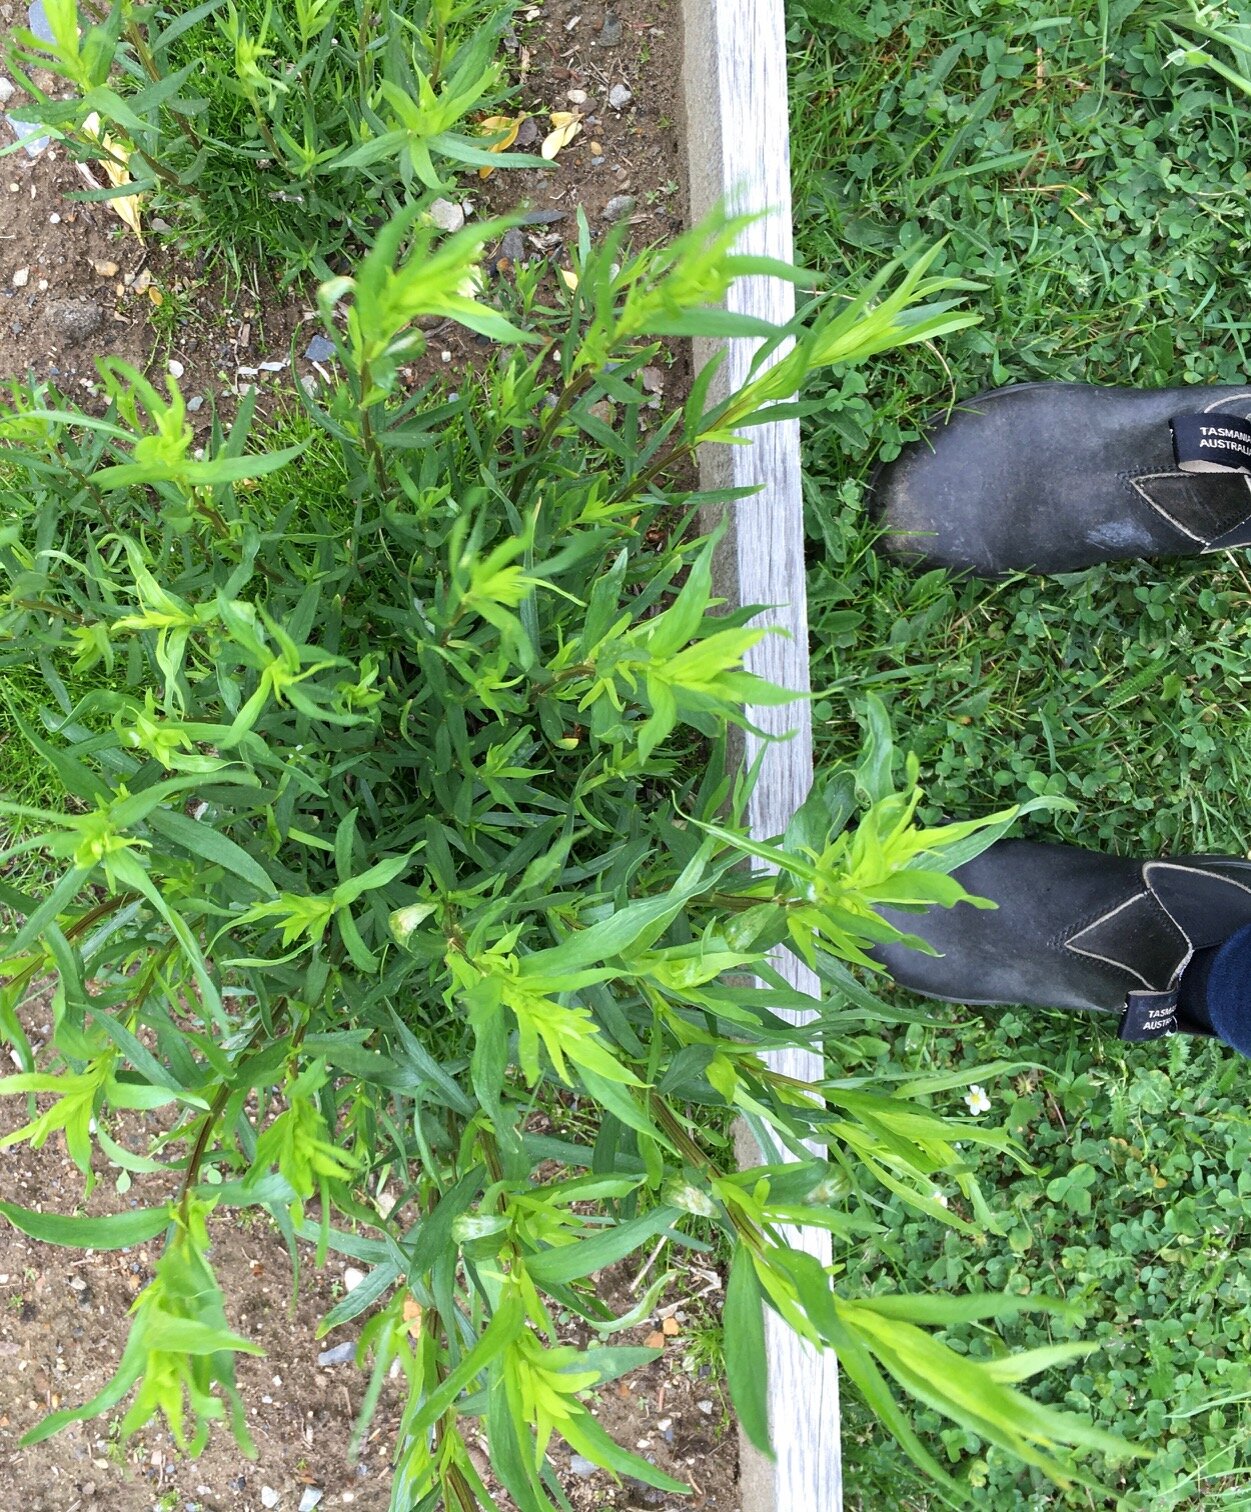
The spinach transplant likes the cold, and grows fast, we’ve been eating baby spinach salads almost daily (in June), which is a treat when not much else in your garden is growing yet, except chives! Chives are champs! We planted these perennials the first year, even in snow they’re bursting out of the ground in this beautiful spray of vibrant green and by early June the purple flowers are out.. Oregano is another perennial, they spread a lot and have grown into this beautiful tall mass of herby green leaves. Since we can’t grown basil, we use oregano they way we would normally use basil - in everything. The sugar snap peas were the sweetest surprise, we planted these for the first time last year and to our surprise these sprouted out of the ground this year along with the chives. Some fallen seeds from last year just germinated on their own and now there’s a entire crop of them growing like crazy, they are hands down one of the most delicious things we grow, and beautiful climbers. Cabbages are my go to. I plant dozens of these, purple and white. They’re gorgeous, huge, and add so much texture and colour to the garden right through to end of October. They store well, and we love cooking with cabbage so its win win win. Terragon,,,not my favourite herb to eat but I love the plant because it reminds me of rosemary (which we can’t grow) its a perennial that just keeps coming back bigger and bigger each year. It pops up in very early spring and like the chives, its a welcome burst of green in the garden when nothing else has been planted yet.

Carol Reed Design - Potager Garden Chive Harvest.jpg

Arm loads of chives, the first of three harvests. We cut them down to a few inches of the soil three times a season, they grow right back to full height in less than 2 weeks. A never ending supply (more than we can possibly eat), we put chives on everything now.

Carol Reed Design - Kitchen Farm Sink with Chive Alliums.jpg

I love this plant as much for the flowers it produces.

If you’re not yet growing any veg or herbs at home I highly recommend starting some, nothing tastes better than growing your own, and they look beautiful too!. As newbie gardeners we get overly excited at the smallest successes because we’ve had so many failures but we keep on experimenting and discovering new things that work and what doesn’t, I hope our list of easy to grow plants grows longer every year.

Our East Coast Barn Makeover & Potager Garden: Part 1

Beautifying an old barn by the sea

Our 150 year old gothic farmhouse sits on acreage that backs onto a shoreline of grassy dunes and a salt marsh meadow beside a long white sandy beach, we have views out to the ocean from most parts of the property. The only part of the property that isn’t covered in wild sea grass or trees is the large front lawn and perimeter yards around the house. An antique barn sits next to the house, slightly set back, its not as old as the house as its only 125 years old and pretty much in its original condition. The house and barn were built by a carpenter and we’re now good friends with his relatives who are neighbours. A few years ago after having spent 4 years renovating the interior of the house we turned our focus to the exterior of the property, its sad to think it took us that long to get around to it because it was in such a neglected state. When we purchased the property the decks and paint were literally falling of the buildings and there was a surplus of dead trees and wild overgrowth surrounding the house - the grounds were ROUGH and bare, there was no landscaping to speak of, no garden beds, no shrubs, not a single flower or specimen plant. There wasn’t even a proper driveway - they just drove on the grass. Looking at the exterior was overwhelming (and still is!), especially for our limited experience with landscaping (none) but a few summers ago two things became top priority; a paint job for the old barn and …. a vegetable and flower garden - a potager garden was what I envisioned. It was a small goal in light of all that the property needed to look inhabited and loved, but it was a start at least and we had a small window of seasonal weather to get it done.

We started the project in the early fall because its just the best time for exterior painting work here and then that would also give us a head start on getting raised garden beds built so they’d be ready to go the following spring.

Carol+Reed+Design+Potager+-+First+Plantings.jpg

Here’s a peek at a corner of the finished garden shortly after the first plants were put in, although it looks pretty simple you can’t truly appreciate how beautiful it is to us unless you understand what it looked like a few months earlier. Below is a glimpse of what the barn and garden area were like just as the painting of the barn got underway which gives you an idea of what we started with…..(click through the slides for more before photos).

There was a large area of mixed grass, gravel and dirt to the side of the house in front of the barn. It was like a no-man’s land and by default it became the parking area and home for the recycling bins. Whether we wanted it to be the parking area or not,,,that’s where everyone who ever came to the house would park, and they literally would drive the car right up to the door at the back of the house, it didn’t seem to matter if there was grass or not. There’s sloping yard on the other sides of the house so this level area was a prime spot for a garden and it would give some purpose to this barren space. My plan was to transform this area into a enclosed garden and outdoor lounge area.

CarolReedDesign-Barn-Painting.jpg

We approached the paint job of the barn as a necessary cosmetic fix, but bigger picture it needs a longer term solution if we want to use it for anything other than storage or a workshop. Our immediate goal was to make it not look like an eyesore anymore, which it clearly did…..as you’ll see below.. The new paint was sprayed on, the cedar shakes were the original and since they’re heavily weathered there was no primer needed they just did some scraping, cleaning, some minor repairs, and away they went. White. everything. The painters kept asking me repeatedly, everything white? Yes. Everything. White. I pointed to the house, just like the house.

CarolReedDesign-Potager-Beds-Progress-1.jpg

We had no option but to use raised beds for the garden since the property is mostly on ledgerock. I had come up with various layouts for the bed shapes and garden design but ultimately decided to do a series of simple rectangles in a grid of 8. The wood for the beds was milled for us by a neighbour who has a saw mill, we went to his lot and picked out some boards from an old growth tree and he milled them to size, 12” H x 1.25” thick, 8’ long. Ideally we wanted all single lengths so no sides would have a seam/joint but we ended up needing to use cut pieces so I decided to put them on the ends and create a detail for the seam which I repeated on the corners.

CarolReedDesign-Beds-Barn-Progress-1.jpg

AND here she is!! The newly white barn (late evening pic, hence all the shade) and beds in progress! (actually lmost finished paint job, this was awaiting final coat on the end of the barn and part of the back). Without a doubt this was the single most satisfying and impactful update we’ve done to the property. Definitely worth every penny even if its a temporary solution. So how long did it take and how much did it cost? In total it took 2 painters 4 days to complete the job, but due to a pause for some bad weather, the duration from start to finish was about a week and a half. They used a sprayer for the application which took almost double the paint I had anticipated so the project in total including paint and labour was about $4500 - I think this is useful to share because how many people know how much it costs to paint a 125 year old shingled barn? And in case you were wondering, yes ,there was a lot of overspray which I was concerned about before starting, although I was assured multiple times there wouldn’t be any overspray on the roof,,,, there was. A LOT, thankfully the worst is on the back. So if you ever have a building exterior sprayed be sure to insist, insist, on covering up your roof if its not being replaced. I was also then assured over my distress about the overspray on the roof that it would wash off with the next good rain. It didn’t. After many many rain storms (incl. hurricanes) it hasn’t. Although we did plan on a new roof in the near future, it’ll now be sooner rather than later.

CarolReedDesign-Beds-Barn-Progress-2.jpg

The painting was finished just a few days before Thanksgiving, at the same time the raised beds were in midst of being built and loosely laid in position. This is a great opportunity to test out your spacing. At this point we were super excited as we could now see and experience the physical transformation of the space as the beds created a new boundary which defined the pathways and traffic flow and created a distinct purpose to the area. And magically, in combination with the new paint this unified the barn and the house, one was now an extension of the other.

CarolReedDesign-Beds-Progress-View.jpg

One of the best features of this garden is this view, from the centre points in the garden you can see out to the ocean. Its also where gusts of winds whip through the area,,, so there’s that challenge we have to deal with….along with fog and salt air.

CarolReedDesign-potager-Beds-Winter.jpg

Before the ground froze that fall we fixed the beds in position, lined them and filled them with soil before the freezing temps arrived, this would give the freshly cut wood frames a chance to weather over the winter. And I would have the winter months to research and plan out how we would fill each bed.

CarolReedDesign-Potager-Obelisks.jpg

Flash forward to the spring, the first thing we did was create a garden bed along the side of the house where we planted a series of globe boxwood, catmint, hostas and some salvia or sage? and climbing roses (which didn’t survive the year). Then the first long weekend we built a pair of obelisks for the two raised beds closets to the house. The key was ensuring they were anchored securely into the ground and I’m happy to say these have withstood countless nor’easters, a winter bomb cyclone and a hurricane! Although sadly we’ve had zero success finding a climbing plant to grow/thrive on them.

Filling all the beds is another post all together, It took weeks, almost months,,to plant all of the beds. (garden centres are few and far between around these parts so it was also a hugely time consuming process that involved endless driving to various garden centres, often not finding what we had in mind so making lots of substitutes.)

Carol+Reed+Design+Potager-FirstPlantings.jpg

Soon as the plantings were done we installed a picket fence across front side of the garden including two two gates. Sigh, the picket fence. . I have to say this was the single most impactful change of the garden and barn makeover. it transformed the property aesthetically and physically as it created this ‘new’ private outdoor area, an extension of the house that didn’t exist before. This wasn’t a space we ever spent a second of time in before this (or wanted to). Now its the central hub, a space where we spend many hours of our days, its where we go first thing in the morning, where we spend the last moments of daylight every day. And it supplies us with amazing things to eat!! The fence confines the garden and makes it a ‘private’ zone even though its at the front our property, not the back. Although this area was always here before, we felt like we just gained this expansive addition to our home, not to mention, a new pastime.

CarolReedDesign-Potager-Fence-1.jpg

Not only do we enjoy spending time in the garden, it provides beautiful sight lines from inside the house, inside the barn and of course, from the street. We’ve had a quite a few people we hadn’t met before stop in to comment on the new additions and many cars stop to take photos. i think everyone is happy to see the old haunted looking barn gone! It often gets mistaken as the house now.

On the other side of the fence ….here’s a view of the front of the house. Not gonna lie,,,,I can’t say we grew the hydrangea, we bought these plants already this size,,,and with blooms, for instant impact. They’ve struggled every year since, , but they finally seem to be getting better established after a few years. The front of the house is another landscaping project, with hardscaping involved, Iv’e had plans done up with the help of a local landscape architect but logistics just haven’t worked out as yet to get it done (did I mention, small window of seasonal opportunity, shortage of contractors!).

CarolReedDesign-PotagerGarden-After.jpg

Here’s a view from the far end of the garden, standing at the barn workshop doors, furthest away from the house. I think this may have been from the second year. We keep a couple of muskoka chairs here and its where we have a pre dinner drink every night (weather permitting), eventually there’ll also be a garden shed at this end of the fence.

CarolReedDesign-PotagerGarden-After-2.jpg

The beds have a mix of evergreen boxwood, flowering shrubs, herbs, vegetable,s and annual and perennial flowers.

CarolReedDesign-Potager-Garden-After-Obelisks.jpg

Late August or early September of the first year (possibly second?)……

This before and after slides show how much of an impact a new paint job can have on a building. Its that time of year I spend every minute I can out there so I hope you enjoyed the before and after tour, stay tuned for the next post on what we planted in our beds, what worked and what didn’t.

If you don’t already, please follow us on Instagram, Facebook and Pinterest for more daily peeks from the garden or client projects.

@carolreeddesign

E-Design Kitchen Floor Plan: Mountain Cabin

One of the best parts about working on E-Design projects is the opportunity to create concepts for homes in a range of different styles and regions across North America from urban to country from coastal to mountain, the varied requirements can be a refreshing change from the typical projects I would otherwise work on locally. This E-Design client reached out to me for help creating a new kitchen floor plan for her mountain cabin located in Northern California. She was preparing to embark on a total overhaul of the dated kitchen and had a big wish list but was struggling to figure out how to configure it all in the existing space.

The cabin is used as a getaway for total relaxation and outdoor recreation with groups of friends and family who would come and stay for the weekend. At the cabin the kitchen is the centre of action all weekend long, cooking and eating, wine tastings, enjoying music and board games late into the night. So the existing kitchen just wasn’t living up to be the functional and inviting hub of the home she wanted it to be.

The wish list for the new kitchen was pretty clear; a big kitchen sink, an island or counter for hanging out, exposure to the fireplace, open concept to the dining and or lounge seating, lots of counter space, open shelving, more storage, chef style appliances, a mix of materials, a furniture like cabinet, upgrade the patio doors and of course, showcase the scenic views.

Here’s a look at some inspiration images she collected on her Pinterest boards.

Carol Reed E-Design Cabin Kitchen Layout Inspo.png

The existing kitchen had two amazing features going for it, a wood burning stove (fp) and exceptional views, a prime feature of the cabin’s locale. The kitchen was situated along two exterior walls with the best panoramas, and had a walk-out to the wrap around deck.

Below is a slide of the Before Floor Plan, and the second slide is a layout that reflects what the homeowner had in mind, which was a basic island layout, or variations of this with different appliances/sink positions.

I always find its most productive to first review/assess the client’s initial idea which makes its clearer for them to see, to scale, what the shortcomings of that concept might be, so as not to waste time getting hung-up on trying to make it work if there’s a better alternative. I didn’t feel this was the best solution for her needs and intended to explore a different direction all together. What I especially didn’t like about this concept was that it eliminated a window,,, but I understand the rationale behind that idea and the need for more wall space.

Instead of eliminating a window I wanted to increase the windows if I could. It was also clear to me the patio doors were the obstacle that was prohibiting a better layout and more counter space. Since the deck wrapped around the corner of the kitchen, I saw great potential in moving those patio doors, in fact, great potential! Below are a few preliminary block plans of this concept, you can see how suddenly, the possibilities were looking interesting!

The magic of relocating the patio doors is that it freed up the long kitchen wall and allows for an expansive uninterrupted “L” configuration of counters and cabinets (super efficient) but also, by swapping the patio doors with a large window it means the sink and prep areas could directly overlook the prime views. I proposed the window be made as large as possible and strive to align them with the ceiling beams. The new patio doors (sliding or swing t.b.d.) would then be off to the side of the main deck area, adjacent to the bbq and would no longer impose on the seating arrangement in front of the current patio doors. Win win. Further, they could mirror those patio doors on the opposite side of the fireplace and have a second walkout to the deck from the dining area and enhance that indoor/outdoor vibe, although its precious wall space for furniture, so alternately a similar effect would be to install a new larger window for symmetry.

Based on this concept I developed 3 variations that spoke to her wish list; a centre island option, a centre table option, and a peninsula option - and she was super excited about each of them. After reviewing the window and door modifications with her contractor it was unanimously agreed that moving the patio doors would work well, although the decision was to keep the new window the same width as the old patio doors to lower costs. By happen-stance during this same time the homeowner also came across a vintage butcher block table and bought it in hopes it could work in the new layout. And so it did - final plan done! The vintage work table will really give her that one unique furniture piece she was wanting to incorporate.

Here’s a look at the final ‘After’ layout compared to the ‘Before’.

Carol Reed E-Design Cabin Kitchen Layout Before & After.png

With almost no change to the footprint of the original kitchen the impact of the window and door changes in addition to enhancing the ceiling beams, will make this a really dramatic transformation. Its a good example of how much your window and door placements can be detrimental or beneficial to a space - so never overlook the opportunity to change them during a renovation.

If you need help with a challenging floor plan, check our E-Design services on thedesignshop.ca

For more peeks at full-service and e-service design projects you can follow us on Instagram @carolreeddesign

You can also find us on PINTEREST and FACEBOOK!