when the destination is a journey
“…it changes to a dirt road then you will travel several dramatic rolling hills of farm land. At the end you will see an open gate with a little white picket fence and a prominent community sign. Continue through the gate along past all the little seaside cottages to the very end of the private road where you’ll find our cottage”.

Rolling country hills of Lunenburg County
When the directions to your newest client’s project sound like the makings of a scenic road trip you know you’re about to discover a special place with a special owner. Even though this project, a new build, was already far along in the construction stage and quickly nearing completion, its exciting to jump on board at any time.

Exterior scaffolding - Lunenburg New Build
jumping on board
Although Its not ideal for a designer to come in at such at late stage its still possible to provide tons of valuable input prior to finishes and fittings being installed. Inevitably you’ll spot things you wish could be changed or corrected but doing so can cause serious delays and added expense, so if that ship has sailed, its simply time to focus on working with what’s there and prioritize outstanding decisions so work can continue with a co-ordinated and cohesive vision. Time isn’t on anyones side so the homeowner has to trust in the Designer’s experience to navigate them through countless decisions and selections as efficiently as possible.
For this project I was introduced just as drywall priming was completed but all the decisions beyond that stage still needed to be made. I quickly got up to speed and focused on the most pressing issues first - assisting the owner with selecting the flooring, the trim work, and all paint finishes. Once that was sorted we’d turn our attention to bathroom tiles, staircase details and then, cabinets, counters and light fixtures.

On board the New Build Project - Day 1. View from family room into kitchen.
The home is situated ocean front on a peninsula inlet in Lunenburg NS, complete with its own beach and dock for all the waterside activities. This new cottage is replacing the old family cottage of this single mother and her daughters. Although it won’t be their primary residence they will spend extended periods of time here joined by extended family and friends. The goal for the interior was for it to have a bright, relaxed and contemporary coastal vibe, outfitted with practical materials and comfortable furnishings for easy living in every space. Longevity was the key objective, It was especially important that everything be of enduring style and lasting quality for low maintenance over the long term.
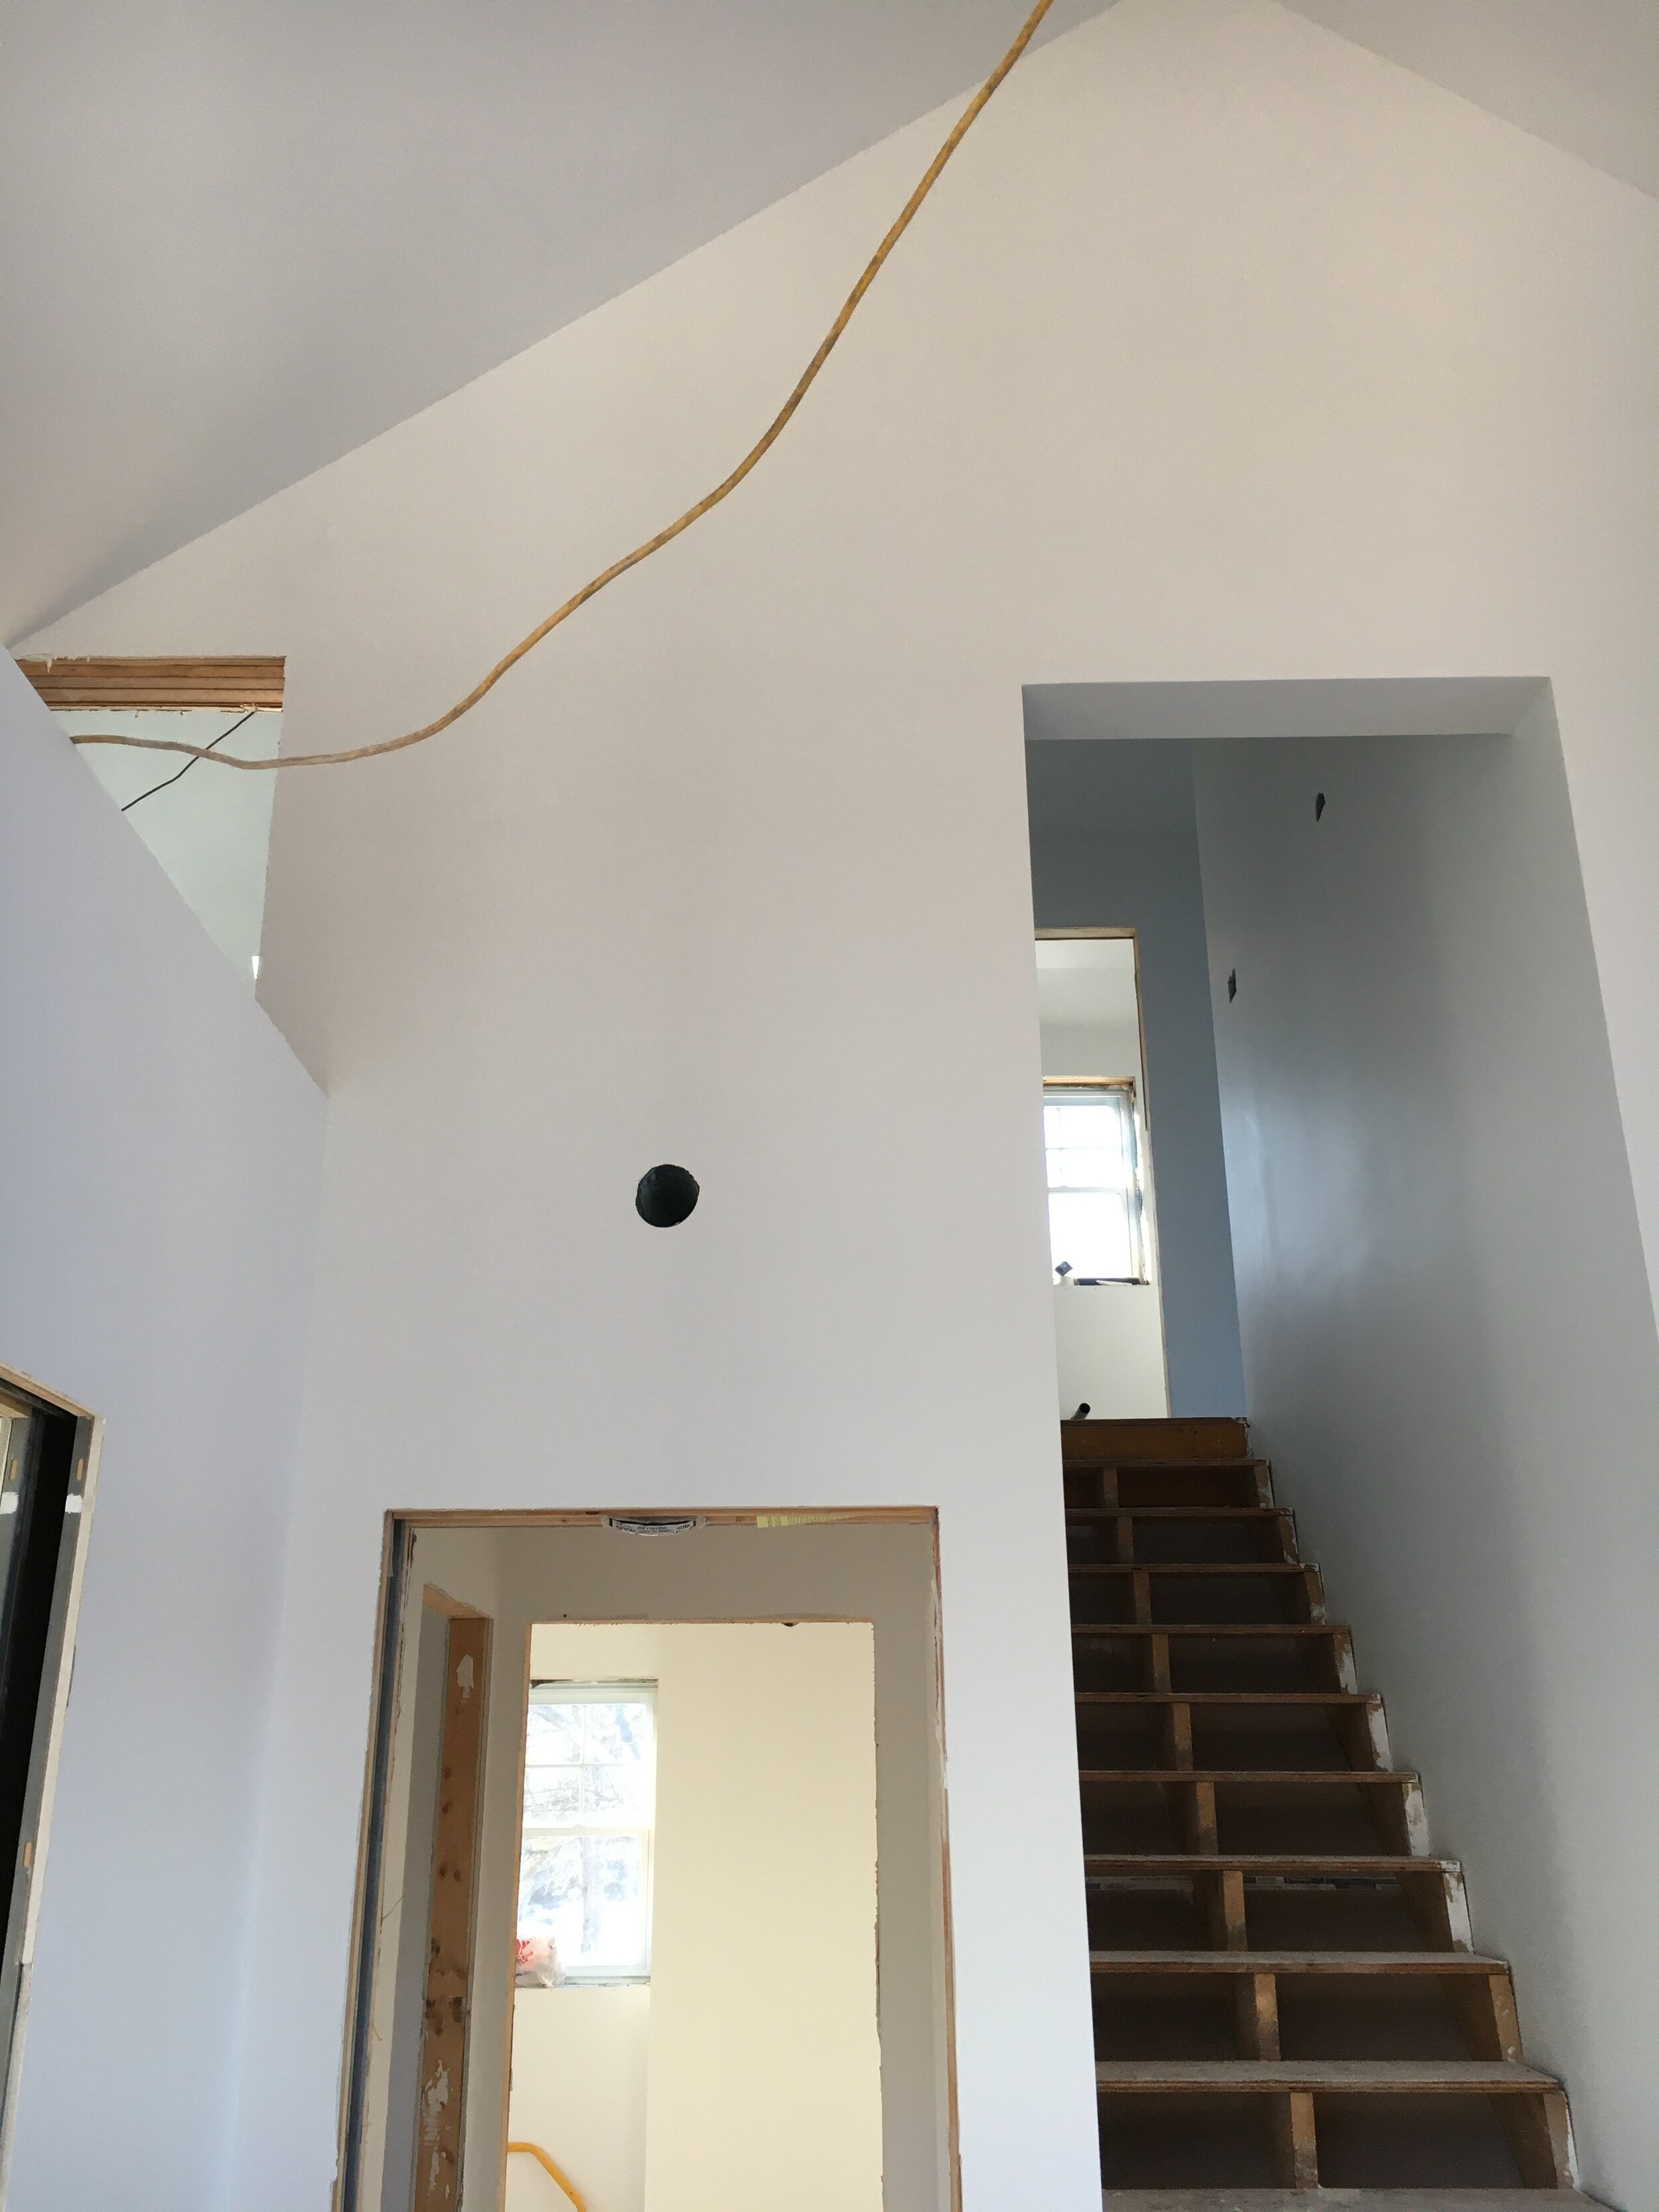
View from the mail floor up to the second floor.
As you enter the house from the road side its a two storey design with a double height main floor family room, bedrooms with cathedral ceilings area upstairs plus there’s the added bonus of a full walk-out basement level on the waterside.

Partial view of the family room
PICTURE POST CARD INSPIRATION
The homeowner hadn’t amassed the usual inspiration images of interiors but what she had tacked to a wall by her desk was more interesting - a series of coastal art post cards. These images were the inspiration for the palette and mood she wanted the interior to have. Without wasting a minute, we decided on the trim work before I left, and then I got to work sourcing options for the flooring which, once selected, would inform the direction for all other finishes.

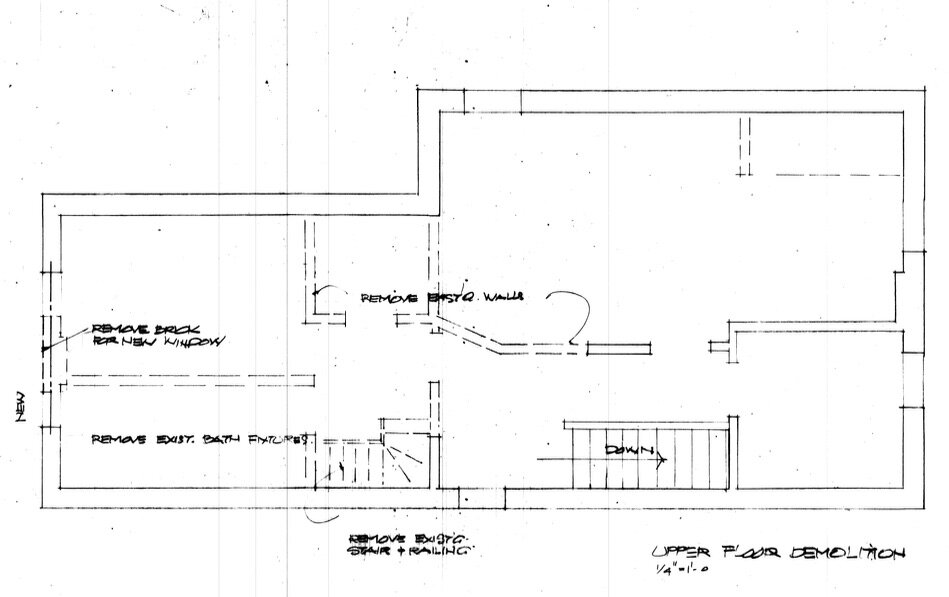
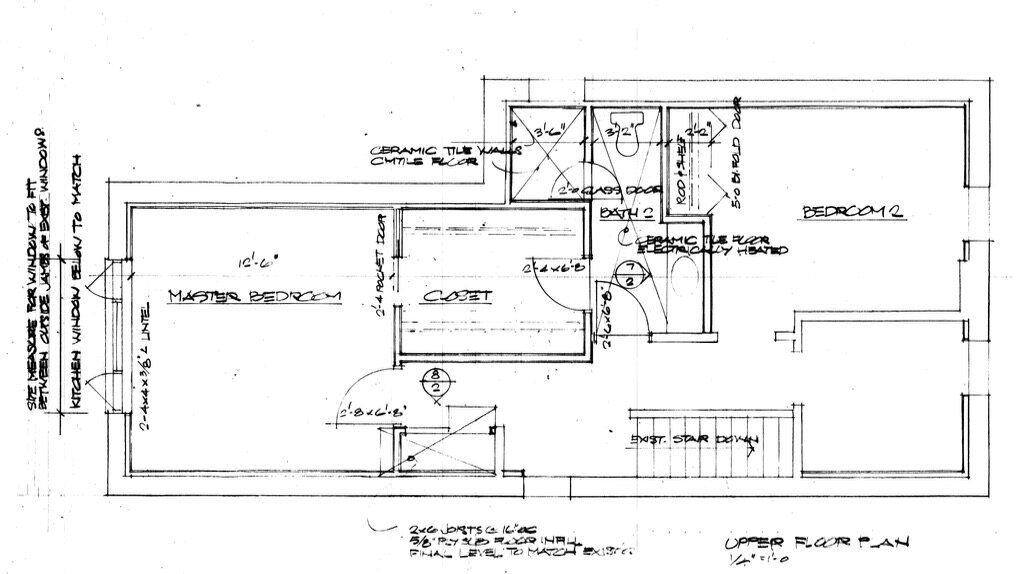
The build had progressed to this point with an exterior rendering and a set of plans that depicted the interior floor plan and kitchen and bathroom elevations but no specifications for any interior finishes or trim.
For the flooring the homeowner had already sourced and narrowed down a couple of options but after reviewing them I recommended we look at some alternates. I fully agreed with the direction she was going, which was a wood look vinyl plank, or luxury vinyl flooring, but I didn’t feel the colour or quality of the options she was considering were the best choice based on style or performance.
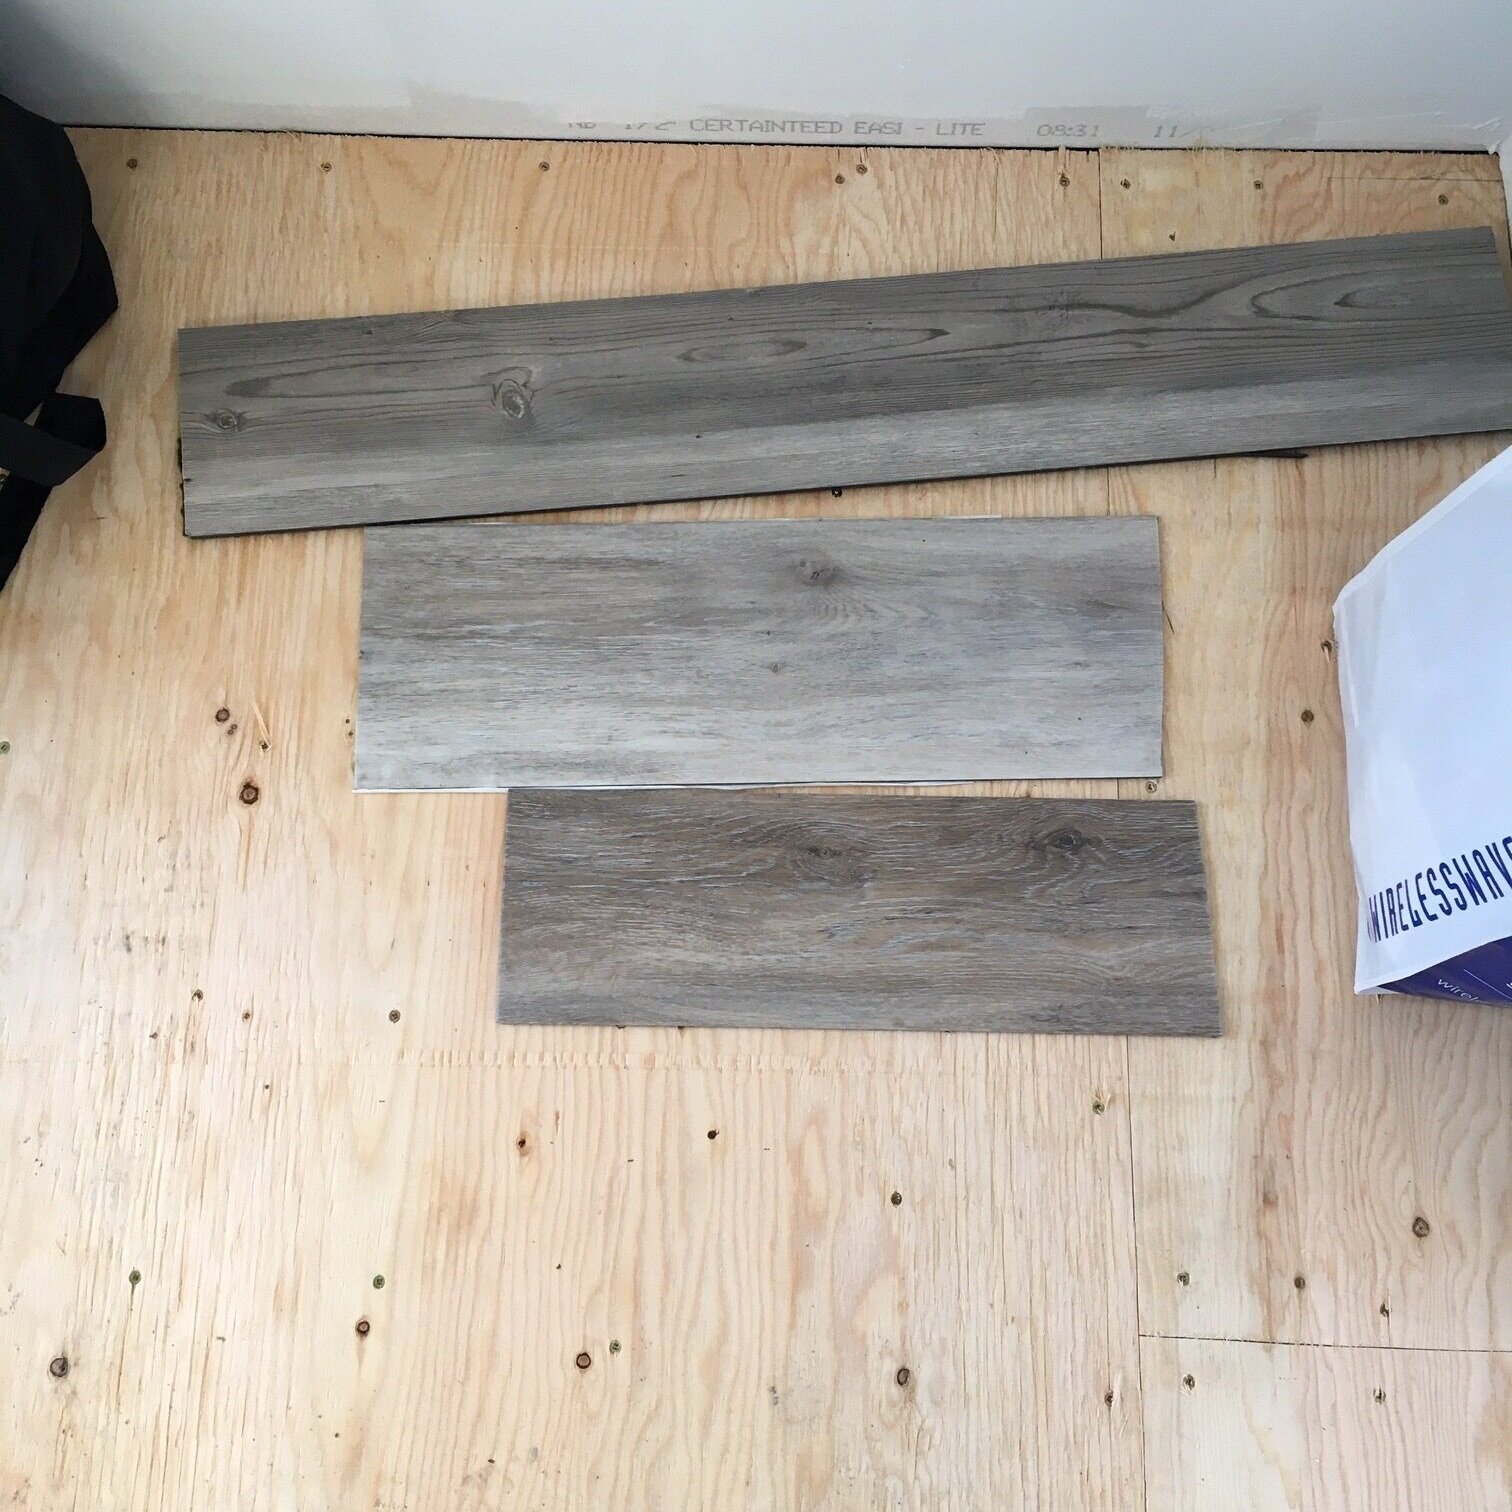
Client’s original vinyl flooring samples.
what is luxury vinyl flooring (lvf)
LVF or LVT is a term you’ll hear and see a LOT of these days - its the hottest thing in flooring. Its a performance product in that its designed for durability and practicality. Just like marble look porcelain, LVF is a product of the digital era, with advanced technology and high resolution digital imagery these vinyl planks or tiles can replicate the look of the natural materials so convincingly you won’t believe your eyes, you’ll have to touch it to see if its real and even then you’ll wonder? With real-wood good looks paired with the practicality of vinyl, its the fastest growing flooring product out there. Here are some pro’s and con’s I’ve created to help weigh the benefits:

styles: LVP & LVT
The product is made in individual tiles. Plank shapes that replicate wood are referred to as LVP, Luxury Plank Flooring, typically 6-8” wide, 48” long. When made in square, rectangular or octagon tile shapes to replicate stone or ceramic its referred to as LVT, Luxury Vinyl Tile. Generally its ALL most commonly referred to as LVT but I simply refer to them collectively as LVF. Lately, we’re sourcing them for primary residences, cottages and seasonal home projects alike.

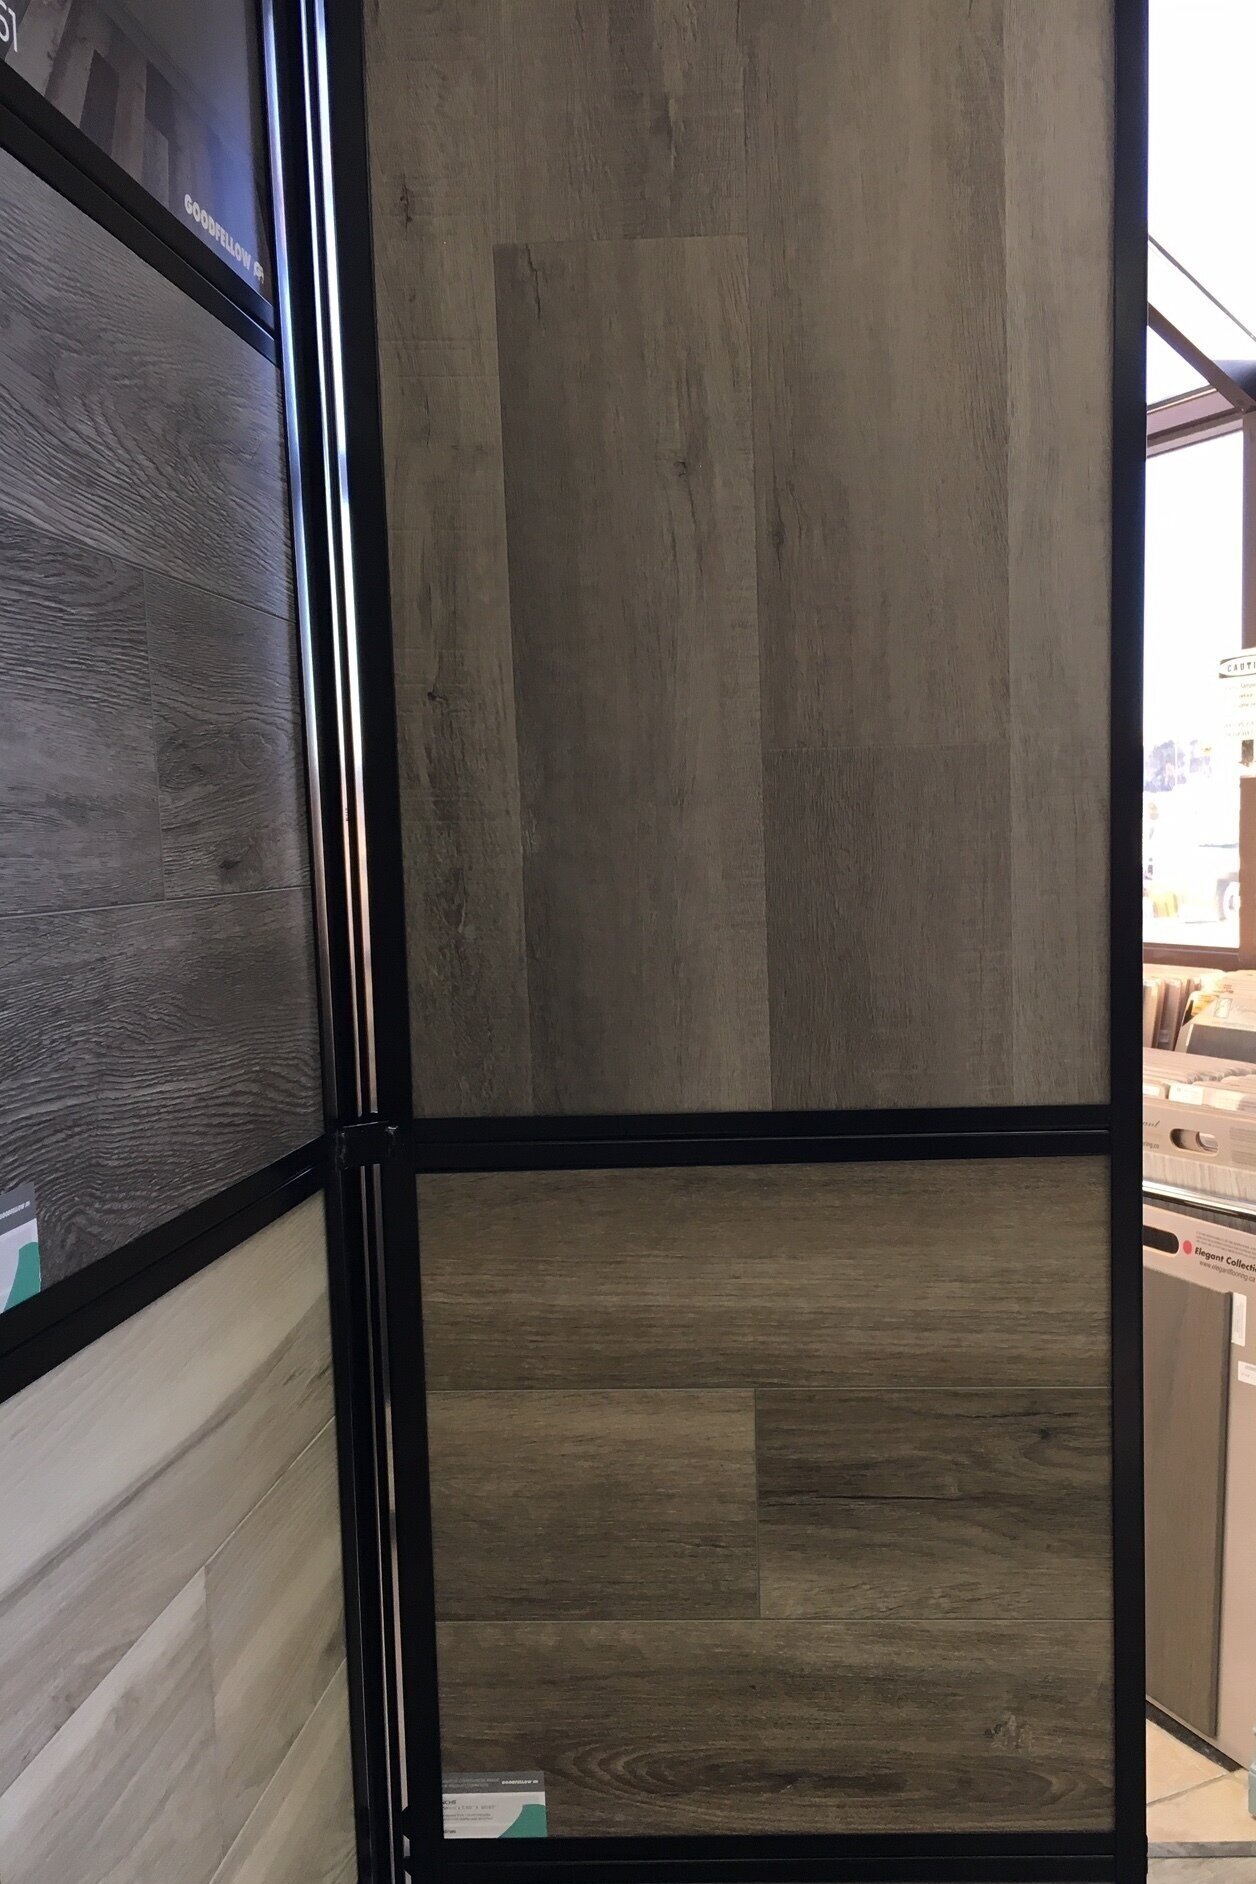
Example of an engineered Luxury Vinyl Tile Installation in progress on a different job site earlier this year. Ceramic look LVT by Armstrong Flooring.
LVT: standard VS. engineered
STANDARD = GLUE DOWN: Standard LVP and LVT are glue down installation, they have a bendable vinyl core with a composite backing (usually made of recycled material) to facilitate glueing to the substrate. LVT products also have the option of adding grout to enhance the tile look. This standard category also includes self-adhesive varieties, and some loose lay types.
ENGINEERED = FLOATING: Engineered with a rigid composite core and attached underlayment (pad). The edges are tongue and groove so they click and lock into place, designed to be a floating installation (much like real engineered wood flooring) but adhesive can also be used for added stability. Engineered planks/tiles are generally thicker than standard LVT. The thicker the product, the more added stability and comfort underfoot.
My descriptions above may differ slightly from mfg’s categorization, you’ll find some hy-brid types which are a cross-over between standard and engineered but in general the two main types of LVT are glue-down, or floating.

RIGID CORE: SPC & SWC
Engineered vinyl planks/tiles have solid rigid core’s made from either a stone plastic composite SPC, or a wood plastic composite WPC and topped with a durable wear layer. These make the tile extremely hard/resilient, SPC are in fact as hard as a stone tile, while SWC are less hard.
thickness: what to look for
Each product will have two thicknesses noted on the label or specs, the total product thickness and the wear layer thickness.
PRODUCT THICKNESS: is measured in mm, ranging from 2mm to 12mm for residential products. The thicker the product the more stability and comfort under foot.
WEAR LAYER THICKNESS: typically measured in mil, but sometimes mm (ie; 0.5mm). Wear layers range from 4mil to 20mil, 20mil being the highest standard for residential, 28mil+ is commercial grade. 8 - 12 mil is suitable for most residential applications.
QUALITY: ITS ALL ABOUT THE WEAR LAYER
With the huge range of types and quality of LVF, you simply get what you pay for. In both glue down and floating (locking) grades the thickness of the actual plank or tile is not necessarily what reflects its quality. The key difference in quality is the wear layer thickness. The wear layer is what protects the digital pint image and is what what gives the product is durability (scratch resistance, dent resistance, etc). The thinner wear layers scratch easier and show wear much sooner than a thicker wear layer so factor that in to your choice for high traffic areas.
Here’s a look at 3 different manufacturers that were available at a local flooring dealer as an example of the styles available.
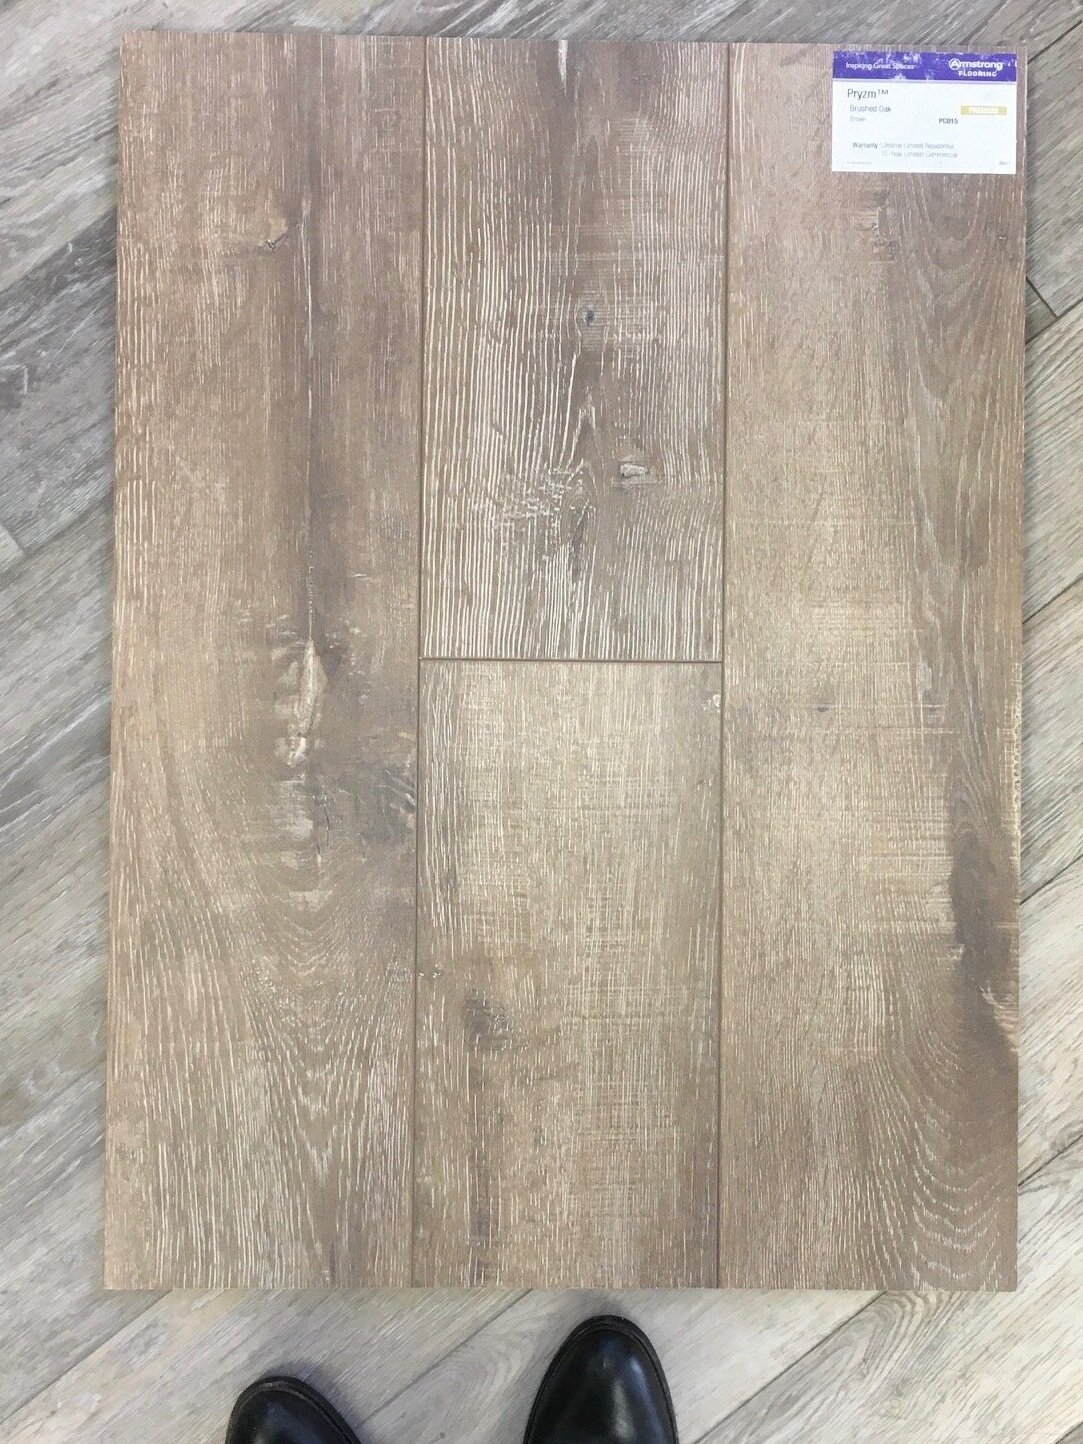
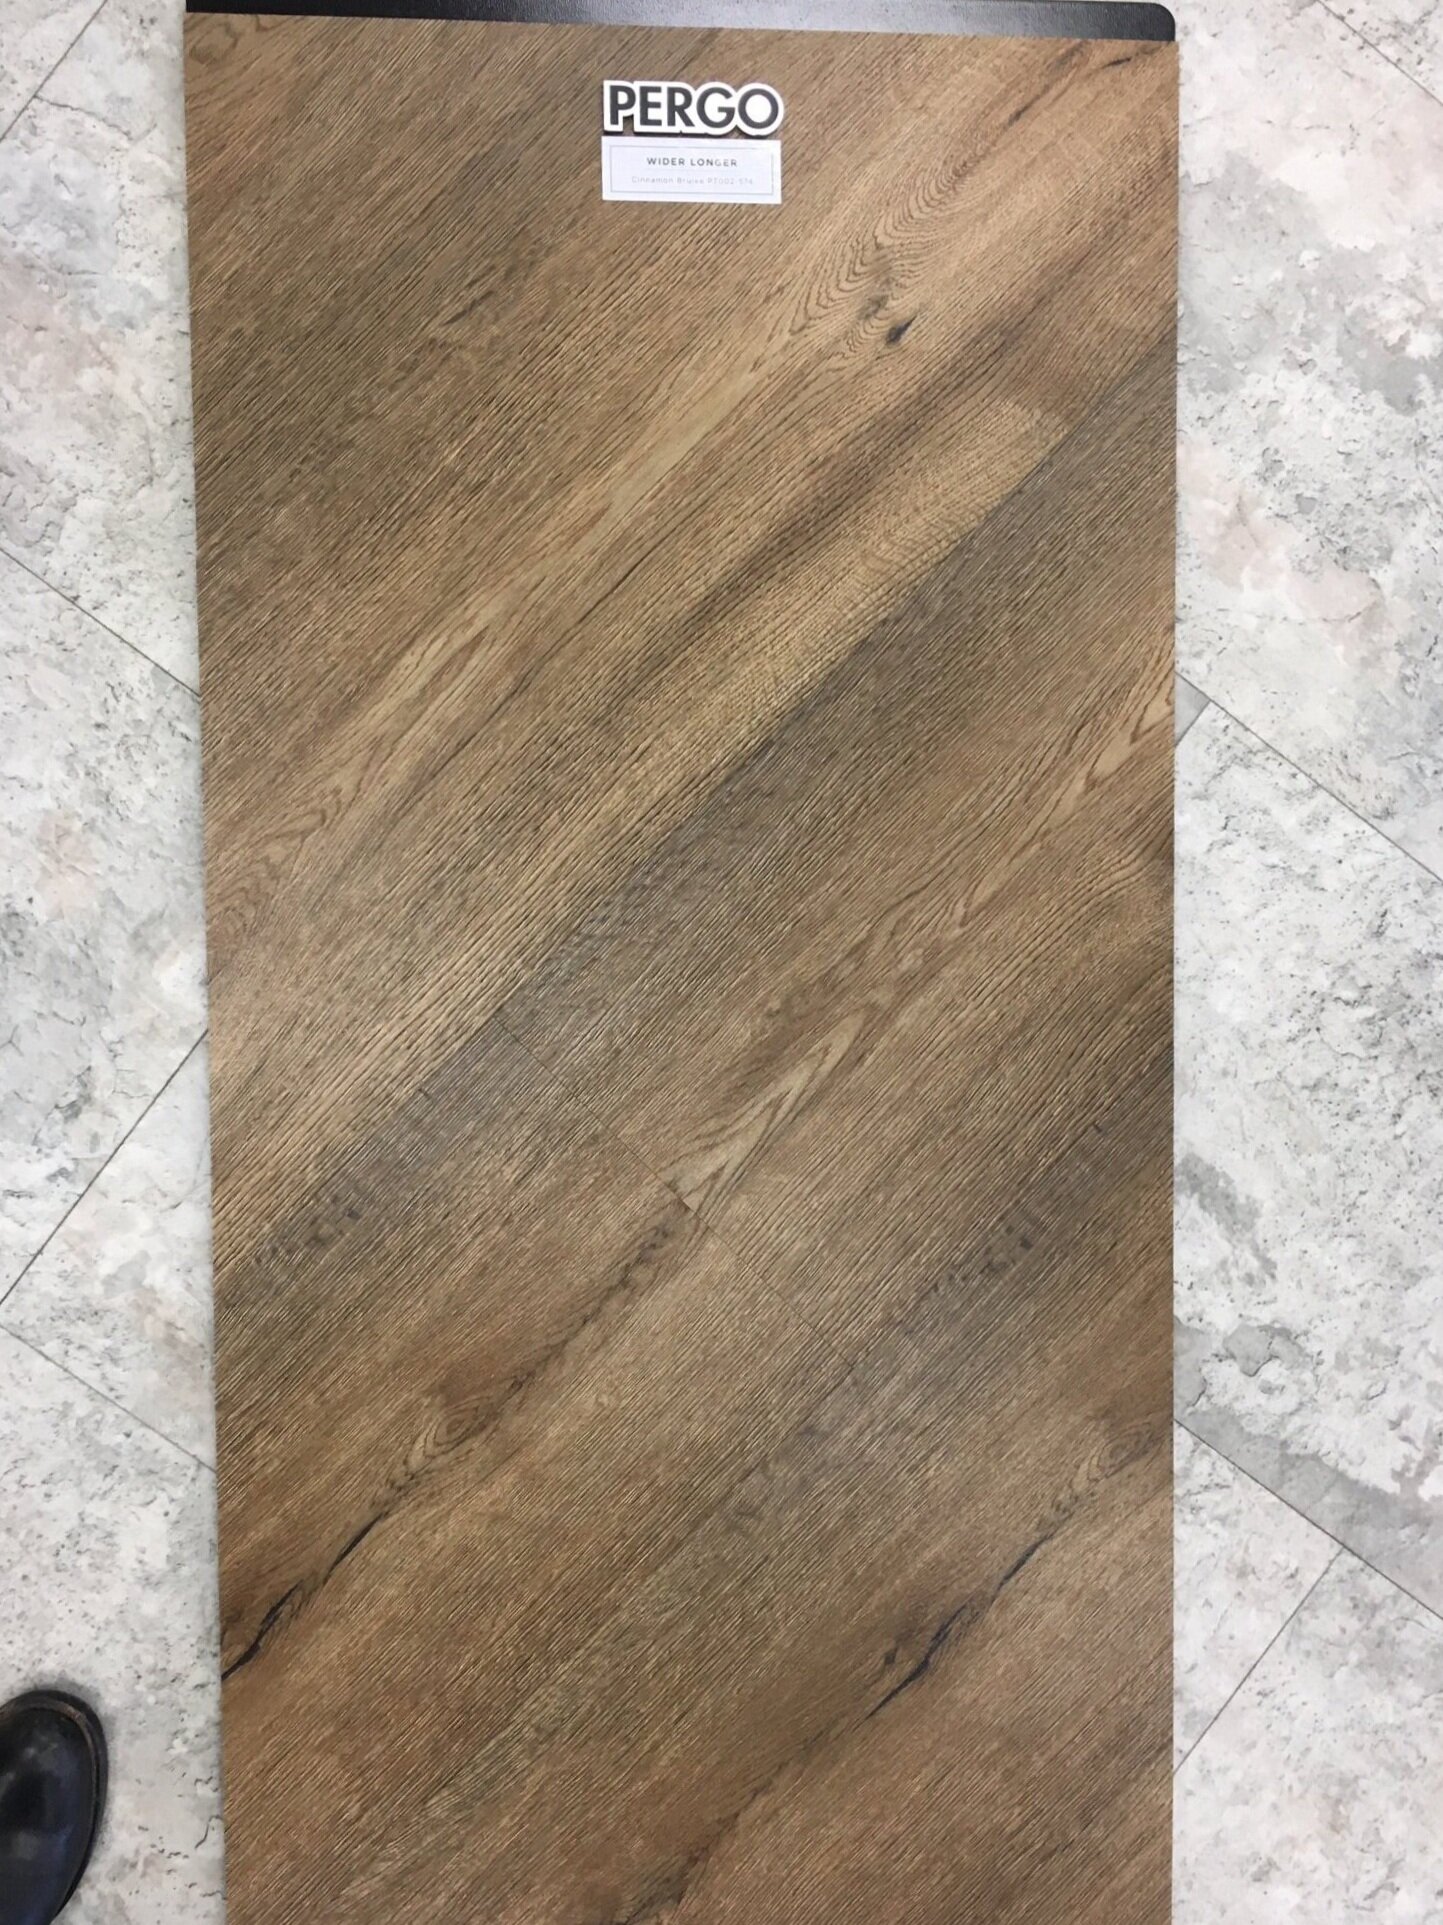
All of the above options are an engineered LVP , with rigid stone cores and locking installation. Retail pricing ranged from $3.05sf to $6.99sf. (all had wear layers of 20mil or higher).
Although I found more than one option that could work perfectly at this new build project they ultimately didn’t go with any of these due to delivery lead times. (I mentioned time wasn’t on our side!) So we selected an in-stock option form a local building centre to keep things moving along on site.

A few boxes of samples were brought to site and this was the final selection. Its a locking (floating) LVF and while it still has a subtle weathered grey effect it has a lot more natural wood tone in it than the original samples the client had selected. Its lighter, warmer, without having yellow or orange tones and the variation in colour will make it very forgiving.

Sampling paint colours for the stair treads.
Here’s a look at the vinyl install in progress and a peek at the staircase finishing. It ended up having more colour variation in it then we anticipated even after dry-laying a sample box but we were still really happy with it knowing what other finishes were still to come. For the stairs, a much consideration the client opted to go with painted treads and risers instead of leaving them natural hardwood. We tested several coloured paints for the treads which will be topped with a bright colourful rug runner. More on the interior paint palette in an upcoming post.

Here’s a sneak peek of the flooring install in the kitchen several weeks later when the cabinet install was in progress. More about the kitchen and that fabulous huge awning window (it opens up to a bar counter on the exterior) in an upcoming post.
WHERE TO BUY
Available everywhere flooring is sold, certain brand names are only available through authorized dealers. If you’re investing in a large quantity my advice is to select from a product line available through a local retail dealer, I prefer the retail dealers rather than a big box store because they’re better informed and you’ll get a higher level of service, including installation co-ordination if you need. Any retail flooring dealer will have at least 3 or 4 different mfgs product lines to chose from. Compare the specs versus the level of durability you need. Borrow the large samples and view them in your space or better yet go online and order your own free sample from the mfg and put it to the test at home.
DIY
Ultimately the quality of the product performance is dependant on a quality install. I don’t recommend DIY’ing the engineered products. Proper preparation of sub-floor and allowing for expansion/contraction is critical and the rigid cores can be difficult to cut. These should be installed by experienced installers.
WHEN TO CHOSE LVF
The stone and ceramic look vinyl tiles are a great option for those who don’t want the hardness or cold feel of real tile in their kitchen or bathrooms, but desire a higher quality look than regular vinyl. And no worries of tiles cracking!
Personally, I’m loving the possibilities of the wood-look LVF, but its not a substitute for real wood nor is it simply a less expensive wood alternative. Higher quality LVF is comparable in price to hardwoods. Real wood has an elegance and distinct warmth and every single piece has unique original character - that simply cannot be duplicated in an LVP. Like it or not real wood will age and show wear over time, some people desire this character and embrace it over its long lifespan. While the luxury vinyl is a near dead ringer in looks, its super powers are in the mfg advancements which make it a durable, waterproof and low maintenance option for areas where real wood wouldn’t be suitable. So if practicality is your priority then LVF is a great choice.
For more than you ever wanted to know about LVF for your residential projects, including recommendations, download this handy reference guide I’ve created for my clients.
Or Pin this for Later!

This post is not sponsored nor associated with affiliate links. All opinions are my own.