My House

Framing Pressed Leaves


Each June the huge chestnut tree on the front lawn of our East Coast house in Nova Scotia puts on a spectacular show.  Spring arrives late in the Maritimes so its usually June before its gigantic leaves open up, and then immediately after, the cone shaped blooms appear.  This majestic old tree has a huge canopy that reaches low to the ground and spans at least 30 feet wide and when its at its peak by mid-June, its a stunning sight, between that and the sprawling lawn it creates a view of brilliant green out all the front windows.  Sadly the white blooms on the tree barely last 2 weeks so I try to enjoy every moment of them while I can.  I'm really not into DIY posts on this blog but I wanted to share this small project which I just did for my own house because it was so easy and turned out so beautiful.


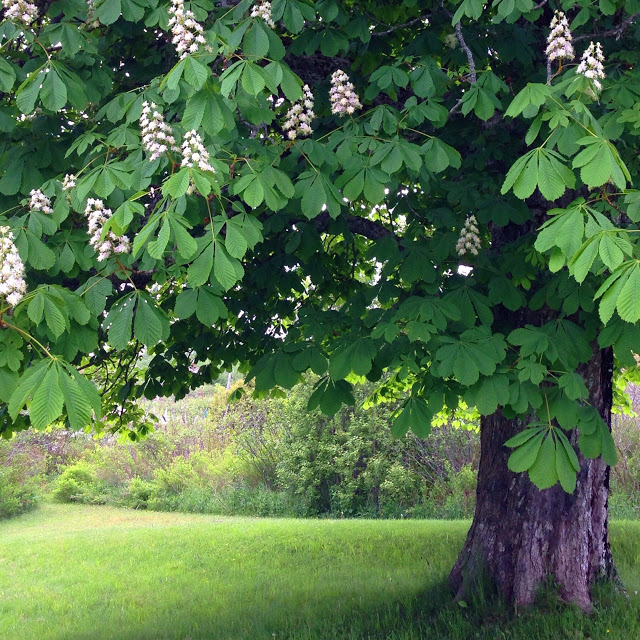
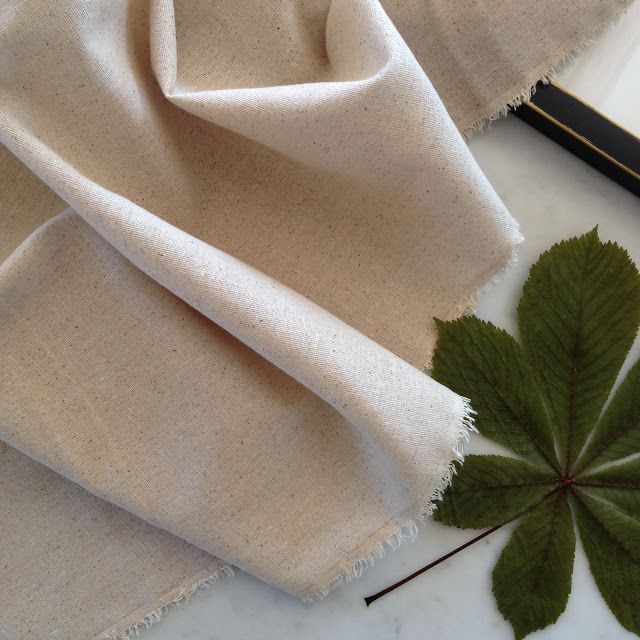
This species is known as a horse chestnut tree, the leaves are enormous with five or seven petals, they kind of have a tropical palm-like vibe to them (which is probably why I love them so much).   Last June when the tree was blooming in all its glory, I was inspired to preserve its beauty somehow as I'm so in love with this gorgeous foliage.  I've always had a passion for natural elements and found objects that I always come home from a walk or outing with my pockets full of rocks, shells, branches, bark or anything I find to be beautiful or interesting.


The idea of framing these chestnut leaves had been in my head for a long time so last June when they were at their peak I decided to give leaf pressing a try.  I absolutely love botanical prints and have installed them in client's homes but I've never pressed leaves before so this entire project was/is an experiment. I picked about a dozen or so perfect looking specimens hoping that at least a few of them would turn out.  BF quickly made a press for me using multiple layers of plywood, I carefully placed the cuttings between sheets of cardboard and paper towels layered between the plywood, we clamped it all down and let time do its thing.  After about a month or so I took them all out and moved them into flat drawers where they stayed until just a couple of weeks ago.  

My plan was to hang a series of botanicals in my new kitchen and finally ….. finally (!) a year later as the kitchen is slowly finishing up, I was ready to get these leaves framed!   After a lengthy search for some affordable ready to hang frames I decided on these simple black gallery frames from Walmart that I found online. 


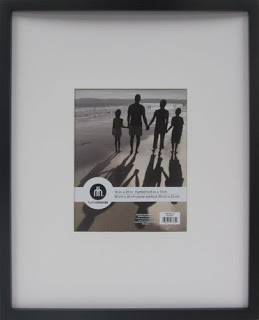
Black Gallery Frame 16 x 20

There are very few retail options available in Nova Scotia outside of Halifax, and I'm sure anyone who lives in rural Canada can relate - basically your in-store shopping options are Walmart, Canadian Tire, Home Hardware, the grocery store and the drug store.  Online shopping is great but there's always a 2 or 3 week wait plus exchange rates and shipping charges,,,and as I was experimenting here, I really wanted to be able to try one first before purchasing 9 of them, and I also didn't want to drive 3 or 4 hours to purchase one trial frame.   I considered Ikea's Ribba frame which I've used many times but it wasn't available to buy online in the size I needed and ultimately I really wanted something a bit more traditional. My search didn't net too many options on that front though so on my next visit to the nearest Walmart (its the only place I can get the cat food my diabetic cat likes, so I make regular trips) I checked out the frame in person and decided I could make it work.  They didn't have the size I needed in stock but the best part was, I could order them online and they arrived at my door in 4 days, free shipping.  (note, this is not a sponsored post, I'm just sharing the facts and also, I had no idea you could shop on-line with Walmart).


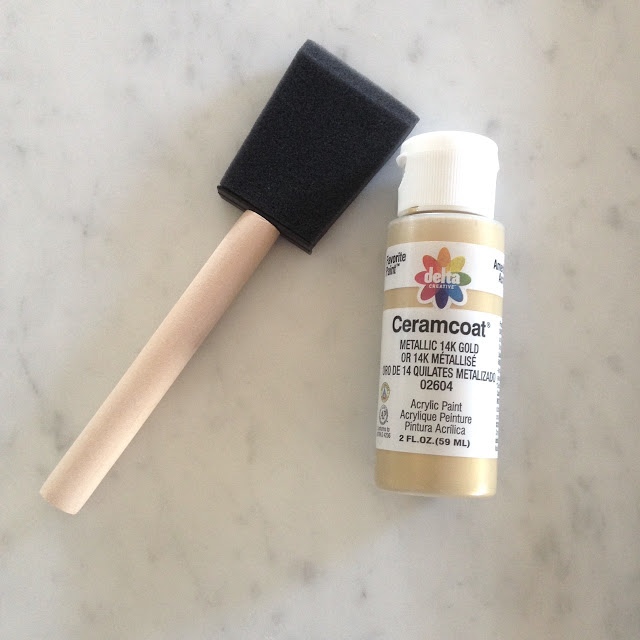
Because I didn't really want a modern frame, I also purchased some gold metallic acrylic paint, again, from Walmart, so I could experiment with making the frame look less new, less modern.   I used a foam brush to apply the gold paint along the inside and outside edges of the frames by just dipping, dabbing off excess, then dragging the brush up and down the edge.  It just took that *new* off the shelf department store frame and made it look a bit more like a custom frame moulding.  


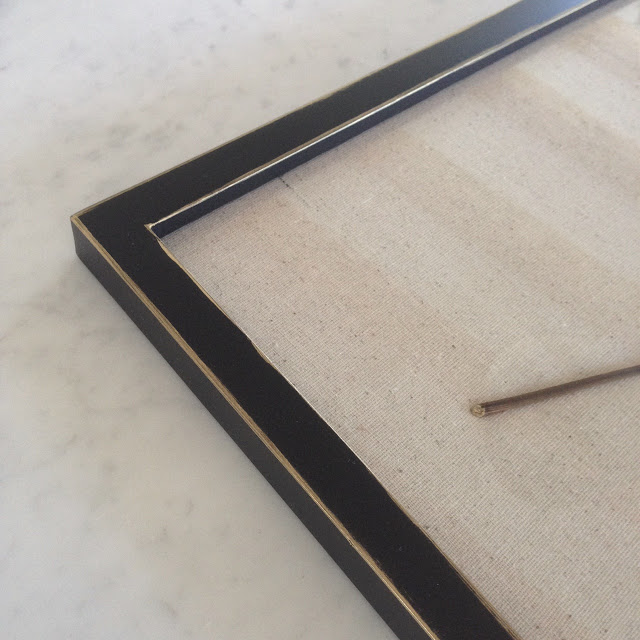
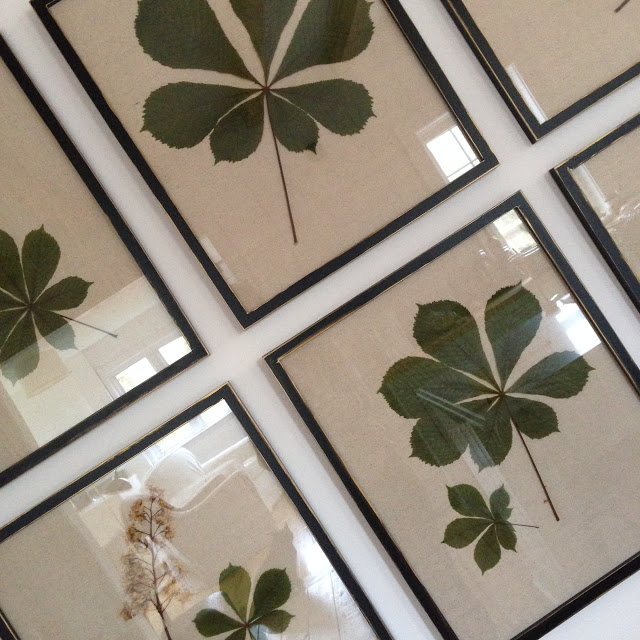
The hand painted gold edge gave the stock frames an aged look and I loved the effect.  It took about 15 minutes to do all frames.  (The fabric looks like it has stripes in this photo but it doesn't, its just the reflection of the beam ceiling seen on the glass)


The frames came with a fairly nice, wide white matt but I knew I wouldn't be using them, partly because the leaves were so huge and partly because I had envisioned them mounted on borderless sheet of watercolour paper or a linen.  On my next shopping excursion I found a wonderful linen fabric at Atlantic Fabrics (which is the maritime equivalent of Fabric Land).  I needed 2 yards and it was only 7.99 a yard, easily affordable for experimenting with.  To make the linen mats I took the backs off the frames and used the backing as a template to cut fabric rectangles, each slightly larger than the frame. Then I pressed each piece of fabric using starch.  To mount the leaves I simply removed the contents of the frames and placed the leafs right side down, directly on the glass, then I carefully laid the linen overtop and proceeded to layer the original mats and all the backing back into the frames.  I didn't use any glue, tape or adhesives, the fit was very tight and everything is held in place by pressure.


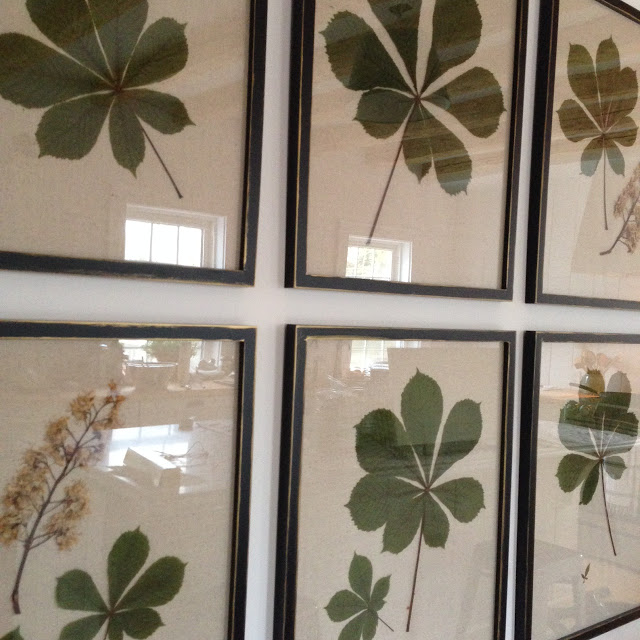
Here's a sneak peak of the collection in progress.  I was able to use all the frames I pressed which filled 6 frames but I'm planning on pressing some ferns and wild flowers this month which I'll add to this grouping later in the summer.  I should point out the glass is regular glass, its not non-glare and its not UV glass which means they shouldn't be hung anywhere that's exposed to direct sunlight or the fabric and leaves will be effect by fading.


If you're looking for a super easy, fun and inexpensive way to create some personalized (and beautiful) wall art this is a wonderful way to display some of your prized specimens from your own garden or keepsakes from a favorite destination not to mention a great project to do with your kids.  Anything that grows can be pressed - flowers, leaves, herbs, moss and you can mount them in so many different and interesting ways.  I'm so thrilled with how the chestnut leaves turned out, I already have the press ready for some ferns and wild flowers but after that, what I really can't wait to try is a series of seaweed which is plentiful on our beach and just a great excuse to go for even more beach walks.  


All Pohtos:  Carol Reed


Easter Lilies


I have a growing collection of vintage crocks, I pick them up whenever I'm out antiquing because not only do I love the putty colour of their glazes, the number of uses for them is as countless as their sizes.  I keep several in my kitchen and I use them for putting fresh herbs in from the market,,,and holding coffee spoons, utensils and rolling pins.  This size (in the pic above) is my favourite because it always seems to be the perfect size to put a potted plant or some branch cuttings from the yard and it works perfect as an ice bucket in a pinch too.  To be honest I'm not a fan of the typical holiday variety, foiled wrapped potted plants the markets seem to have every season or holiday but I love to receive any type of flower or plant as a gift so when someone is kind enough to gift me with one I love to find a stylish way to display them.  Sometimes I actually cut the blooms from the stems and put them in a vase or multiple single vases but if you have cache pots or a crock this size, pop your plant in for an instant stylish fix, it takes two seconds and doesn't interrupt your hosting duties.

This morning as I was getting things ready for brunch I happen to switch this crock out (to use as an ice bucket) but I had a cache pot handy that is almost the exact same size so it was a simple swap that looks equally as beautiful with the Easter Lillies.  (This blue and white pot is perfect for potted orchids too which is the main reason I bought it a few years ago.)


Either way, both of these options provided a beautiful place to display the Lillies which were a welcome addition to our Easter weekend and a wonderful distraction from all the the snow outside!  I hope its a little greener wherever you are celebrating your long weekend.

Happy Easter!


All Photos:  Carol Reed


My House: Staircase Before & After


My almost complete, newly renovated staircase.

Upon completion of the first phase of our house reno, we wasted no time in moving our things into the new part of the house but we weren't in any rush to plunge into phase 2 of the renovation just yet.  Living in the house throughout the renovations took quite a toll on us and the cats, particularly our older cat who became quite sick during this time.  So we've spent the past 6 months enjoying a break from the construction as we slowly chipped away at completing some of the finishing work that was left to be done, like some trimwork, painting, and installing door hardware etc.,  We recently finished painting the staircase treads and railing and added a new runner.  There's a teeny bit more painting and touch-up to do on the staircase yet but I'm so thrilled to finally have the staircase at least 'looking' like its finished - its been a long transformation.  Here's a look at the staircase we started with.


Staircase before.
The existing staircase was not original to the house and I'd guess probably a 1980's addition.   It had no redeeming features or character, the railing was not to code as the spindles were spaced much too far apart and I felt the staircase itself was overly wide for the size of the house.  On the second level there is a hallway on one side of the staircase which you can see in the above photo.  We didn't demolish the staircase entirely, aside from the railing system, I worked with what was there as much as possible.  I did however rework the entire second floor layout which resulted in the upper hallway and railing being flipped to the opposite side of the staircase. 

Front hallway and staircase in progress
The one good thing about the extra wide staircase is that it makes for a large closet underneath the stairs, you can see a bit of the old closet door in in the photo above (under the stairs).  A glimpse of the new living room framing can be seen on the right.

Staircase in progress
In the above photo you can see the new wall is now installed on the second floor on the left side of the stairs.  The new staircase railing will go up the right side of the stairs continuous from the bottom tread to the top landing and then continue (with a 180 deg turn) back along the right hand side of the staircase opening above.  I wanted to do this without having a jog in the staircase section of the handrail which posed a bit of a challenge.  (If you look back to the photo of the old railing you can see the spindles and handrail actually terminate at the ceiling - or alternately the railing could have continued if it took a jog around the ceiling at this point.)


Railing install in progress
The knotty pine stringers and risers were painted out white.  New shop painted solid wood spindles were installed along with solid wood newel posts and handrail. I loved the simple elegance of the tapered spindles.  I was fortunate to find Eric, of Rise and Run Wood Crafting, he's a skilled and knowledgable staircase installer who with the help of an assistant completed the installation in a day and half. 

Staircase after, view from the top.
In this view you can see the newly configured second floor hallway located opposite to where it was previously.  The upper hallway is now directly above the lower hallway. What you can't see in this photo is that on the second floor directly above the front door, there is a tall peaked dormer with an original gothic arched window which now falls in the centre of the second floor hallway.  It has brought back symmetry to the floor plan and highlights the beautiful gothic window and drama of the peaked dormer.  I swear I could hear the house breathe a sigh of relief "aaagghhhh, that's better".  : ) Ok, i'm sure it was myself I heard saying that out loud but it really feels like the way the hallway was always meant to be. 

You can also see in this photo above how the spindles are positioned quite a bit inside the edge of the treads but this allowed for the handrail to remain straight (no jog) and the spacing on either side of the runner to remain equal from top to bottom.  A detail I debated with myself at length.  Another challenge was working with the antique wood flooring on the second floor which is 1-1/4" thick. Typically your wood flooring would transition flush with a wood nosing selected to match your flooring.  Since we were dealing with antique wood and a non-standard thickness, I opted to go with a paint grade nosing instead, installed on top of the flooring, not flush with it.  This meant I saved on the expense of having a custom nosing made and it would be a less labour intensive install.  Because its painted white it looks integrated with the railing system and other millwork around the stairs, so it works well.  


Staircase runner install in progress
We added v-groove planks to both side walls of the staircase and coated them in white paint like the risers and spindles.  The same v-groove planks are also used upstairs in the bathroom, master bedroom and closets.  My love for v-groove panelling will never waver....  


Staircase runner install in progress
I chose a durable ready made seagrass runner in a chevron pattern with a black binding, by Safavieh.  I like how the black border adds a crisp contrast against the white risers.  I love how the angle of the chevron echoes the gothic peak dormer on the front of the house and the seagrass suits this casual beachside location.  I ordered 2 separate runners which we butt joined together (bound ends cut), it was installed with a pneumatic gun. This is a thick carpet and very rough to the touch.  I chose this specifically for its durability and practicality for our cats.  One of the reasons I was so anxious to get the runner installed is because bare treads are slippery and dangerous for pets and our older cat in particular was having such a hard time, slipping and falling.   


Staircase After
The treads and handrail were painted a satin finish black.  You can clearly see here how the new spindles are inset quite a bit from the edge of the treads, this is a bit further than where I would typically place them, but I'm not bothered by it at all and I'm happy that I did this rather than jog the railing part way up the stairs.


Staircase after.
This is the view from just inside the living room.  We still have some touch up painting to do on the newel posts and clearly we still need some vent covers for the floor. (!) We're working on some custom wood ones, in the meantime we have to figure out how to retrieve all the cat toys that have fallen down the vent.  


Staircase closet door, after.
 The old closet door was clad in the same v-groove planks to make the door look seamless within the panelling.  I opened the door slightly in this photo to illustrate the baseboard is attached to the door.  Its such a good sized closet you can actually 'walk-in'.


Staircase runner, after.
As you can see Lucy (2 years old) just loves the new runner, as does the older guy who I'm happy to see sprinting up the stairs almost as fast as her. 

I had looked forward to dressing the newly finished staircase with cedar or pine garland this holiday season but a mix up in the shipment meant that we didn't get the correct runners delivered until new years eve.  Sooo,,,,it wasn't meant to be this season but next year I'll be ready with bells on and if all else goes according to plan I'll have a fireplace mantle to dress up too. Knock on wood.

An earlier post on the demo progress can be seen here, and check out this post for a sneak peek at the dining room progress here.


All photos and room design by:  Carol Reed