NYC Family Apartment

NYC Reno: Progress & Boy's Bath


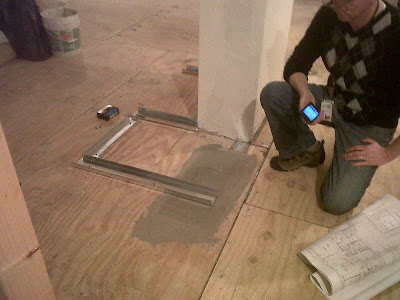
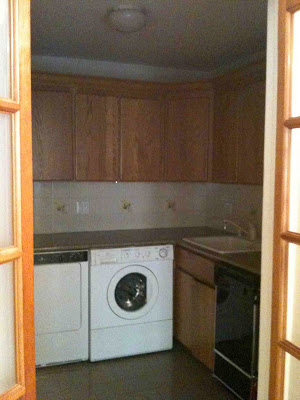
The past couple of months construction on the NYC family reno project has been moving along at a rapid pace.  I've painstakingly overseen the precise placement of plumbing and electrical rough-ins, in some cases we were scrutinizing 1/4 inches.   More recently, over the past two weeks I've overseen the stone tiles being sorted thru, picked-out and installed.  The paint samples are about to go up,,,,kitchen cabinetry is being installed and very quickly, very suddenly it all seems like the entire home is coming together all at once.  Its visible, tangible progress for the clients when all the 'beauty' starts appearing, a major turning point in this long process.

There are 3 bathrooms in this "3 apartments into 1" conversion, however, the tiny footprint of each of the original bathrooms had to remain as is.  These compact size bathrooms consumed an unimaginable amount of time in planning out the details to the precise inch.  On top of that, sourcing vanity/console options that are no larger than 18" and trying to maximize storage when recessing niches or cabinets into the wall space was limited - it was a challenge!

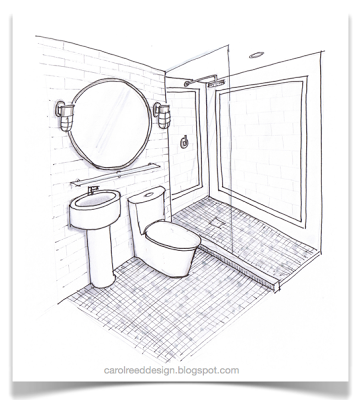
The most challenging of them all for me was the Boy's bathroom.  It's original layout had a tub/shower unit which we would replace with a walkin shower.  What you can't really see clearly in these concept sketches is that the room has quite a few jogs, including a dropped bulkhead in the shower not depicted in here at all.  The clients desire was to do this bathroom in all ceramics or porcelain tile. Not usually my preference especially when the cost of the ceramics or porcelains can be equal to the cost of a marble.  I recommended we do a marble mosaic floor tile paired with a simple ceramic on the walls.  Just that bit of marble would add a luxe edge along with texture and pattern.  I'm not a fan of decorative tile borders and inlays or using a multitude of various tiles in a bathroom for the sake of adding some 'wow'.....an approach I find just too decorative and trendy.  I think the tile should provide the basic bones to the space, evoke the vibe you are going for and add a sense of long lasting quality.  If using a ceramic, I go for timeless white or colour block an entire wall in an accent colour. If you use a natural stone, the statement is simply in the stone itself, no enhancing needed, leave the decorating to the towels, accessories and artwork.  A common exception I make is the use of a contrasting band or pencil liner.


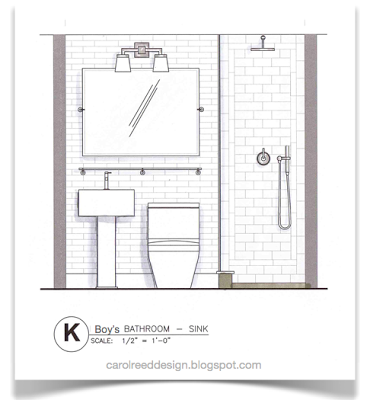
The sketches shown in this post were really really preliminary and done at the concept stage waaay back in August of 2011.  (For this post I've stripped them of dimensions and notes.)  The intent of these was to illustrate to the client how we could use a basic and classic ceramic tile shape but still add some detail.  We considered doing a combination of a dark blue vintage style (handformed, crackle finish) 2" x 8" floor to ceiling wall tile behind the sink and toilet, then tiling the shower walls in white field tile with frame borders in the same blue tile.  Even though they had told me they didn't want 'subway' tiles, they really loved this. (variation of this above and below)


There is a jog in the wall where the shower glass screen is so this provides a natural transition spot to change to a different wall tile inside the shower. A small carrara marble mosaic floor tile is continued thru to the shower floor, the shower sill would be carrara slab, on the wall not visible is a recessed soap niche also made of carrara slab and outside the shower is a full height small storage closet. Completing the space is contemporary plumbing fixtures and vintage style lighting.


One of the most common apprehensions clients have is floor to ceiling wall tile.  I personally don't understand the resistance, especially in a bathroom -  and true to that these homeowners were uncertain about taking the tile all the way to ceiling behind the sink so the final decision was half height.  


Months later when all the final specs and detailed design drawing were completed I can tell you the final design is not like ANY of these concepts!!!  ; )  You'll have to visit again to see sneak peaks of the installation.  You'll see we ended up with a modified version of this last sketch above, except we're going with a different type of sink all together and we're using Select White Thassos marble on the walls. ( The sink and toilet will also be in the reverse location.)


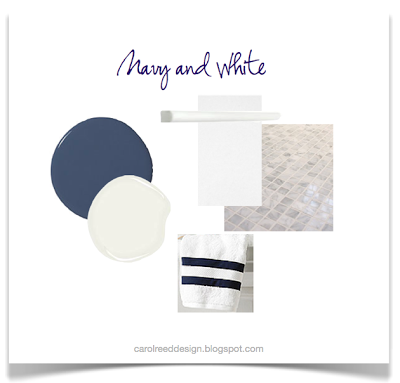
This young boy's bathroom will exude the fresh classic crispness of navy and white. Whatever walls are not clad in white tile, will be coated in a deep navy paint. All the polished chrome will sparkle against it and the white will look extra fresh.  What I love most about this foundation is that navy is such a 'neutral' you can chose from a myriad of accent colours for your accessories be it yellow, purple, green or red.


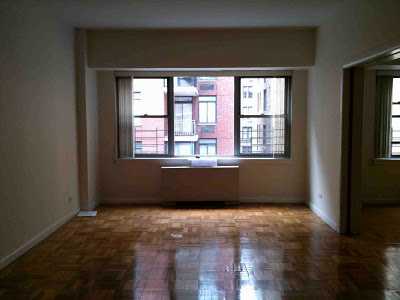
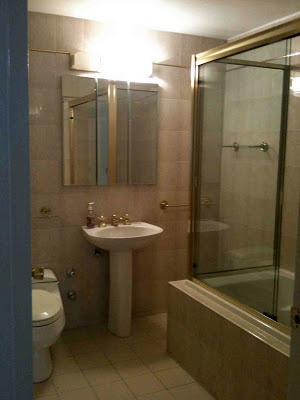
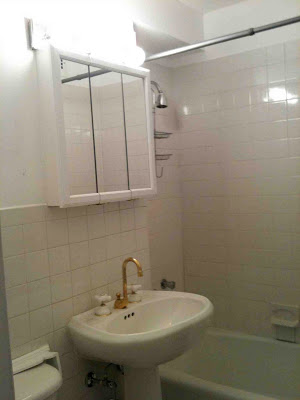
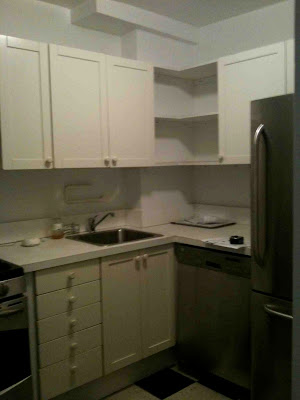
Check out the full back story and before photo  here.
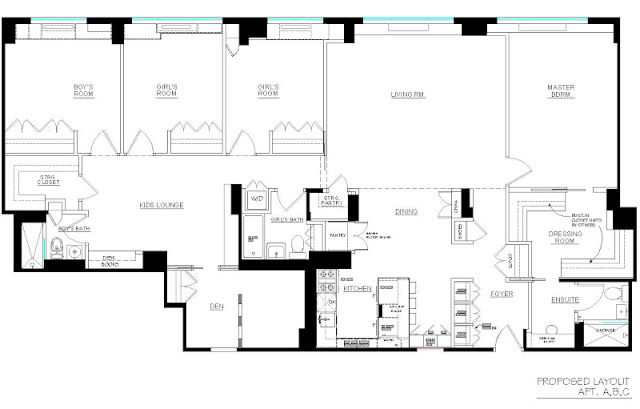
See the before and after floor plans 
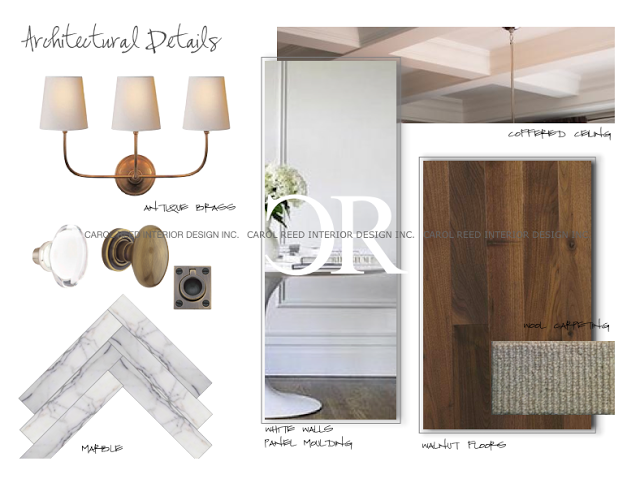
and my concept for the architectural details here.


All Drawings by:  Carol Reed Design


NYC Reno: The Family Plan


I started working on this renovation project in New York City last June, the scope of work was extensive as it involved converting 3 adjoining apartments into one single family residence. (Check out some of the before photos and my introduction of this project here.)  At the very onset of a project I usually formulate a vision for the bones of the space very quickly.  In this case, my clients who are parents to three young kids were in synch with this vision, represented in the collage above.   Timeless elements like natural wood and marble, fresh white walls with panel molding for classic character, fixtures with clean simple lines and vintage patina - would become the backdrop for this family's busy city life in the Upper East Side for the next 20 years or more.  It reflects their affection for tradition but will exude a young and modern edge, just like them!

The 'Before' Plan


The existing three apartments had tiny enclosed kitchens and equally small bathrooms.  The biggest challenge in redesigning this space, aside from ALL the structural elements that couldnt' be moved, were the rules of the building.  It seemed the more layouts we came up with, the more the rules changed.  No problem.  I can design around anything - I was coming up with new layouts as fast as they were coming up with more rules.  : ) After weeks of marathon space planning the conclusion was -  NO kitchen or bathroom could extend beyond their existing footprint, NO plumbing drains or appliance locations could be moved, AND no additional bathrooms could be added.  Uh huh.  Did you look at the existing plan?  Soooo, Carol, good luck getting that dream kitchen into a closet, scrap the luxurious Master ensuite with double vanity, and forget about the convenient new powder room off the foyer.  : /  Discouraged yet?  My clients were.

I"m not gonna lie,,,the decisions from the Board were crushing to the homeowners.  As more and more restrictions were placed on them, they doubted whether this space could ever come close to suiting their needs no matter how extensively it was renovated.  Thoughts of scrapping the entire reno entered their minds,,,,,, until they found this plan in their inbox. 


The Proposed Plan


At first glance this plan may not look super impressive, but this really was a triumphant success. We have a 'spacious' open concept kitchen!!! A decision was made early on that the kitchen in the middle Apt. B would be the new kitchen, and the main entry would be thru Apt. C, this allowed for a split bedroom plan.  All good, except the kitchen in Apt. B had a column in the middle of it and no where to put a fridge if we took down the walls.  (It was so space challenged the existing kitchen only had an 18"wide dishwasher.)  

Two key elements allowed this plan to happen,,,,,,,#1 we were permitted to move the washer/dryer out of the kitchen to a closet within the footprint of the main bathroom, and #2, even more crucial - under counter refrigeration!!! I've been using under counter refrigeration for about 10 years and it's been the 'hidden' key to many successful kitchen redesigns.  I was able to place 3 fridge drawers and 1 freezer drawer in the peninsula, equivelant to a standard fridge.  All plumbing and appliances remained within the footprint of the original kitchen = Board approved!  The compromise as you can see, the column is still there and it falls right in the middle of the peninsula - but that's one small compromise in exchange for this expanded family style kitchen.

When my clients received this plan the single sentence response I received by email was "you are my hero"!  An exaggeration, a wee bit ; ) yes, but I was thrilled they liked it.  They loved it.  For me it was so satisfying to know I was able to help turn this space into everything they had hoped it could be instead of it becoming their biggest disappointment.  That's the value of design.    


Custom Details & Elevations


This plan indicates where all the custom built-ins and custom details will be located and identifies all the new interior doors.  Well planned built-ins and well appointed doors will take advantage of every square inch and integrate awkwardly placed obstacles into useable space. 

What I love most about this new layout;  the open concept kitchen lets mom interact with the kids and benefits from the natural daylight, the dining table can extend into the living room when needed, the master gets a luxuriously large dressing room and the kids have a separate lounge area, in fact the entire kids 'wing' can be closed off from the main living areas whenever the parents chose.  To make the most of a tiny master ensuite I created a spacious vanity area outside of the bathroom which will be finished in the same materials as the bathroom so it all reads as one larger space.  There's a lot of great features packed into this 2200 sf home.  A 4+ bdrm, 3 bath plan - in manhattan,,pretty sweet.


Preliminary Furniture Plan


This is how this new family apartment will be used.  To help clients visualize if the proposed layout will meet their particular requirements I draw up a general furniture plan so they can see if that king size bed will fit or how many dinner guests they'll be able to seat.  The furniture is generic and except for sizes, the pieces are not specific unless the homeowners have existing items that must be used.  Otherise I create a generic layout like this which then becomes the basis for the electrical and lighting location plans.

Each of the kids rooms will have built-in desks with storage and the Den will do double duty as a home office and guest bedroom, we'll be creating some open niches and shelves into the dividing wall in the Den but unfortunately it can't be moved. 

 All of the Interior Design plans were completed last September and construction started on site about 4 weeks ago.  Currently I'm finalizing the paint and wallpaper specs (yes there will be some colour and pattern!) and dealing with the daily issues and changes that come up.  That's the nature of a renovation,,,,expect the design plans to go thru a round of changes after demolition is completed.


Like the change to this small hall closet that apparantly will be even smaller due to the unexpected size of the column. yikes.  That's the contractor, with a set of my drawings, explaining to the homeowner why this framing is not jiving with my plans...  


I'll take you thru the design plans for the kitchen and the individual bathrooms in future posts. 


All images, drawings and photos are the property of Carol Reed Interior Design Inc. and may not be reproduced.


New Project: NYC Family Apartment


I can't even begin to describe how wonderful my newest client is and how excited I am to be designing her 'new' family home, a 4 bedroom, 4 bathroom apartment in the Upper East Side of Manhattan.  To say I'm 'excited' is an understatement actually,,,it is a privledge to have the opportunity to redesign a family home, its the ultimate for me - creating the partition layout, planning out the kitchen, designing the bathrooms,  determining how the spaces flow from one to the next, how the rooms relate to each other, how they'll be used and how the family will interact with each other and their guests.  Selecting all the materials and finishes, designing all the special details to reflect their personality and style is truly a joy for me and every moment, every step of the way I envision the family's day to day activities and even more so (!) I envision, down to the smallest detail, all the special time they will enjoy in their home with family and friends.  Enhancing the function of these mundane daily routines as well as all those special occassions informs every design solution and decision.

Although this is a first for me, designing a home located in NYC,,,the design process is really no different than any other.  The family requirements and needs are very much the same as any family and the space challenges are similar to those faced by anyone living in small urban homes.  Some might not call a 2200 sf apartment in NYC small,,,but for a family of 5, with no outdoor space, no basement, no garage and frequent out of town guests,,,,it can quiet easily feel small - every inch is precious.


The street view


What is unique about this project is that the project involves combining 3 individual small apartments into one large apartment suitable for a young family of 5.  Of course being a high rise building there are the usual concrete floors and ceilings to deal with and the typical awkwardly placed obstacles like columns and plumbing stacks, intercom panels and such that can't be moved, these are expected and come with the territory.  I've never met a column or a vertical chase that I can't work around, in fact I ENJOY the challenge, they demand creative solutions.  In this building what's even more of a challenge is their strict wet over wet regulations, meaning you must keep all plumbing fixtures located in existing wet zones (ie; kitchens or baths must be installed over and within the footprint of another bathroom or kitchen only).  This makes it a bit challenging to expand the size of a bathroom or kitchen,,,imagine the existing bathrooms and kitchens designed for small 1 bedroom apartments are the size of closets so they obviously don't fit the needs of a larger family home.   But even that,,,,even that challenge I'm confident can somehow ingeniously be solved.  What's MORE of a challenge than all of the above, is actually getting your proposed plans approved by the Building Management.

Its been over 4 months since the homeowners made their first drawing submission to the board for approval, via an Architect, (long before i was on board) and many versions, concessions and submissions later,,,,they haven't made much progress.  The board hasn't approved what's been proposed to date so I'll be attempting to rework the plans and come up with some solutions that hopefully will meet with their approval,,,and are still functional, you know for a family of five as opposed to 3 bachelors.

To get this project started I flew to NYC just a couple of weeks ago to meet my new client for the first time and see the apartments in person.  We discussed her vision for the space, her style preferences and all of her family requirements and we were completely on the same page - a great place to start!  I had a good visual of the space already as I had a set of plans and had already done some space planning, primarily I wanted to see the space to verify dimensions and document the existing elements I'd need to work around.   The apartments are in a 1960's building and all three of the units are in fairly original condition with the exception of one unit that has some 1980's upgrades.  Yikes.  Kudos to my clients for being able to see the potential in these 3 separate units.  Without a doubt the location was the main selling feature - and its stellar, situated in the mid 80's between Park Ave. and Madison.  Below are some pics I took of the space.


Windows are all along one side of the apartment(s) and this is the typical scenario.


The ceiling height is a nice 9' throughout most of the units.


One of 4 bathrooms, this is the most updated of them all.  Despite how 'trendy' blush tones and brass are right now, this unquestionably screams 80's.


There is one other bathroom just like this and a fourth (master ensuite) that will be created in what was once a kitchen.


Bulkheads everywhere, this looks like a big closet until you open the doors.  This space under the bulkhead will actually become a desk in what will be the childrens play area.


This is one of three kitchens, and it will be completely removed.


This existing kitchen will become the new kitchen, the intent is to open it up and expand it, however, the 'suggested' expansion plans are not going over so well with the Board.  : /


The biggest obstacle of all is this very large column which houses telephone cable and the electrical panel and it falls right smack dab in the middle of the proposed new kitchen.   Its not visible in the kitchen photo above, its on the direct left of the doorway.


When I look at these photos I can't help but feel overwhelmed with excitement about what an enormous transformation this will be.   To take an outdated and depressed space and turn it into a beautiful home full of life and love is a definite thrill for me.  I can't wait to show you the plans and the "New Traditional" design direction we're headed in.

At this point we're awaiting another pending decision from the Board which will determine whether the Architects proposed solutions to expand the kitchen area and master ensuite area are a go (waterproof membrane and exhaust issues), if not, I've prepared several alternate layouts that we'll fire right back at them.  If none of those plans meet with their approval, I'll need a magic wand.   


All Photos:  Carol Reed