Dealing with Obstacles


A rough 3D sketch helps clients decide how to deal with unexpected changes

Despite how much preplanning and investigation is done prior to embarking on a renovation, you don't really get a true picture of the extent of new work required until after the demolition phase.  Often after the demo you'll discover structural or mechanical elements that need to be worked around or beefed up.   Quick decisions have to be made on how to deal with these obstacles without adversly effecting the design, the budget or the schedule,  but it can be difficult for clients to visualize how the proposed changes will look.   The quickest way to help them make their decisions is by showing them photos of similar situations or in many cases, I quickly draw up a rough 3D sketch to illustrate a point. 

In this case, I was working with a client on a kitchen renovation and after the demolition it was determined more support was required for the floor above and new beams needed to be added across the kitchen ceiling.   We didn't have much flexibility in where they could be placed which meant they weren't necessarily going to be equally spaced or centered within the room.  There was no space above the ceiling to install these and the homeowners didn't want to lower the entire ceiling, so,,,, since the beams were going to be visible, we had to decide how to finish them.  

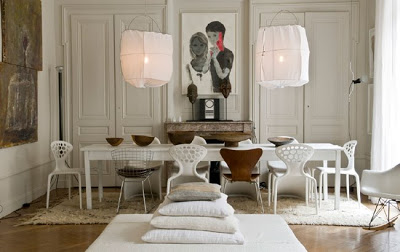
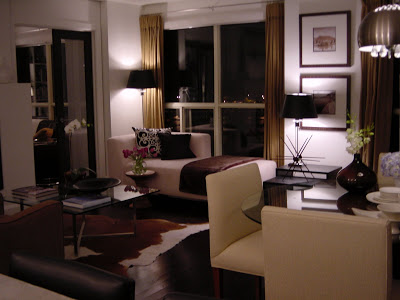
My clients wanted to clad them in antique wood (as the new kitchen cabinets were being custom made from antique hemlock) to create a beamed wood ceiling effect, but I was recommending we just drywall them and paint them out white.  The house itself is a century home but the interior has been renovated in a very pared back modern style with lots of vintage mid-century modern furniture.  The house throughout is white with old wood floors.  The new kitchen design was what i would call a modern-industrial style, a combination of wood, concrete and stainless steel with simple clean lines.   

My suggestion on how to treat the new beams was to just ignore them.  The best way to not draw attention to something - is to make it blend in.  They weren't completely convinced and thought it might be a good opportunity to add more interest to the kitchen by making the beams a feature.    So I did these sketches to illustrate how the contrast of the wood on the ceiling would look.


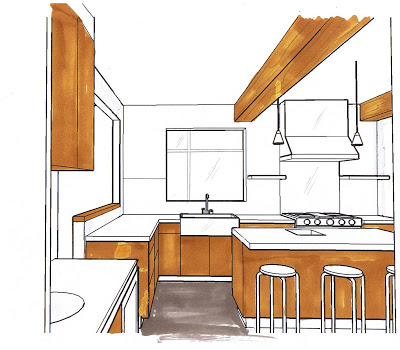
The view from the hallway as you enter the kitchen.

As these sketches illustrate, cladding the beams in wood does two things - it creates high contrast with the white ceiling, and visually it brings the ceiling down.    In my opinion, this detracts from the impact of the understated, cabinetry free wall we had intentionally planned.


View  from the Dining Room

The view from the dining room is a good example of how the wood beams make the ceiling appear lower.  Often people will angst over obstacles like this and worry and stress about how to deal with it, and its easy to waste a lot of time and effort trying to recreate the wheel in attempts to disguise it or over-design it.  

When I'm faced with these obstacles, I deal with them in one of two ways:
 1. Make a feature out of it.  Only do this if you can integrate this into the overall design so it looks like it was always planned to be there, it should enhance the rooms design concept not detract from it.  The size, the placement, the way its finished should not look out of place with all the other elements in the room.
2. Understate it, make it blend in, make it disappear.  It may not be perfect, but it is holding the roof up,, providing you heat or  supplying you with water so its better than not having it at all!  If you look closely at magazine photos in your piles of inspiration rooms, you can spot obstacles treated like this in most rooms if you look for them, but because the room is so fabulous you never even notice it. 

On this project the final decision was made to understate the beams by painting them out the same as the ceiling.  As I promised them, in the end, when the kitchen was all complete they would blend in, become unaware of them and wonder why they were ever concerned about them in the first place.  I'll post more drawings and photos of this incredible kitchen reno in future posts...


Dining - Inside Out

Update July 20th:  I was sourcing some dining chairs for a client today and came across a couple of stunning chairs that are perfect for indoor and outdoor use and they're pretty reasonably priced, so I just had to include them with the post below ! (Room above: Hand Interior Design).


Web Chair $120


Stilt Chair $175


This will be my last post on outdoor furniture for the season, considering the weather’s been so lousy this summer we have yet to dine outdoors even once this summer.  But if we get lucky enough to enjoy a warm summer evening dining al fresco, then this is how I would make it more magical...


TAKE COVER.  For outdoor dining, I prefer a covered porch or awning rather than an umbrella, the post in the middle drives me crazy.  But i think my favorite summer product this season is Ikea’s Dyning Gazebo canopy, offerred in either a rectangular or trianglur shape.  You can string up one or two or three of these between trees or posts to create a dreamy canopy effect that looks like boat sails......  Great for irregular shaped spaces, and situations where awnings and permanent roof structures are not an option.  This is ingenious and a steal at $29.  


AVOID MATCHING suites of furniture.  Most people seem to have grasped the concept of not buying suites of dining room and bedroom furniture like our parents did, but somehow this concept hasn’t translated to our outdoor rooms yet.  Even though there is more of a selection than ever before, when it comes to outdoor furniture (most of it more expensive than our indoor pieces),,,,,I always seem to see entire backyards or decks furnished with matching sofas, coffee tables, dining tables, chairs, bar carts and side tables all from the same collection.  I know its usually less expensive to buy the entire set, but they will sell these pieces individually too so perhaps its a case of people rushing to furnish their outdoor spaces so they can just get busy enjoying them?


BRING THE INDOORS OUT. Whether its indoor dining or outdoor dining, chairs are always a big investment, because you need multiples.  Four, six or eight.  So why buy chairs that are only suitable for outdoors?  Stretch your patio budget by only buying 2 or 4 outdoor chairs, or one long bench, or,,,,,if you’re really tight on space and dollars, skip the outdoor chairs altogether and think multipurpose.   If you purchase chairs for your deck or balcony and they look like patio furniture then you minimize the amount of use they’ll get (I don’t think it ever looks appropriate to use them indoors, even in a pinch) and you’ll have to find dedicated storage space for them in the off season.   But taking your indoor chairs outside,,,somehow always looks decadent.


Today there are a variety great looking chairs that are suitable for both indoors and out (see photo collage at bottom of post) but you won't find these in outdoor section.   Initially you might have only ever considered these for indoor use, but surprisingly not only will all of these chairs look stunning in your kitchen, home office or dining room, they’re all suitable for outdoor use too!  And as a bonus, they all stack for easier storage if needed.   These are modern, clean lined and would mix well when paired up with chairs of any other style making them super practical. So if you buy a few extras, you’ll be prepared for extra dinner guests at anytime of the year and your mix of chairs will look stylish and chic as opposed to mismatched and makeshift.


EASY TO FIND.  These chairs are available in shops 12 months of the year which means you’ll never have to scour the city mid-way thru summer looking for some stylish outdoor seating.  If you’ve ever shopped for outdoor furniture after the May long weekend, you know how frustrating it can be to find anything.  But what do you do if its your first place, or your first backyard, its mid-way thru June and you’ve got guests coming for a bbq!?  You may not even have dining room furniture yet let alone patio furniture.  Investing in 2 or 4 of these chairs will give you the flexibility to use them inside or out.


I'm partial to these chairs paired with old rustic wood tables, especially trestle style, or chunky teak tables.  If you're outdoor dining space is well protected and you have a place to store a table in the off season, you can get away with almost any inexpensive table or create one using workhorses and plywood or an old slab door, then layer it with table cloths.    

Photos:  Living Etc., ebay, DWR, Living Etc. (3), Apartment Therapy, Chairs clockwise left to right, top; Alonzo Chair DWR $44 (sale),  Air Chair DWR $98 (sale), White Bertoia Side Chair DWR $450, Ikea Urban Chair $50, Navy Chair DWR $415, Ghost Chair DWR $400, Marais Arm Chair DWR $135 (sale), Panton Chair DWR $250

My Condo Renovation

Master Bedroom


The first time I had an opportunity to design a home for myself was about 6 years ago. My boyfriend and I were buying our first place together and we decided to look for something we could renovate and redesign to our own specs. We found a 1980's condo on the waterfront with panoramic lake views and just 10 minutes to downtown, in original condition and ready for a complete gut. It wasn't my dream home, nor did I even design it in a style that reflects what I would want in my dream home, but it was somewhere we only intended on living for 2 or 3 years (which turned into 4). I designed it in a style that I felt suited the condo and would be appealing to buyers when it came time to sell. Although these photos are a good example of my work, they don't necessarily reflect my true personal style. I despise condo living (i need outdoor space), have a passion for simple country antiques, vintage finds and traditional architectural detailing. So buying this condo also meant we had to rent a storage unit across the street to store our oversized rustic pieces and my ever growing collection of 'great finds'.


New Open Concept Kitchen

The existing kitchen was a completely enclosed tiny U shape room, we knocked down all the walls opening it up to the lake views. The new 9 foot long island had a poured on-site concrete counter top and the back counter was stainless steel with an integrated oversize single sink. The backsplash was back painted glass that just glowed a watery blue/green colour.

Living Area

The open concept living and dining area had floor to ceiling windows and almost no wall space. The furniture was kept low to not obstruct the view. The draperies added vertical dimension and texture to the space and helped warm up the expanse of bare windows at night.

Dining Area

During the day the condo was flooded with direct sunlight so in additon to lined drapery panels, I had Hunter Douglas solar shades installed on all the windows. This helped control the temperature and protect fabrics and wood from fading. (The photo above was taken at about 10 in the morning.) It wasn't possible to install a junction box in the concrete ceiling to hang a light fixture over the dining table so i opted for a high arched floor lamp. It also swiveled so it offerred us the added bonus of being able to swing it over the coffee table in the living room if we wanted. I custom designed the dining chairs and the dining table was a freebie, a cast-off '80's meeting table from my old office, headed for the dumpster but i thought it had great lines and I loved the walnut veneer. I hauled it home just in time for our first Christmas dinner in our newly reno'd condo. I added a larger glass top to it and it comfortably seats 6, we've squeezed 8. I can't tell you how many inquiries I've had about this table and offers to purchase it. In fact its the most standard plain office meeting table there is, the style is commonly referred to as a drum table but i've always admired it for its simple lines. It pairs well with all chair styles, i often use the modern Bruno chairs or Eames side chairs with this style table.

Living/Dining Room Evening Shot
A view of the living and dining area at night, my favorite time. Large expanses of window with water views become large black walls at night, without the drapery panels the windows would look very cold and bare especially in winter.

The Views.....


The condo had floor to ceiling windows that wrapped around the perimeter of the unit, and faced south overlooking the lake and marina below. To the far right we could see the corner of one other building, which happens to be what I think is one of the most beautiful condo buildings in the city and provided a stunning architectural view.


The purchase and closing was quick, giving me only about 3 weeks to complete the design drawings and co-ordinate the start of constuction. Demolition was extensive, we removed absolutely everything, including the stippled ceilings, taking the entire unit back to the bare concrete. In a matter of a few weeks I had designed everything including 2 washrooms with custom vanities, the new open concept kitchen with custom shelving, counters and backsplash and even custom doors, casings and baseboards throughout. The entire renovation took 4 months to complete....... but the furnishing of the unit took another 2 years!

In upcoming posts I'll show more before and afters photos along with some of my design sketches and also write about what it was like having the condo featured in Canadian House & Home!


All photos above by Carol Reed