Springing Into Summer


Spring has come and gone and I didn't manage to get a single update on the blog.  Maybe because I was so pre-occupied waiting for Spring like weather to arrive I didn't realize it had come and gone, already?  So instead of jumping back in with new regular posts (I've already prepared a couple) I thought I'd do a quick recap of what I've been pre-occupied with during the past few months, wow the time has flown by - in 4 different time zones no less.  I love that with the advancement of technology and travel I can work on projects in various cities, provinces or countries.  Principles of design are universal but I really enjoy being exposed to different regional traditions and lifestyles as well as exploring the local materials that influence the design of a home. 


Upper East Side reno project, Living Room progress.

NYC - Construction on the UES reno project was completed some time ago and after taking a much needed break from more than a year and a half of reno madness, the homeowners were ready to focus on furnishings and decor.  So with the hard work done and a great canvas in place we've been working together on the furniture room by room.  The very first pieces to arrive this spring for the living room where the sofas and the area carpet.  So much more to come, tables, lamps, pillows, mirrors,,,its very exciting to see it coming together.  (no the table in the corner is not part of the new furniture plan ; )).


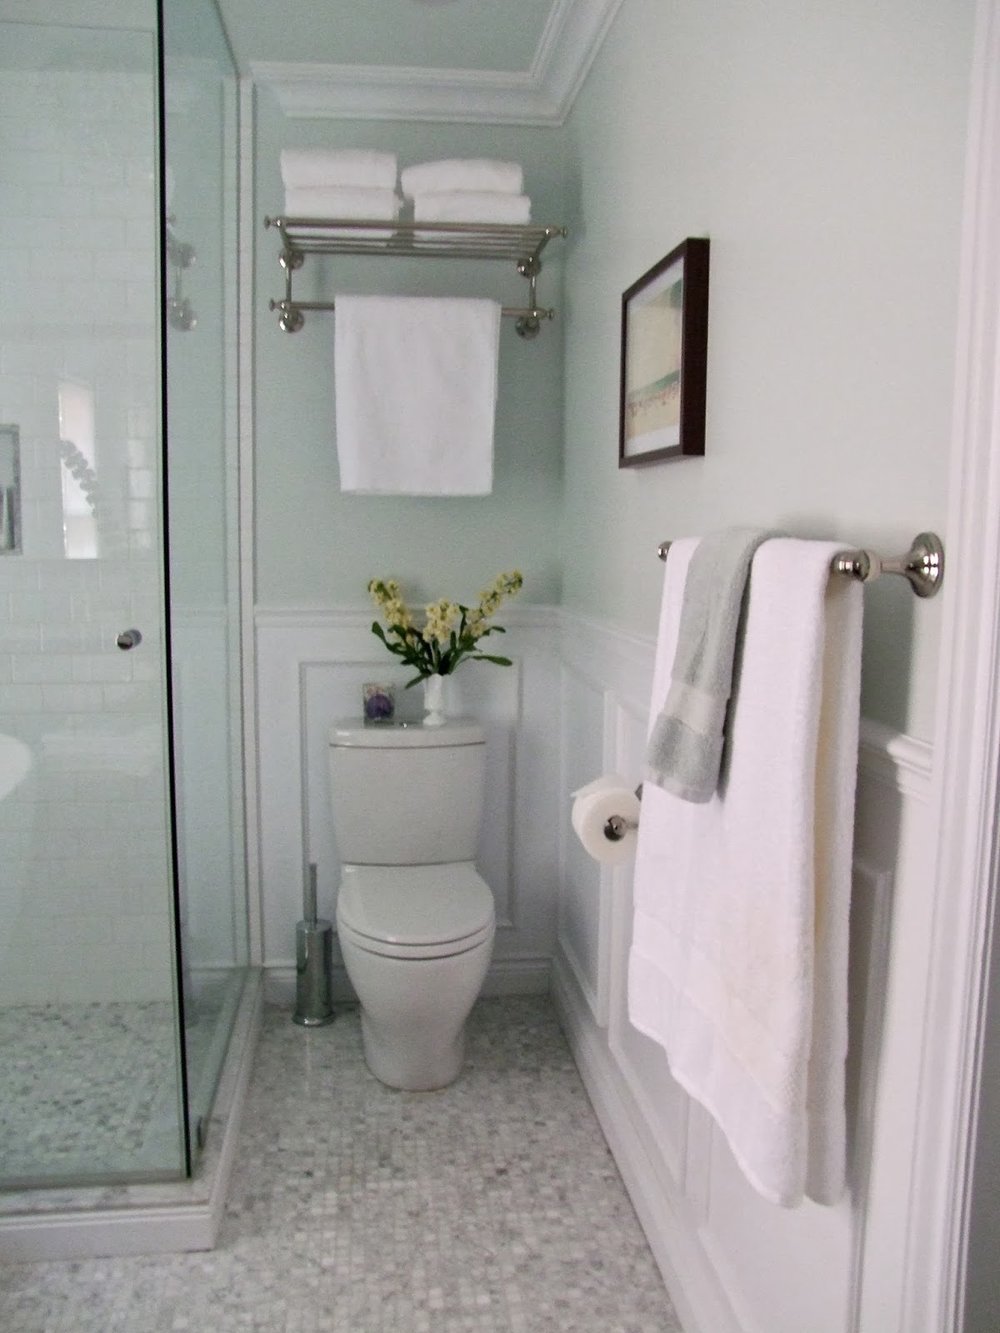
A whole home renovation near Sydney, Australia

AUS - Over the winter (their summer) construction started on a whole home renovation I designed for clients in Australia not far from Sydney, she's an expat from Toronto and he's a native Australian. Aside from having to learn some new jargon and conversing in metric, the process was no different than renovating in North America.  The entire renovation was completed in slightly more than 3 months and the homeowners moved back into the home in early May.  I'm looking forward to sharing more about this project on the blog and its entirely new floor plan.  The project began with a very modern vision of a white on white interior and for the most part stayed true to that initial concept.


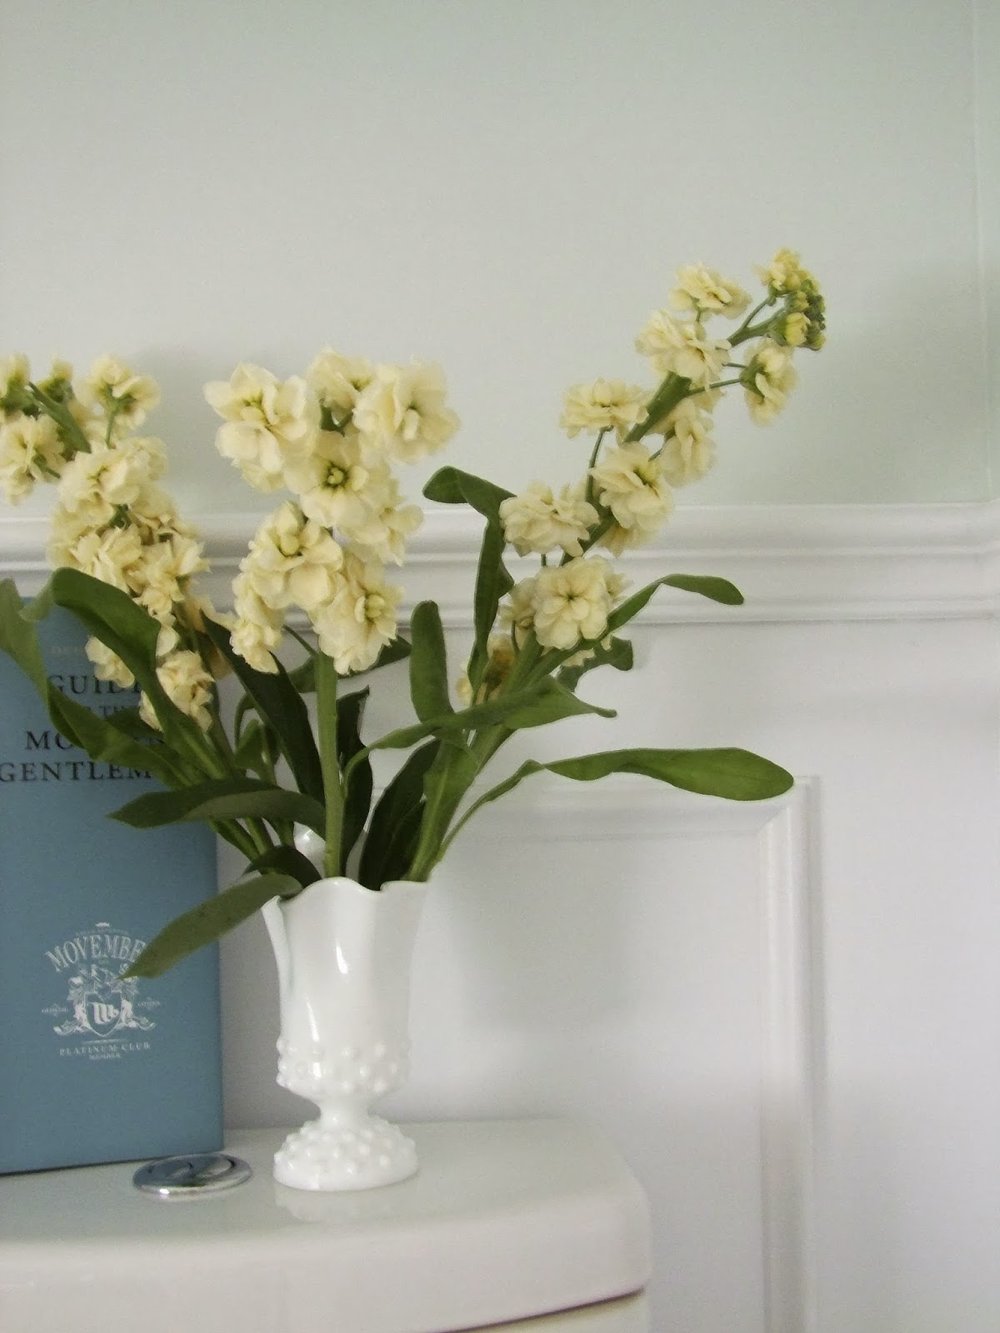
Stony Lake Cottage main entrance sneak peek.

ONTARIO - In May I was in Toronto getting started on a couple of new renovation projects one is in Oakville and is a family home for a young couple and I'm so excited to get started on the design planning and the other is a master suite renovation for long time clients in Port Credit.   I also headed up to cottage country to get some progress photos of the Stony Lake project which wrapped up last summer.  It was finished and furnished enough for use last season, some more furniture and small accessories are still needed to fill in some gaps but its been a huge transformation so far.  Lots more before and after posts to come.  


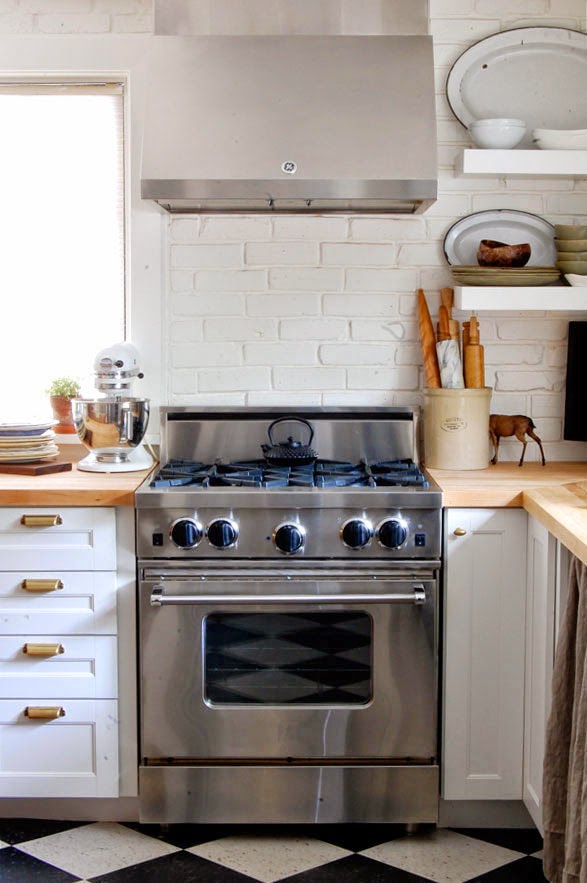
Sneak peek of Karen's new kitchen.
Image from: The Art of Doing Stuff.
Over the spring I enjoyed keeping in touch with Karen and helping her work thru some final details on her long anticipated kitchen installation.  Its finally finished and ready for its close up, in fact its being shot for Canadian Living magazine this coming week.  If you haven't seen the sneak peeks on Karen's blog yet, click on over and have a look, as I try and contain myself from showing you the rest of it - which I've already seen, and its fantastic!! 


Field of beams.  Reclaimed antique wood, in Canning, Nova Scotia.

NOVA SCOTIA - Home of the world's slowest renovation, my own house project came to a halt in the winter when early into the kitchen phase of the reno we discovered we just couldn't salvage the existing wood floor boards.  Sheets of plywood screwed down with a million screws would make it almost impossible to remove without doing a lot of damage to the wood floor beneath.  The good news is I was able to track down some antique wood flooring of the same age and species.  The bad news is we had to wait for the snow to disappear before we could get access to where the wood was stored.  It was a looooong snowy winter......so things were at a standstill for a while but an update on my kitchen reno is coming soon, soon as I have some progress photos.  Any day now.  : / 


That's a really brief update on some of the things that have been keeping me busy without even mentioning the garden work I'm trying to do or the many E-design orders I've had the pleasure of working on.  I couldn't be more excited that Summer's here and especially to be able to enjoy most of it on the East Coast!


All Photos and drawings:  Carol Reed, except where photo is credited otherwise.


Janice's Bathroom: Before & After Photos


Receiving after photos  from E-Design clients is one of the most exciting things I find in my inbox, and the sneak peeks I was seeing of this particular particular bathroom reno had me eagerly wanting to see more.  It didn't disappoint, in fact when I did see the finished space I was so impressed with how well Janice and her husband had implemented their design plan that I was longing to see it in person.  Since they live in Toronto, last summer while Janice was still on maternity leave I took the opportunity to meet her and the beautiful new bathroom in person.  I brought my camera and also a small assortment of flowers, so just a couple of vases and few minutes later I started snapping.  The room has wonderful daylight and aside from the fresh blooms, the photos I took below are exactly what the room looked like when I walked in I only wish I could share with you how it felt...it sounds corny or cliche to say 'it was like a breath of fresh air' but it really was like that.


The matt finish of the freestanding tub was one of my favorite things, like honed stone that compels you to touch it,  truly gives the tub a modern sculptural quality.


One of the 'bespoke' features of the bathroom was this custom designed and built walnut vanity, its clean contemporary lines, cararra marble counters and vintage style faucets make a classic and elegant statement.  The lines of the walnut grain and warm tones of the wood are stunning details on their own, no further embellishment needed.


A marble mosaic floor tile of simple small squares has a wonderful textural impact in the space.  The simplicity and expanse of little squares gives this timeless material a modern vibe. 


The walls were finished with panel moulding and chair rail.  A nod to the historical character of the century old house.  I adored Janice's milk glass vase.


A modern chandelier of pear shaped glass makes the room sparkle.


Double sinks and wall sconces.  The marble mosaic creates a wonderfully multi-tone effect that adds movement and interest without adding fussy with borders and accent tiles.   Janice is still on the hunt for a cart or table and a comfy stool to put beside the tub for bath time, but she has a charming vintage bentwood chair she uses in the meantime (sorry not seen in these pics).  


A walk-in glass enclosed shower, with classic white subway tile keeps the space bright and spacious. The modern loo pairs well with the equally clean lines of the soaker tub.


The end result achieved what Janice was hoping to, a classic bathroom that's not too traditional and not too modern but a well balanced mix of both.  With a use of quality materials and simple classic details this bathroom will have stylish appeal for many many years to come.  

Thank you Janice for welcoming me into your home, even though I felt I knew you already it was such a pleasure to meet you and your adorable Luca in person. xo   

For a look at the before and after plans check out my previous post here.

For more information about E-Design services for your home please check out my E-Design website www.thedesignshop.ca


Room Design & All Photos by:  Carol Reed


E-Design Bathroom: Before & After Plan


When Janice contacted me regarding her bathroom reno a couple of years ago, she was in the same predicament as most who reach out with inquiries to me.  Her and her husband, who live in a century old victorian in downtown Toronto, had been planning on renovating their main bathroom for quite some time.  She had the budget in mind and a contractor lined up but they didn’t have any plans or specifics to share with him.  They had some ideas in their head about what they wanted but ideas that they just weren’t sure about. That’s were I came in. Or should I say, that’s when Janice’s bathroom arrived in my in-box and we began the e-design process.

Here’s a look at the floor plan before the reno.  This main family bathroom and laundry room are located on the second floor, in the middle section of the house.  Typical of Victorian row houses of this period, the house is long and narrow.

Bathroom Floor Plan - Before

I imagine at one time this used to be a smaller bathroom and a bedroom and then sometime in the 80's somebody converted a bedroom and moved the laundry upstairs.   In any case, both the laundry and bathroom were in dire need of updating and improvement.  The main objective Janice wanted to achieve was a larger bathroom to accommodate 2 sinks and a separate tub and shower.  Her initial idea/request for the re-design was to remove the wall between the rooms and combine everything into one large shared space. 

There's too many reasons to list here why I didn't think combing the two rooms into one was the best option; for practicality - the noise and smell of laundry, soaking, hang drying etc...not to mention the enormous square footage of the space would make it too costly to finish to the level she wanted to achieve in her bathroom.  Also in my opinion deleting the separate laundry room for a shared bathroom would be a downgrade to the home not an upgrade.  So I worked up a few different layout options for her with the intent of keeping the two individual rooms.  Here's a look at the final plan.


Bathroom Floor Plan - After

After several back and forths this was unanimously declared the winning layout.  A new larger bathroom with double vanity, separate tub and walk-in shower and a separate laundry room which they agreed would be so much more practical and appropriate for the house than having it combined with the bathroom.  The window locations worked best for each room by flipping the laundry room and bathroom locations (and also means the laundry room no longer backs on to the baby's room).  But even in flipping the rooms the new layout was able to utilize a lot of the existing plumbing locations.  In addition to this layout I also created a budget for them based on the new plan which confirmed their initial budget just wasn’t going to be enough to achieve their goals. This was an enormous help in making sure they were properly prepared for the costs involved before moving ahead with the project or making any purchases. 

Vanity Elevation Options

I provided Janice with three different vanity wall mirror and lighting options. She had her own source for custom cabinets so I was able to design the vanity to fit the space.


Wall Panelling Elevation
The design plans included two different wall treatment options and Janice opted for this one which is a wainscot treatment created from panel moulding.  The elevations provide her with all the dimensions needed for installing the moulding (the moulding specs and sizes were included but have been omitted from this copy).

Janice and her husband are experienced DIY'ers who have completed many projects around their house which Janice blogs about on her popular blog Life Begins at Thirty Right?.  Due to the extensive nature of this reno she was nervous about making mistakes and wanted the reassurance of expert advice.  She does enjoy being hands-on thru the process, she's really savvy when it comes to sourcing products and co-ordinating a project so an E-Design solution was a perfect fit for her.  Within the package there are enough options presented that she still gets to have design input in the decision making. This project is from a couple of  years ago but Janice kept me updated along the way and last summer I had the opportunity to visit and take some 'after' photos of my own - which I'll share next week!!!  I was so impressed by what an amazing job they did turning these plans into reality the room literally blew me away when I saw it in person.  

The above drawings are just a portion of the e-design package I completed for Janice, she also received finish and fixture selections, a lighting plan, a source list, and a budget breakdown.  (note that specs have been removed from the drawings shown in this post).  You can check out more of Janice's bathroom project on theDesignshop website where you'll see some before pictures and some progress photos. 


All plans and drawings:  Carol Reed